Chicken Quesadilla

These irresistible wraps are packed with spicy pan-fried chicken and gooey, melted cheese, coming together in just 30–40 minutes. It’s the kind of dish that disappears fast — expect your kids (and honestly, everyone else) to come back for seconds… maybe even thirds.

Simple, quick, and incredibly satisfying, these wraps are perfect for busy days when you still want something homemade and full of flavor. The best part? You can prep a lot of it ahead of time, making it an easy go-to for lunches, dinners, or even a fun snack spread.

For the filling, versatility is your best friend. You can use rotisserie chicken, leftover grilled chicken, or even kebabs — anything pre-cooked works beautifully. I went with a bold Tex-Mex twist: sautéed onions and green chilies form the base, followed by a generous mix of paprika, cumin powder, chili flakes, garlic powder, onion powder, and a hint of dried parsley.

To really elevate the flavors, I added a splash of apple cider vinegar and a dash of hot sauce. Let everything cook together until the chicken slightly dries out and the मसाला clings to every bite — that’s your cue that it’s ready.

While store-bought tortillas work just fine, making them at home adds a special touch. A simple mix of all-purpose flour and corn flour does the trick, and if you have a tortilla press, it becomes even easier.

To assemble, spoon the flavorful chicken onto one half of the tortilla, top generously with cheese, and fold it over. Bake in a preheated oven for about 10 minutes, just until the cheese melts into a gooey layer and the tortilla turns lightly crisp.

Slice them in half before serving — it not only makes them easier to eat but also gives that perfect, mouthwatering presentation.

These quesadillas are everything you want in a quick meal: cheesy, spicy, comforting, and incredibly delicious. Perfect for a cozy lunch, a no-fuss dinner, or a crowd-pleasing snack that’s guaranteed to win hearts at the table.

Khatte Baingan

Khatte Baingan: The Perfect Companion to Your Biryani

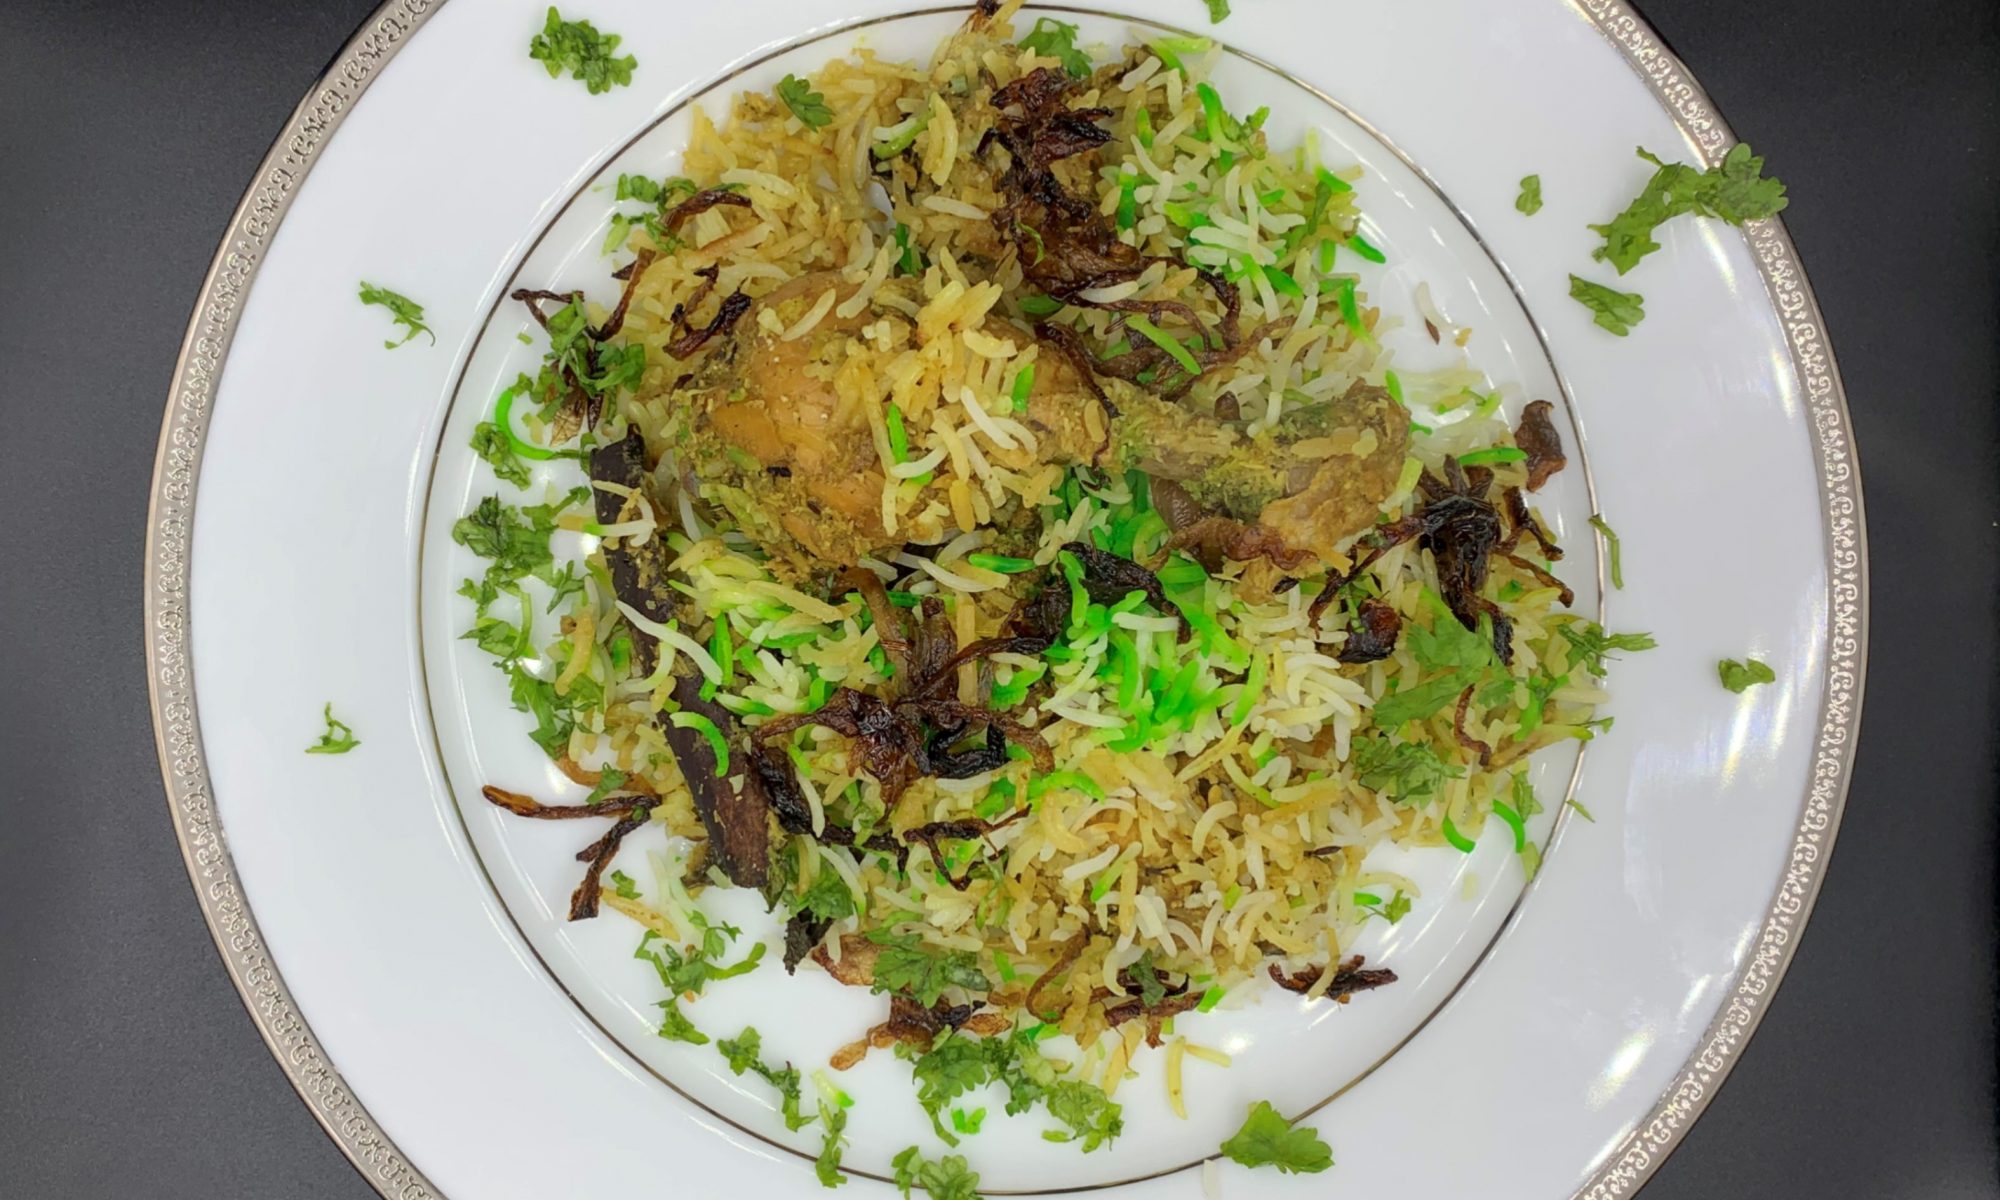
Biryani is more than just a dish — it’s an emotion shared across countries like India, Pakistan, and Bangladesh, where it takes center stage at celebrations and special occasions. But what truly elevates a good biryani to a memorable meal is what you serve alongside it.

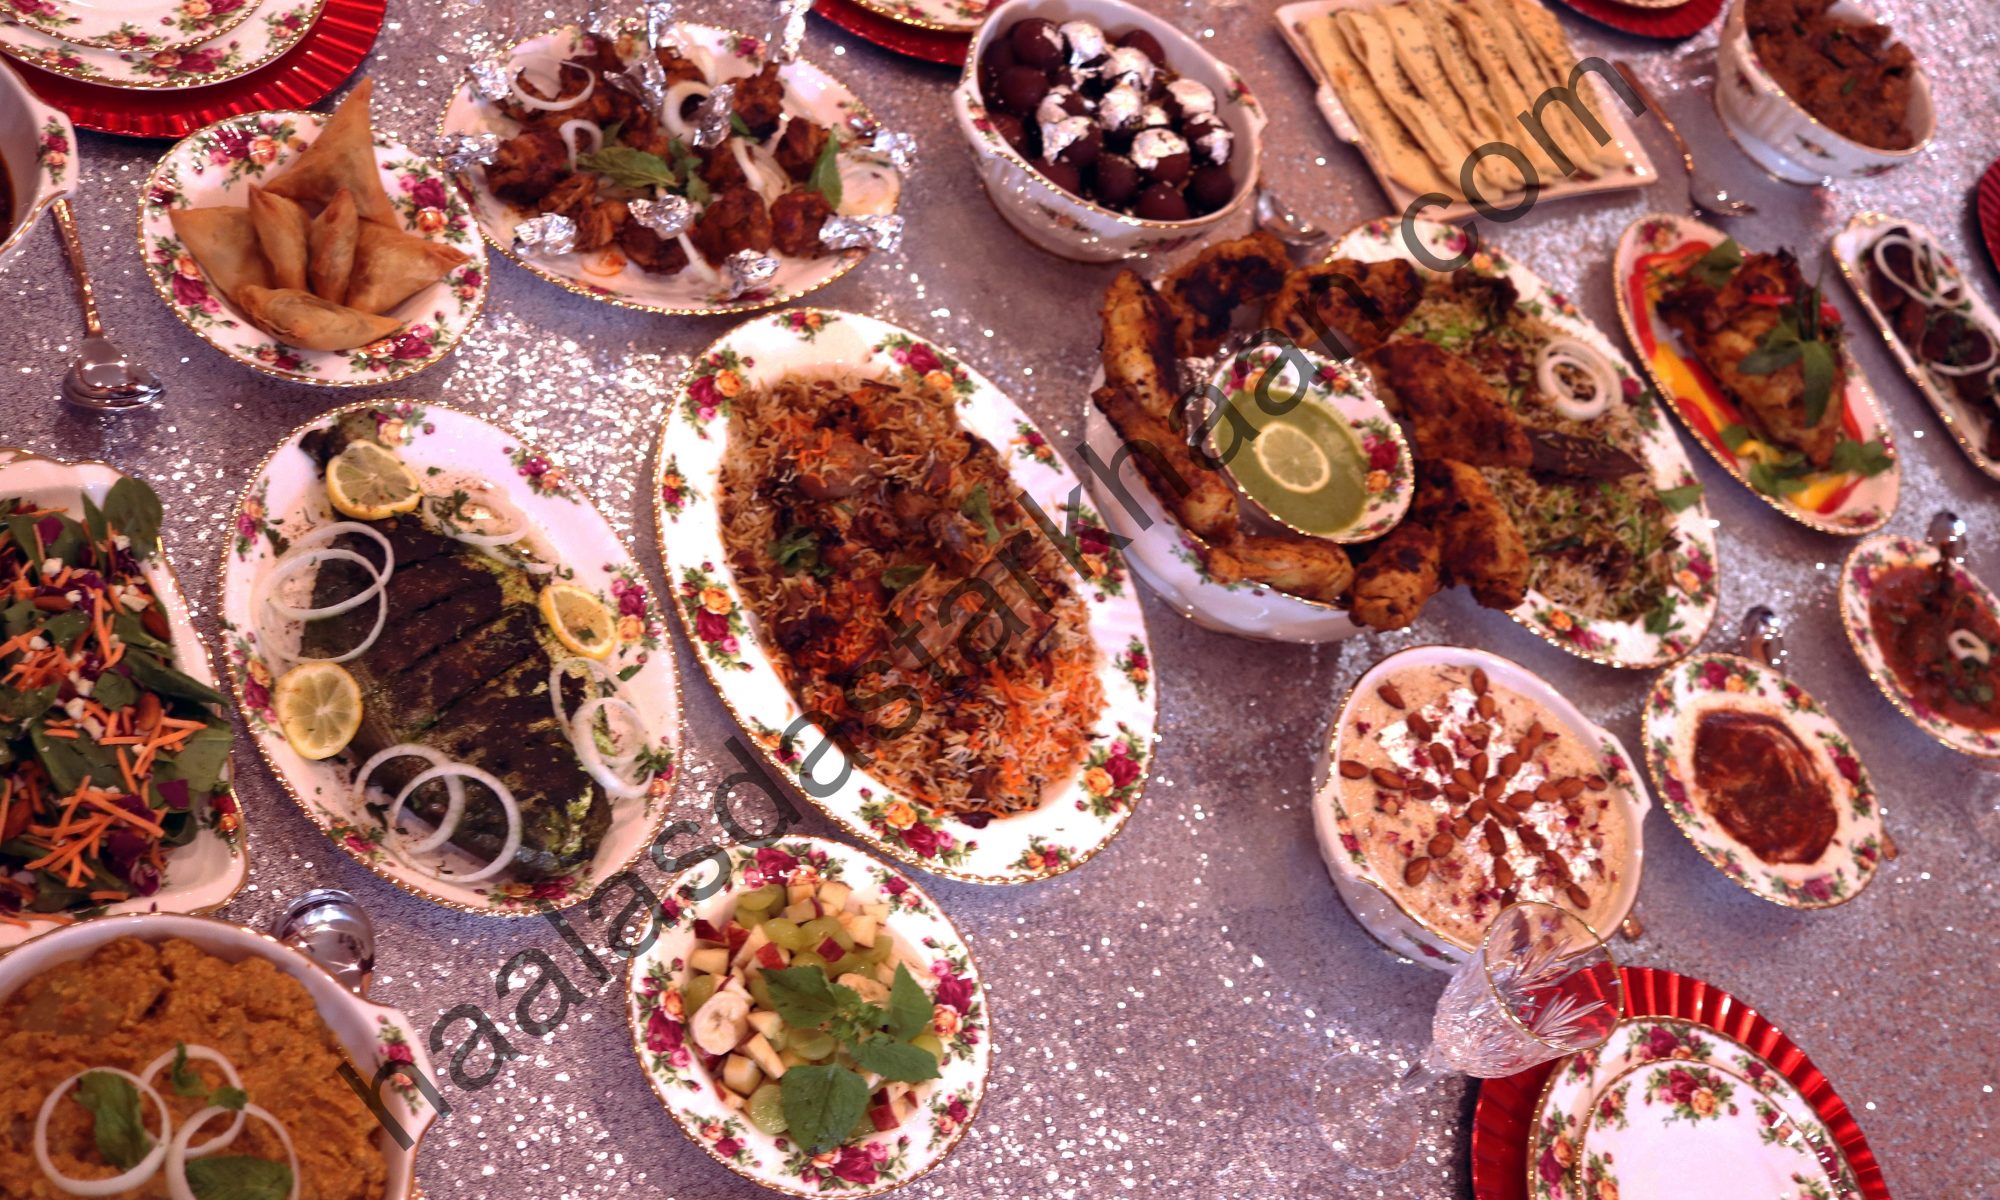
From Baghare Baingan and Mirch ka Salan to Dalcha, chutneys, and cooling raita, biryani comes with a whole world of accompaniments. And contrary to popular belief, not all biryanis pair best with just a simple raita — choosing the right side actually makes a big difference.

If your biryani is mild or subtly spiced, richer sides like Mirch ka Salan or Baghare Baingan add depth and heat. On the other hand, if your biryani is already bold and spicy, dishes like Dalcha or Khatte Baingan help balance the flavors with their tangy and slightly mellow profile. Of course, raita is that universal side that complements almost any kind of biryani.

Why Khatte Baingan Works So Well

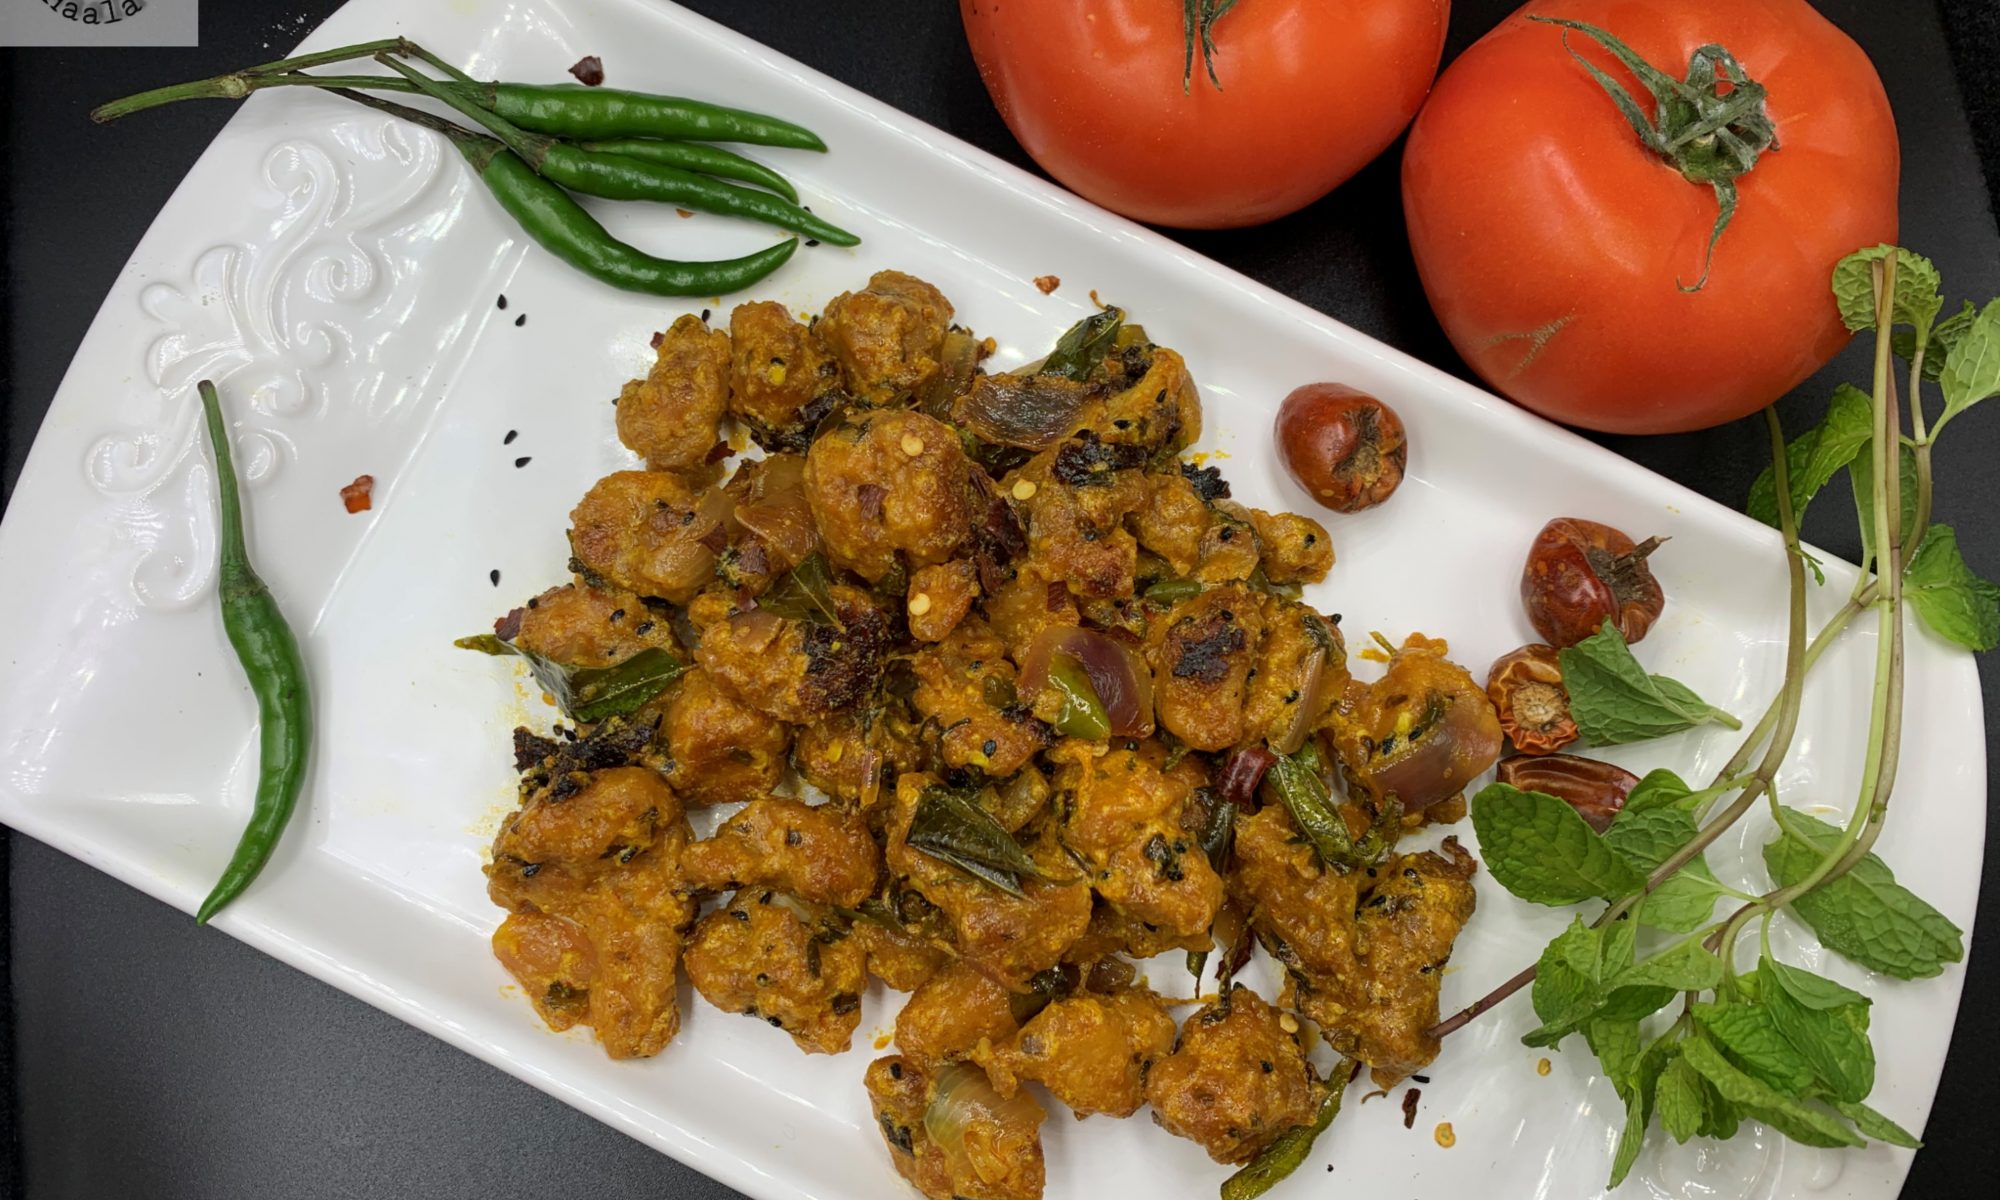
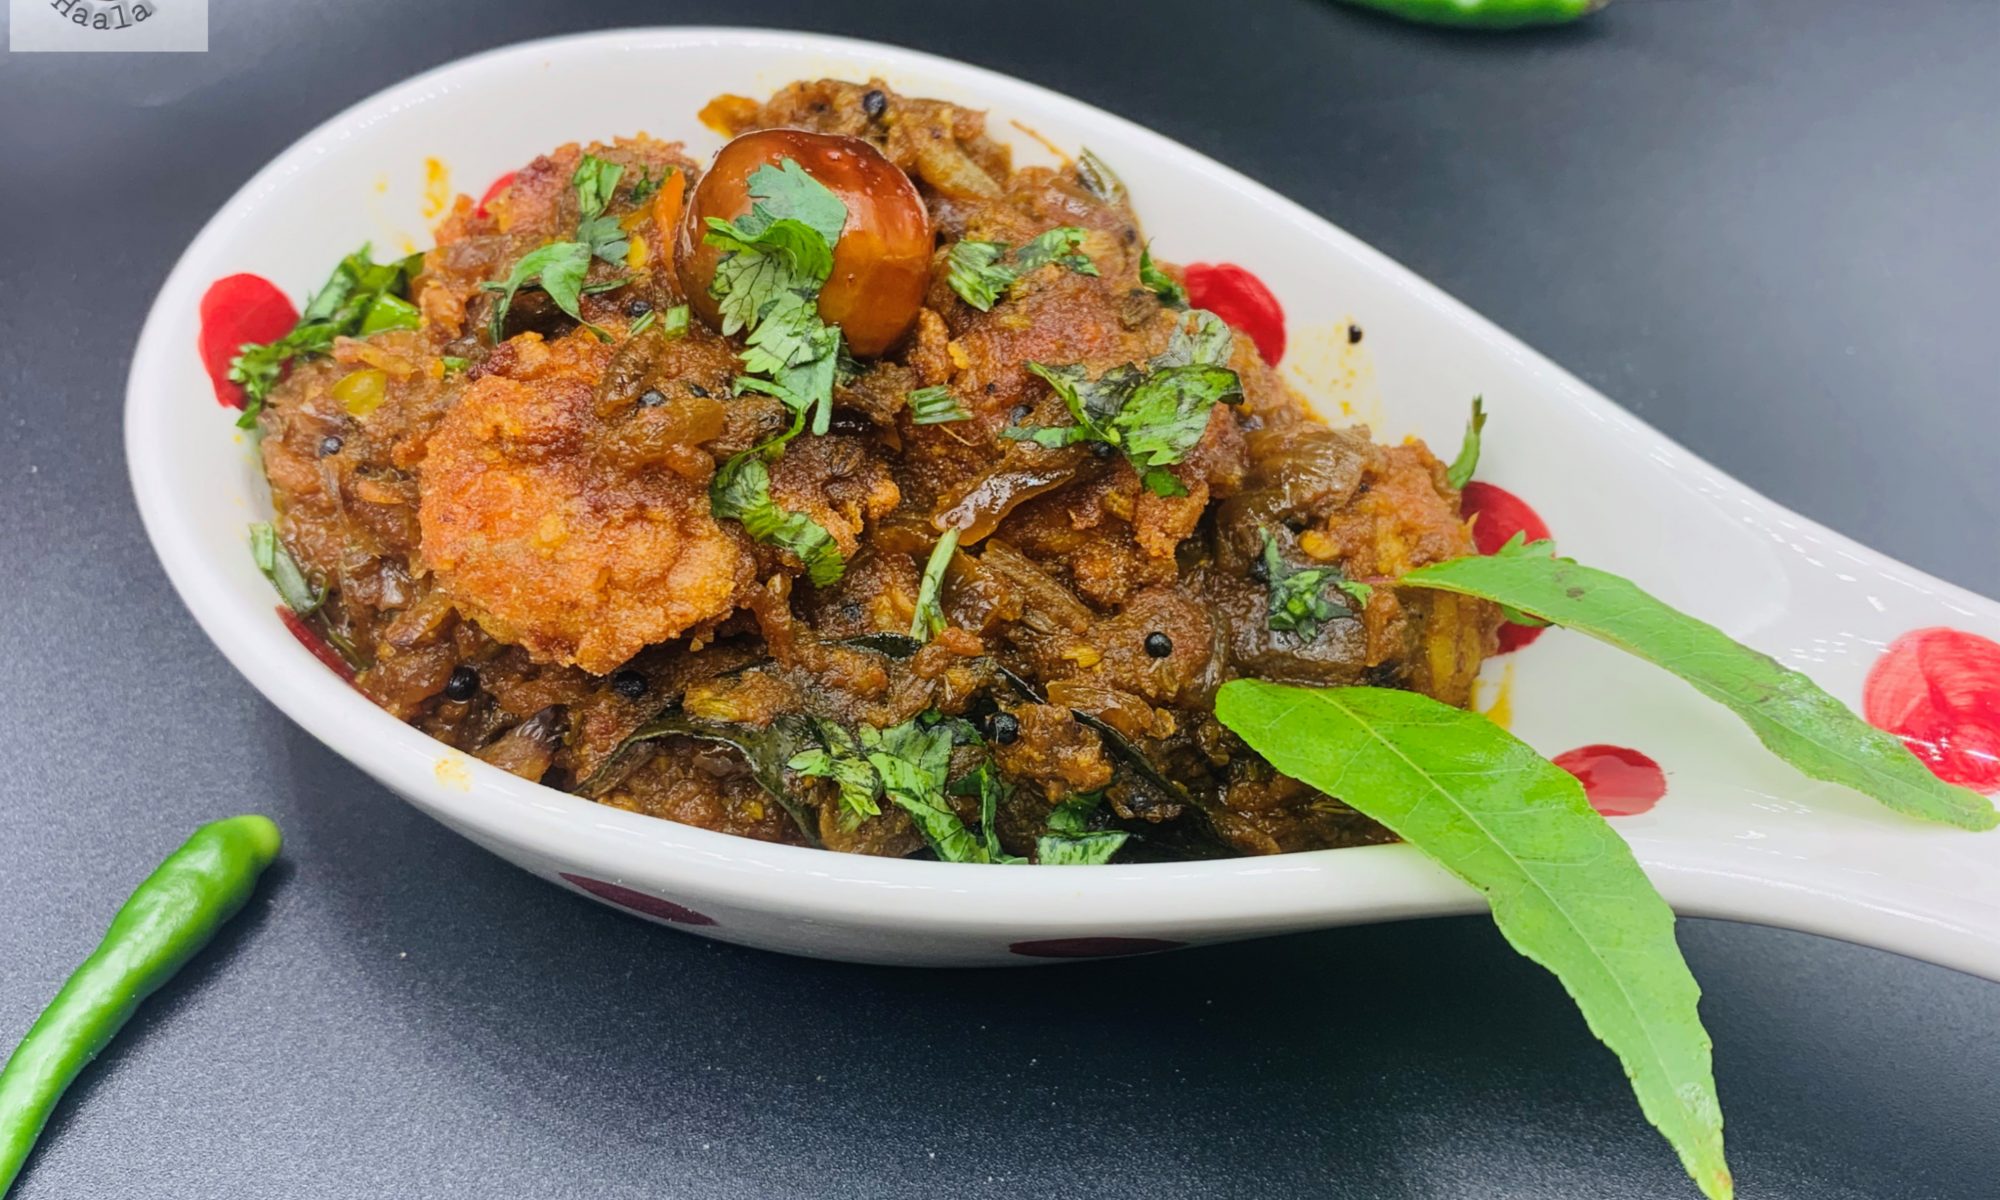
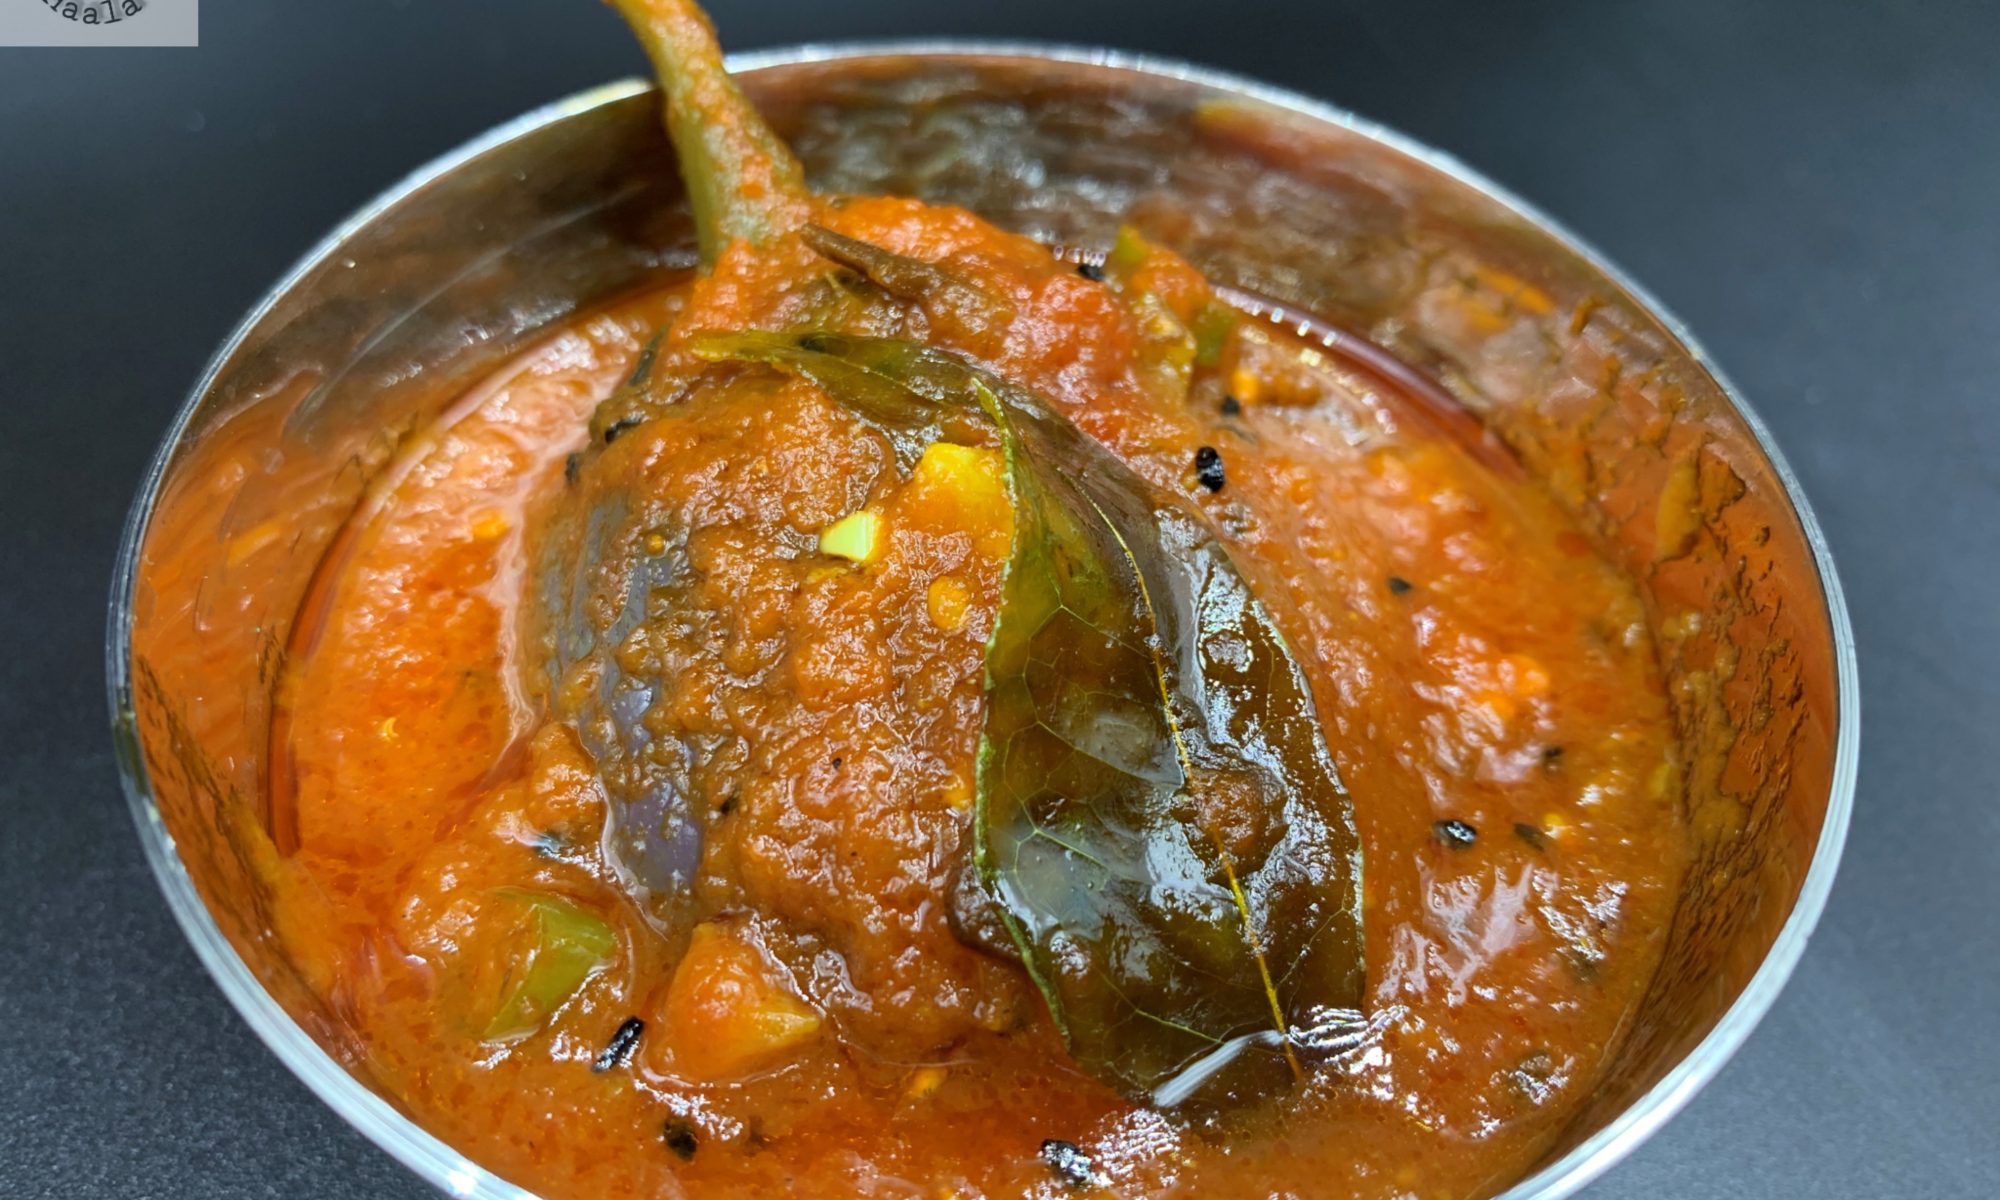
Khatte Baingan is a beautifully tangy eggplant dish that brings just the right amount of zing to your plate. It’s especially perfect with milder biryanis like Mughlai or Thalassery biryani, where its sweet-and-sour notes enhance the overall experience without overpowering it.

What makes this version even better is that it’s light and not overly oily — unlike traditional methods where eggplants are deep-fried.

A Lighter, Smarter Way to Make It

Instead of frying, the eggplants are boiled first. This simple step ensures they’re cooked through while preventing them from soaking up excess oil — something eggplants are known for.

Once boiled, the magic begins:

  • Heat a little oil and temper it with black seeds and curry leaves.
  • Add ginger-garlic paste, turmeric powder, and red chili powder for a flavorful base.
  • Stir in tomato puree, green chilies, and a touch of ketchup.

The ketchup might seem unconventional, but it adds a beautiful color along with a subtle sweet-and-tangy flavor that perfectly complements the dish.

Let everything cook together until the मसाला coats the eggplants well and the flavors come together into a rich, glossy gravy.

A Crowd Favorite — Even for Eggplant Skeptics

Khatte Baingan is one of those dishes that surprises people. Even those who usually shy away from eggplant often end up loving it, thanks to its balanced flavors and light texture.

Easy to make, packed with flavor, and incredibly versatile — this dish is proof that the right accompaniment can truly transform your biryani experience.

So next time you’re serving a mild biryani, skip the usual and bring out a bowl of Khatte Baingan — it might just become the star of your table.

Murgh Hyderabadi Biryani

Hyderabadi Biryani: A Legacy of Royal Flavors

Hyderabad is a paradise for biryani lovers, offering countless varieties, each with its own unique personality, flavor profile, and cooking style. Over time, I’ve explored and recreated many different styles of Hyderabadi biryanis — and what always amazes me is how no two are ever truly the same.

Each version tells a story.

What makes Hyderabadi cuisine so special is the deep influence of the Nizams. Their legacy isn’t just reflected in grand palaces or exquisite jewels, but also in the richness of their food. Every dish feels like a glimpse into a time when hospitality was an art, and food was its grandest expression.

The legendary dastarkhaan of the Nizams was nothing short of spectacular — a lavish spread filled with aromatic biryanis, slow-cooked curries, indulgent haleem, and an array of desserts enriched with dry fruits and cooked in pure ghee. It’s a cuisine built on generosity, detail, and a deep love for flavors.

This particular biryani is a beautiful representation of that heritage — rich, fragrant, yet surprisingly approachable.

What Makes This Biryani Special

Unlike overly spicy versions, this biryani focuses more on depth than heat. The base includes a luxurious paste made with poppy seeds, cashews, and coconut, giving it a creamy texture and a subtle richness that coats every grain of rice.

The heat comes from a green chili paste, which adds a fresh, vibrant kick without overpowering the dish. If you enjoy a spicier profile, you can easily adjust the number of chilies to suit your taste.

A touch of kewra essence paired with a hint of food color elevates the aroma, giving the biryani that signature royal fragrance — the kind that instantly fills your kitchen and makes the dish feel festive and indulgent.

Simple Yet Elegant

Despite its royal roots, this biryani is surprisingly beginner-friendly. The steps are straightforward, and the ingredients come together beautifully without requiring overly complicated techniques.

It’s the kind of dish that makes you feel like you’ve created something truly special — without feeling overwhelmed in the process.

Final Thoughts

This biryani is more than just a meal — it’s a celebration of history, culture, and flavor. It carries the essence of Hyderabadi heritage while still being accessible enough for anyone to try at home.

So whether you’re new to biryani-making or someone who loves experimenting with flavors, this dish is definitely worth adding to your table.

Enjoy every fragrant, flavorful bite — and let it transport you to a royal Hyderabadi feast.

Hyderabadi Chicken 65

Chicken Kebabs are an all time wanted and favorite for everyone. Chicken Kebabs go so well with Daal Chawal as a side dish and even by themselves. I love making Chicken Kebabs for my get together with friends as well. People always feel that you cannot experiment much with Chicken Kebabs at home, where as experimenting with different Kebab flavors at home is the best thing to do.

The basic thumb rule is follow the fragrance and the flavor. If there are spices that go well together and there are spices that don’t go too well. Spices like Black pepper is something that you need to add little at a time, since if its too much the dish tends to get bitter. If you need to enhance the flavor of Black pepper in your dish, its always better to add less of Black pepper and more of White Pepper to balance the pepper taste. Adding Tandoori masala gives a lot of kick to Red chili powder and makes kebabs more flavorful. You can always use citric acid in place of Vinegar or Lemon juice. Adding Flour with Rice flour and Corn starch Powder will add a lot of crunch to your kebabs if you are frying them.

With the Hyderabadi Chicken 65, I added Red chili powder and other spices with Ginger garlic paste and mixed it well. Further rolled the spiced Chicken pieces in Flour, Rice flour and cornstarch powder and fried them. Later cooked them in a sauce made with Onions, green chilies, various spices and Yogurt. I also add a little cornstarch powder to the gravy to make it a little thicker.

Chicken 65 is made in different ways in different places of India. Though the original recipe was made in Chennai, but different places modified their ways and made it suitable to their taste buds. Honestly, every pace has their unique flavor and we always tend to have our favorites but making them in different ways is always great to add more variety to your dinner table.

Puraani Dilli Ka Burrah Kebab

Puraani Dilli or Old Delhi is an awesome place for food. I believe being a central place that connects Punjab, U.P., Rajasthan, Bihar and also being close to Kashmir, it has people from all neighboring states. Hence, there is a medley of food. My dad took a lot of trips to Delhi for work. Even we as a family, would be visiting the capital of India quiet often since back in the 80’s and 90’s, we didn’t have the concept of direct trains from one city to another. So, we would take a train to Delhi and then another one to the destination. Since, My maternal family lived in U.K., dropping someone off to Delhi or picking them up from Delhi or we visiting our maternal home was always a trip through Delhi.

Now, being a non vegetarian, purani delhi is the place to be. Despite the crowd, the pollution and uncountable hygiene issues, every non veg lover at some point visited “jama masjid area” to satisfy their cravings. We did that on almost every trip and my father tried it at least twice each time, if not more. Some very popular restaurants serve awesome and delicious kebabs and curries with sheermaal, roomali roti and finger licking biryani.

Amongst the various variety of kebabs, Burrah kebabs stole my heart. Made from lamb/Goat meat marinated for a few hours, these kebabs are juicy, crunchy and full of beautiful flavors. So I had to search for the recipe. Though the recipe that I found wasn’t close to what my taste buds witnessed as a kid but being a home chef I knew how to add and deduct things and come out with the exact taste.

Dilli ka Burrah Kebab also has a funny story connected to it. I suffered from Typhoid and I was forced fed all the food without oil or spice for days and when it got over and I fully recovered, the doctor asked me a simple question, “What is the first thing you would like to eat?” and I said, “Burrah Kebab”. Of course the doctor had no clue what a seven year old was saying but my parents couldn’t stop laughing realizing how tortured I was after the sickness.

This is a must try for people who love Mutton kebabs. Pretty easy to make and can be stored too.

Malabar Shrimp Curry

Shrimps are one of my favorite kind of seafood and I would always try shrimps with new kind of gravies or new styles of marinade and fry them or grill them in different ways. Mr. Parveez always preferred eating an actual fish to eating shrimps. He finds Shrimps to be a little tasteless. So, when I started making Shrimp curries, he was still not a big fan. He would eat, but you know not really enjoy it as much as how I would like him to.

We watch a lot of travel shows and during one such show, the host happened to be travelling around restaurants in Kerala and one such restaurant was cooking Malabar shrimp curry. Now before anything let me tell you this. We were watching this program around an hour or so before dinner time. While the chef in the restaurant was showing how he prepares his special Shrimp curry, we were glued to the TV and wished we could see it live in person and have a bite of that scrumptious looking curry. Anyways, just as I mentioned that it was around an hour or so before dinner. Looking at that curry, I was determined that I have to try making it. Funny enough I remembered that my freezer has a pack of frozen shrimps. I always believe in miracles and this might have been one such lucky day. I got down to making it that very moment. The curry came out amazingly delicious and a family favorite too. Now the chef had only given in a rough idea on how to make the curry and few things that I have added to my curry recipe was not a part of the show that we watched. So, you might not find this different from an authentic Malabar Shrimp Curry, but you will definitely get the hint of Malabar flavors and savor each bite.

I deveined the shrimps but left the tail on. I feel it makes the shrimps look prettier in a curry, but you can always take the tail off if you prefer. After washing and pat drying, I marinated the shrimps in Ginger garlic paste, Red chili powder, Fennel seed powder, Tandoori powder, salt and lemon juice for 15-30 minutes. I also added a bunch of curry leaves. Further added some Rice flour, All purpose flour and corn starch powder and deep fried the shrimps. Frying makes the shrimps crunchy and the texture with the curry sauce is very flavorful.

To make the curry, add mustard seeds and fenugreek seeds along with dry round red chilies. Once they splutter, add curry leaves and further add chopped onions. Add ginger garlic paste followed by black pepper powder, Turmeric powder, Red chili powder, coriander powder, fennel seed powder, salt and cumin powder. Add the Dry red chili paste, tomato puree and green chilies along with fried shrimps and dry fenugreek leaves.

This shrimp curry is pretty easy and would make a special place in your menu. Its goes along great with garlic naan or plain naan and also Kerala Parantha.

Shrimp Hero Baguette Sandwich

This recipe is a true inspiration from one of our favorite restaurants near our old home. This restaurant is pretty old, owned by a lovely Italian family and has been serving New York style pizza for almost 80 years if not more. A very small restaurant that can barely seat 12 people, but most people order their take outs. We were their regular customers and along with the Pizza, they also served variety of other Italian fast food cuisines. What I loved the most was the Garlic knots and the Shrimp Hero Sandwich. The sandwich was super huge and loaded with wonderful sauce and lots of cheese. The ingredients always tasted so fresh and awesome.

I kind of always love going to these small eateries because one can vouch that they cook fresh because they do run out of things and say “no” too which never happens with big chains. Although, big chains always maintain quality but use large amount of preservatives that keep the food looking good and taste great. Anyways, getting back to my favorite Shrimp sandwich. We moved and its just not possible to go back and forth to that restaurant. So, once I started making my own bread, I also started making baguettes and that led to making these wonderful sandwiches.

My boys love eating bread. Specially if the bread is served straight out of the oven. Baguette, the long delicious French Bread seems to be a family favorite. Every restaurant that served a good bread had us visiting them more often. Every time we bought French Baguette from our favorite baker, I would reheat it in the oven to make it taste fresh, which was great but not the same. And, that’s when I thought I should try making my own baguette at home. Honestly, looking at so many different recipes, I felt that Baguette wasn’t all that fancily difficult and I decided it was time I just make it. I mean, how could anything be better than a freshly baked loaf of bread? That crackly crust, the tender, airy crumb inside, steamy and yeasty and just begging to be torn into.

You can look into my baguette recipe and follow it. It’s a detailed recipe and the instructions are pretty easy to follow and execute. Once your baguette are cool enough to handle, cut them to sandwich size and slit from the middle. To prepare the shrimp, just devein and take the tail off, wash them well too. Fry some garlic in the oil and add marinara sauce. Once it comes to a boil, add shrimps to it. Cook for 2-3 minutes, add Red chili flakes, dry parsley and garlic powder. Cook for a minute and add Onion powder. Cover and cook for 2 minutes. Your marinara sauce should be thick by now and shrimp should also be cooked. Slit the baguette and add the shrimp with sauce. I like mine spicy, so I added Jalapenos as well, but you don’t have to. Place them in the oven at 350F for 5-7 minutes. Sprinkle some dry parmesan cheese and serve.

French Baguette

My boys love eating bread. Specially if the bread is served straight out of the oven. Baguette, the long delicious French Bread seems to be a family favorite. Every restaurant that served a good bread had us visiting them more often. Every time we bought French Baguette from our favorite baker, I would reheat it in the oven to make it taste fresh, which was great but not the same. And, that’s when I thought I should try making my own baguette at home. Honestly, looking at so many different recipes, I felt that Baguette wasn’t all that fancily difficult and I decided it was time I just make it.

Now, when I think of France, I think of high end fashionable people, Eifel Tower and also a girl riding a bicycle with a basket full of long loaves of French bagutte Those long loaves are called “baguettes.” (The term comes from the Latin word for “stick.”) They are iconic, and France’s reputation for incredibly crusty and delicious baguettes is known far and wide.

They say that nothing can come close the bread you can get in France. I’ve never been, so I can’t say for sure, but I think you’d stand the best possible chance if you make it yourself. I mean, how could anything be better than a freshly baked loaf of bread? That crackly crust, the tender, airy crumb inside, steamy and yeasty and just begging to be torn into.

This recipe has just 5 ingredients: water, Oil yeast, flour, and salt. But the results are magical. And it’s all because of the technique. Start by dissolving the yeast in warm water. While that is doing its magic, combine the flour and salt. Create a little well in the center, and add in the yeast. Stir it around, taking flour from the outside edge and bringing it into the well, a little at a time. Keep stirring, and adding Oil followed by water as needed, until a shaggy dough forms. You can also use a stand mixer. Now just cover it loosely, and let it rest. For this type of bread, there’s not a lot of kneading involved. It only needs a few quick folds, to become smooth. Place the dough into a greased bowl and cover it tightly. Allow it to proof (or rise) in a warm place until doubled in bulk.

Divide the dough into 4 equal portions, and shape into long logs (about 15 inches long) with pointed ends. Cover with oiled plastic wrap, and allow to rise a second time. While the baguettes are rising, fill a baking pan with water and place it in the bottom of your oven. Preheat the oven and allow it to fill with steam from the water. This is the key to a crusty baguette. Once the loaves have finished their second rise, remove the plastic wrap and sprinkle them with a little flour. Then quickly slash them with a sharp knife. This is not just decorative, but it also allows the crust to crack and the bread to expand in a more controlled way.

Place them in the oven and let them bake until deeply golden brown. They should feel light and dry on the outside, and when you tap them they should give a hollow sound.

Slice it into 1/2-inch rounds and it’s perfect as a base for bruschetta or crostini. Or it can be used as a dipper for your favorite party dip. And we love it toasted with garlic butter, for garlic bread. So good with a pasta dinner!

Or just tear into it and eat it with a hot bowl of soup. So satisfying!

Roti Anda Boti

We love the combinations of Chicken and Roti, basically a Chicken Roll. My Mom used to make these amazingly delicious Tikka Boti which were inspired by something similar she had a Persian restaurant in Mumbai. Chicken Roll is always an easy go to recipe when you are finding it hard to decide what to cook. It’s a delicious recipe that is loved by kids and is always fuss free.

A regular Chicken roll is always great but, if you get to make some experiments with it, a little twist and change then your palettes love it more. Its basically the same Chicken roll but just made a little differently. This Chicken roll is less of a wrap

I added onions to a pan and Sautee till they were brown in color, further adding ginger garlic paste along with tomatoes and green chilies. I further added red chili flakes, tandoori powder, cumin powder and salt. Once the tomatoes are soft, add the chicken and mix well and cook till the Chicken is well cooked. The eggs are just plain whisked with salt and pepper and make them like thin crepes.

The difference comes in the Roti or the bread. Usually the Roti is cooked and then we add the cooked chicken to it. In this Chicken roll, I divided the dough to little portions, rolled it and then added the cooked chicken and added some dry cheese along with it. Wrap the dough and seal it from all sides and then pan fry it. As much as we feel that the taste might not be too different, it actually is and at the same time it is nothing close to the taste of samosa either. Its just completely different and outrageously delicious…The only way you find it is by trying it.

Murgh Malai Tikka

These are most juiciest and softest kebabs I have ever made. Yet they are amazingly flavorful. My story for Murgh Malai Tikka is connected to my older son. My older son, who is a handsome teenager now used to have GERD as a kid. For those of us who have kids suffering from refluxes and unable to keep their food down, we know the pain. For those who have kids who are picky eaters, we know the struggle. Unfortunately, for my son, he was both a picky eater and suffered from a reflux and that continued for the first 2 years of his life. But, as they say there is always a ray of good hope and things started to get better once he turned 2.

Now once he started eating real food, his choices went more towards dishes that were spicy but considerable mild at the same time. That was when during one of our outings he tried Malai Tikka and he was so much in love that we placed another order of the dish, which of course he didn’t touch because we forgot that he was two and as much as we loved to feed our super fussy toddler, his tummy could only take so much. But, this was the time when I decided that I should start making my own Malai tikka kebabs at home.

And of course, like everything else dishes also require experiments and some times way too many. So, with this one my initial experiments weren’t that bad but they weren’t successful. The first try, I made them with Chicken breast. Although with some kebabs Chicken breast comes out dry, but honestly with this recipe make one of the most moist kebabs ever. Chicken breast is a great choice for curries and for dishes that require you to mince the chicken, but this is something tried and tested, while making Murgh Malai tikka, you can pick any Boneless Chicken Thigh and leg meat or Chicken Breast. Your kebabs will be juicy, moist and a taste to die for! The second mistake was to only rub in yogurt which didn’t make them too different from the other ones that I was already making.

Secondly the addition of different spices also was a little adventurous but finally a few experiments later I discovered that the key to a perfect Malai Tikka wasn’t just Yogurt and cream but also cheese. A little bit of shredded cheese might sound weird and you might feel that cheese is the last flavor you want to taste in you desire when you bite into your Malai Tikka, but trust me, no one ever knows. I guess its a pretty well guarded secret…LOLzzz. Well, now you know. The cheese needs to be shredded and you can only add Mozarella which isn’t too strong in taste. Adding anything like Cheddar will definitely ruin the taste.

I make these tikkas by marinating them in Yogurt, Cream, Ginger garlic paste, Shredded cheese, Black pepper, White pepper, Cumin powder, Red chili powder, Salt, Turmeric Powder, Tandoori Powder and cashew paste. Besides that I also add some fresh chopped Coriander leaves and Green chilies. I believe there is nothing that can enhance the flavor of spices more than fresh herbs. Though I make these kebabs in the oven, but they have been grilled to perfection on our outdoor grill as well by Mr. Parveez and they come out perfectly juicy and delicious. You can always cook them on the pan too. Kebabs are something that cross out all the restrictions and can be made anytime anywhere. I fail to understand recipes that only require an oven. That should never be the case. So, oven, no oven, grill, no grill…as long as you have these kebabs marinated the right way and have fire, these kebabs can be cooked in no time.

I generally do not serve them with the stick unless I make them for a kid’s party. If you are using the wooden skewers, always soak them in water for 20 minutes before adding your kebabs to it. Soaking in water doesn’t let them burn in the pan or oven while cooking.

These kebabs are very appealing and inviting and an instant hit. They melt in the mouth, while the spices give you a light kick, the cream base cools your taste buds down making these irresistible little chunks soft and juicy and delicious enough for you to lose the count of how many you relished.