Plum Cake

Plum cakes are just so special. Christmas all around the world is always so festive and beautiful. I love the old city charms, snow and the gorgeous decorations everywhere. Though, things were pretty festive while I was growing up but in a little different way. I went to catholic convent school and Christmas was always celebrated in an awesome way. The teachers, nuns and students would always put up a grand show on the last day before the Christmas break. One of the teachers would dress up as Santa Claus and distribute gifts to everyone.

What also made me look forward to Christmas in India was Plum cake. For some reason, Plum cake was always made only during the Christmas season. A local and very popular bakery in my hometown made delicious Plum cake and my father made sure he gets ample supply for the family because we all loved it and it was only available for a short period of time. Not just that, I would always look forward to visiting my Christian friends on Christmas and would love their awesome cake preparations on Christmas. Being a Muslim, we couldn’t eat Plum cake everywhere, since most people soak their dry fruits in Rum for a month or more and we could never try those. Thank God! the bakery was owned by a Muslim family.

I could never figure out what exactly they soak their dry fruits in and how exactly they make it so delicious, yet not adding any alcohol and making it exactly the same way as its traditionally made was simply amazing. But, of course, no baker would ever share the recipe, Right? and so, we would just enjoy the yummy Plum cake while the season lasted. After getting married, I discovered that Bangalore’s Iyengar bakeries have a non stop flow of Plum cakes all year round and since, we were travelling to India only during summer. Not just that, we also searched almost all bakeries in Indian areas in New Jersey only to find out that Plum cakes are not in demand so they don’t make it.

Most recipes you search will always ask you to soak the dry fruits in Rum or some other kind of alcoholic beverage and there is no alternative to it. Finally, I got this recipe from a friend’s aunt who happens to bake a traditional Plum cake for the family every Christmas and does not use alcohol. Initially I wasn’t so sure how the cake would turn out, because a few things in the recipe are not hard but slightly tricky but, once you get the hang of it, its a walk in the park. Just make sure you red and follow all the directions mentioned. I promise the cake will make you relive those beautiful childhood memories.

Puraani Dilli Ka Burrah Kebab

Puraani Dilli or Old Delhi is an awesome place for food. I believe being a central place that connects Punjab, U.P., Rajasthan, Bihar and also being close to Kashmir, it has people from all neighboring states. Hence, there is a medley of food. My dad took a lot of trips to Delhi for work. Even we as a family, would be visiting the capital of India quiet often since back in the 80’s and 90’s, we didn’t have the concept of direct trains from one city to another. So, we would take a train to Delhi and then another one to the destination. Since, My maternal family lived in U.K., dropping someone off to Delhi or picking them up from Delhi or we visiting our maternal home was always a trip through Delhi.

Now, being a non vegetarian, purani delhi is the place to be. Despite the crowd, the pollution and uncountable hygiene issues, every non veg lover at some point visited “jama masjid area” to satisfy their cravings. We did that on almost every trip and my father tried it at least twice each time, if not more. Some very popular restaurants serve awesome and delicious kebabs and curries with sheermaal, roomali roti and finger licking biryani.

Amongst the various variety of kebabs, Burrah kebabs stole my heart. Made from lamb/Goat meat marinated for a few hours, these kebabs are juicy, crunchy and full of beautiful flavors. So I had to search for the recipe. Though the recipe that I found wasn’t close to what my taste buds witnessed as a kid but being a home chef I knew how to add and deduct things and come out with the exact taste.

Dilli ka Burrah Kebab also has a funny story connected to it. I suffered from Typhoid and I was forced fed all the food without oil or spice for days and when it got over and I fully recovered, the doctor asked me a simple question, “What is the first thing you would like to eat?” and I said, “Burrah Kebab”. Of course the doctor had no clue what a seven year old was saying but my parents couldn’t stop laughing realizing how tortured I was after the sickness.

This is a must try for people who love Mutton kebabs. Pretty easy to make and can be stored too.

Malabar Shrimp Curry

Shrimps are one of my favorite kind of seafood and I would always try shrimps with new kind of gravies or new styles of marinade and fry them or grill them in different ways. Mr. Parveez always preferred eating an actual fish to eating shrimps. He finds Shrimps to be a little tasteless. So, when I started making Shrimp curries, he was still not a big fan. He would eat, but you know not really enjoy it as much as how I would like him to.

We watch a lot of travel shows and during one such show, the host happened to be travelling around restaurants in Kerala and one such restaurant was cooking Malabar shrimp curry. Now before anything let me tell you this. We were watching this program around an hour or so before dinner time. While the chef in the restaurant was showing how he prepares his special Shrimp curry, we were glued to the TV and wished we could see it live in person and have a bite of that scrumptious looking curry. Anyways, just as I mentioned that it was around an hour or so before dinner. Looking at that curry, I was determined that I have to try making it. Funny enough I remembered that my freezer has a pack of frozen shrimps. I always believe in miracles and this might have been one such lucky day. I got down to making it that very moment. The curry came out amazingly delicious and a family favorite too. Now the chef had only given in a rough idea on how to make the curry and few things that I have added to my curry recipe was not a part of the show that we watched. So, you might not find this different from an authentic Malabar Shrimp Curry, but you will definitely get the hint of Malabar flavors and savor each bite.

I deveined the shrimps but left the tail on. I feel it makes the shrimps look prettier in a curry, but you can always take the tail off if you prefer. After washing and pat drying, I marinated the shrimps in Ginger garlic paste, Red chili powder, Fennel seed powder, Tandoori powder, salt and lemon juice for 15-30 minutes. I also added a bunch of curry leaves. Further added some Rice flour, All purpose flour and corn starch powder and deep fried the shrimps. Frying makes the shrimps crunchy and the texture with the curry sauce is very flavorful.

To make the curry, add mustard seeds and fenugreek seeds along with dry round red chilies. Once they splutter, add curry leaves and further add chopped onions. Add ginger garlic paste followed by black pepper powder, Turmeric powder, Red chili powder, coriander powder, fennel seed powder, salt and cumin powder. Add the Dry red chili paste, tomato puree and green chilies along with fried shrimps and dry fenugreek leaves.

This shrimp curry is pretty easy and would make a special place in your menu. Its goes along great with garlic naan or plain naan and also Kerala Parantha.

Tellichery Biryani

This recipe also happens to be from Kerala and is the second Biryani from this state that I tried out. Kerala is a state of distinct flavor. I know every state has their own flavors that are distinct and are easily distinguishable from the use of their local grown spices with methods of cooking different cuisines and also availability of local vegetation. Not forgetting their natural climate. Isn’t it amazing how every place has different things popular during different seasons and few things that are good to eat during all seasons. Hats off to generations before us who tried, tested and made so many different varieties of food that we just need to follow. And though, it all seems walk in the park, we still do not follow those age old recipes because we find them too time consuming in our busy lives today.

Thalassery town of Northern Kerala has a unique blend Arabian, Persian, Indian and European styles of cooking as a result as its long history as Maritime Trading Post. Tellichery is an anglicized name for Thalassery. The original name of Thalassery has been restored post Independence. Although both refer to the same place, the Tellichery Biryani is different from the Thalassery Biryani. This one is a little simpler version.

This Biryani does not use the Jeerakshala/Kaima Rice like the Thalassery Biryani and should be cooked with Long grain Basmati Rice. This recipe also displays the influence of Mughals in its flavors but seems to be slightly revised. Going through the ingredients, I do not find any ingredient that would distinguish this dish as a dish from Kerela. The recipe makes me feel that its made by some settlers who still did not adapt to the flavors of Kerela cuisine and were still new to incorporating the spice or certain ingredients to the dish. In all, this dish is great for all Biryani lovers, specially for Beginners. Therefore, if you happen to be someone new at making Biryani, this is for you. An easy, delicious and simple way of making a delicious Biryani.

Shrimp Hero Baguette Sandwich

This recipe is a true inspiration from one of our favorite restaurants near our old home. This restaurant is pretty old, owned by a lovely Italian family and has been serving New York style pizza for almost 80 years if not more. A very small restaurant that can barely seat 12 people, but most people order their take outs. We were their regular customers and along with the Pizza, they also served variety of other Italian fast food cuisines. What I loved the most was the Garlic knots and the Shrimp Hero Sandwich. The sandwich was super huge and loaded with wonderful sauce and lots of cheese. The ingredients always tasted so fresh and awesome.

I kind of always love going to these small eateries because one can vouch that they cook fresh because they do run out of things and say “no” too which never happens with big chains. Although, big chains always maintain quality but use large amount of preservatives that keep the food looking good and taste great. Anyways, getting back to my favorite Shrimp sandwich. We moved and its just not possible to go back and forth to that restaurant. So, once I started making my own bread, I also started making baguettes and that led to making these wonderful sandwiches.

My boys love eating bread. Specially if the bread is served straight out of the oven. Baguette, the long delicious French Bread seems to be a family favorite. Every restaurant that served a good bread had us visiting them more often. Every time we bought French Baguette from our favorite baker, I would reheat it in the oven to make it taste fresh, which was great but not the same. And, that’s when I thought I should try making my own baguette at home. Honestly, looking at so many different recipes, I felt that Baguette wasn’t all that fancily difficult and I decided it was time I just make it. I mean, how could anything be better than a freshly baked loaf of bread? That crackly crust, the tender, airy crumb inside, steamy and yeasty and just begging to be torn into.

You can look into my baguette recipe and follow it. It’s a detailed recipe and the instructions are pretty easy to follow and execute. Once your baguette are cool enough to handle, cut them to sandwich size and slit from the middle. To prepare the shrimp, just devein and take the tail off, wash them well too. Fry some garlic in the oil and add marinara sauce. Once it comes to a boil, add shrimps to it. Cook for 2-3 minutes, add Red chili flakes, dry parsley and garlic powder. Cook for a minute and add Onion powder. Cover and cook for 2 minutes. Your marinara sauce should be thick by now and shrimp should also be cooked. Slit the baguette and add the shrimp with sauce. I like mine spicy, so I added Jalapenos as well, but you don’t have to. Place them in the oven at 350F for 5-7 minutes. Sprinkle some dry parmesan cheese and serve.

French Baguette

My boys love eating bread. Specially if the bread is served straight out of the oven. Baguette, the long delicious French Bread seems to be a family favorite. Every restaurant that served a good bread had us visiting them more often. Every time we bought French Baguette from our favorite baker, I would reheat it in the oven to make it taste fresh, which was great but not the same. And, that’s when I thought I should try making my own baguette at home. Honestly, looking at so many different recipes, I felt that Baguette wasn’t all that fancily difficult and I decided it was time I just make it.

Now, when I think of France, I think of high end fashionable people, Eifel Tower and also a girl riding a bicycle with a basket full of long loaves of French bagutte Those long loaves are called “baguettes.” (The term comes from the Latin word for “stick.”) They are iconic, and France’s reputation for incredibly crusty and delicious baguettes is known far and wide.

They say that nothing can come close the bread you can get in France. I’ve never been, so I can’t say for sure, but I think you’d stand the best possible chance if you make it yourself. I mean, how could anything be better than a freshly baked loaf of bread? That crackly crust, the tender, airy crumb inside, steamy and yeasty and just begging to be torn into.

This recipe has just 5 ingredients: water, Oil yeast, flour, and salt. But the results are magical. And it’s all because of the technique. Start by dissolving the yeast in warm water. While that is doing its magic, combine the flour and salt. Create a little well in the center, and add in the yeast. Stir it around, taking flour from the outside edge and bringing it into the well, a little at a time. Keep stirring, and adding Oil followed by water as needed, until a shaggy dough forms. You can also use a stand mixer. Now just cover it loosely, and let it rest. For this type of bread, there’s not a lot of kneading involved. It only needs a few quick folds, to become smooth. Place the dough into a greased bowl and cover it tightly. Allow it to proof (or rise) in a warm place until doubled in bulk.

Divide the dough into 4 equal portions, and shape into long logs (about 15 inches long) with pointed ends. Cover with oiled plastic wrap, and allow to rise a second time. While the baguettes are rising, fill a baking pan with water and place it in the bottom of your oven. Preheat the oven and allow it to fill with steam from the water. This is the key to a crusty baguette. Once the loaves have finished their second rise, remove the plastic wrap and sprinkle them with a little flour. Then quickly slash them with a sharp knife. This is not just decorative, but it also allows the crust to crack and the bread to expand in a more controlled way.

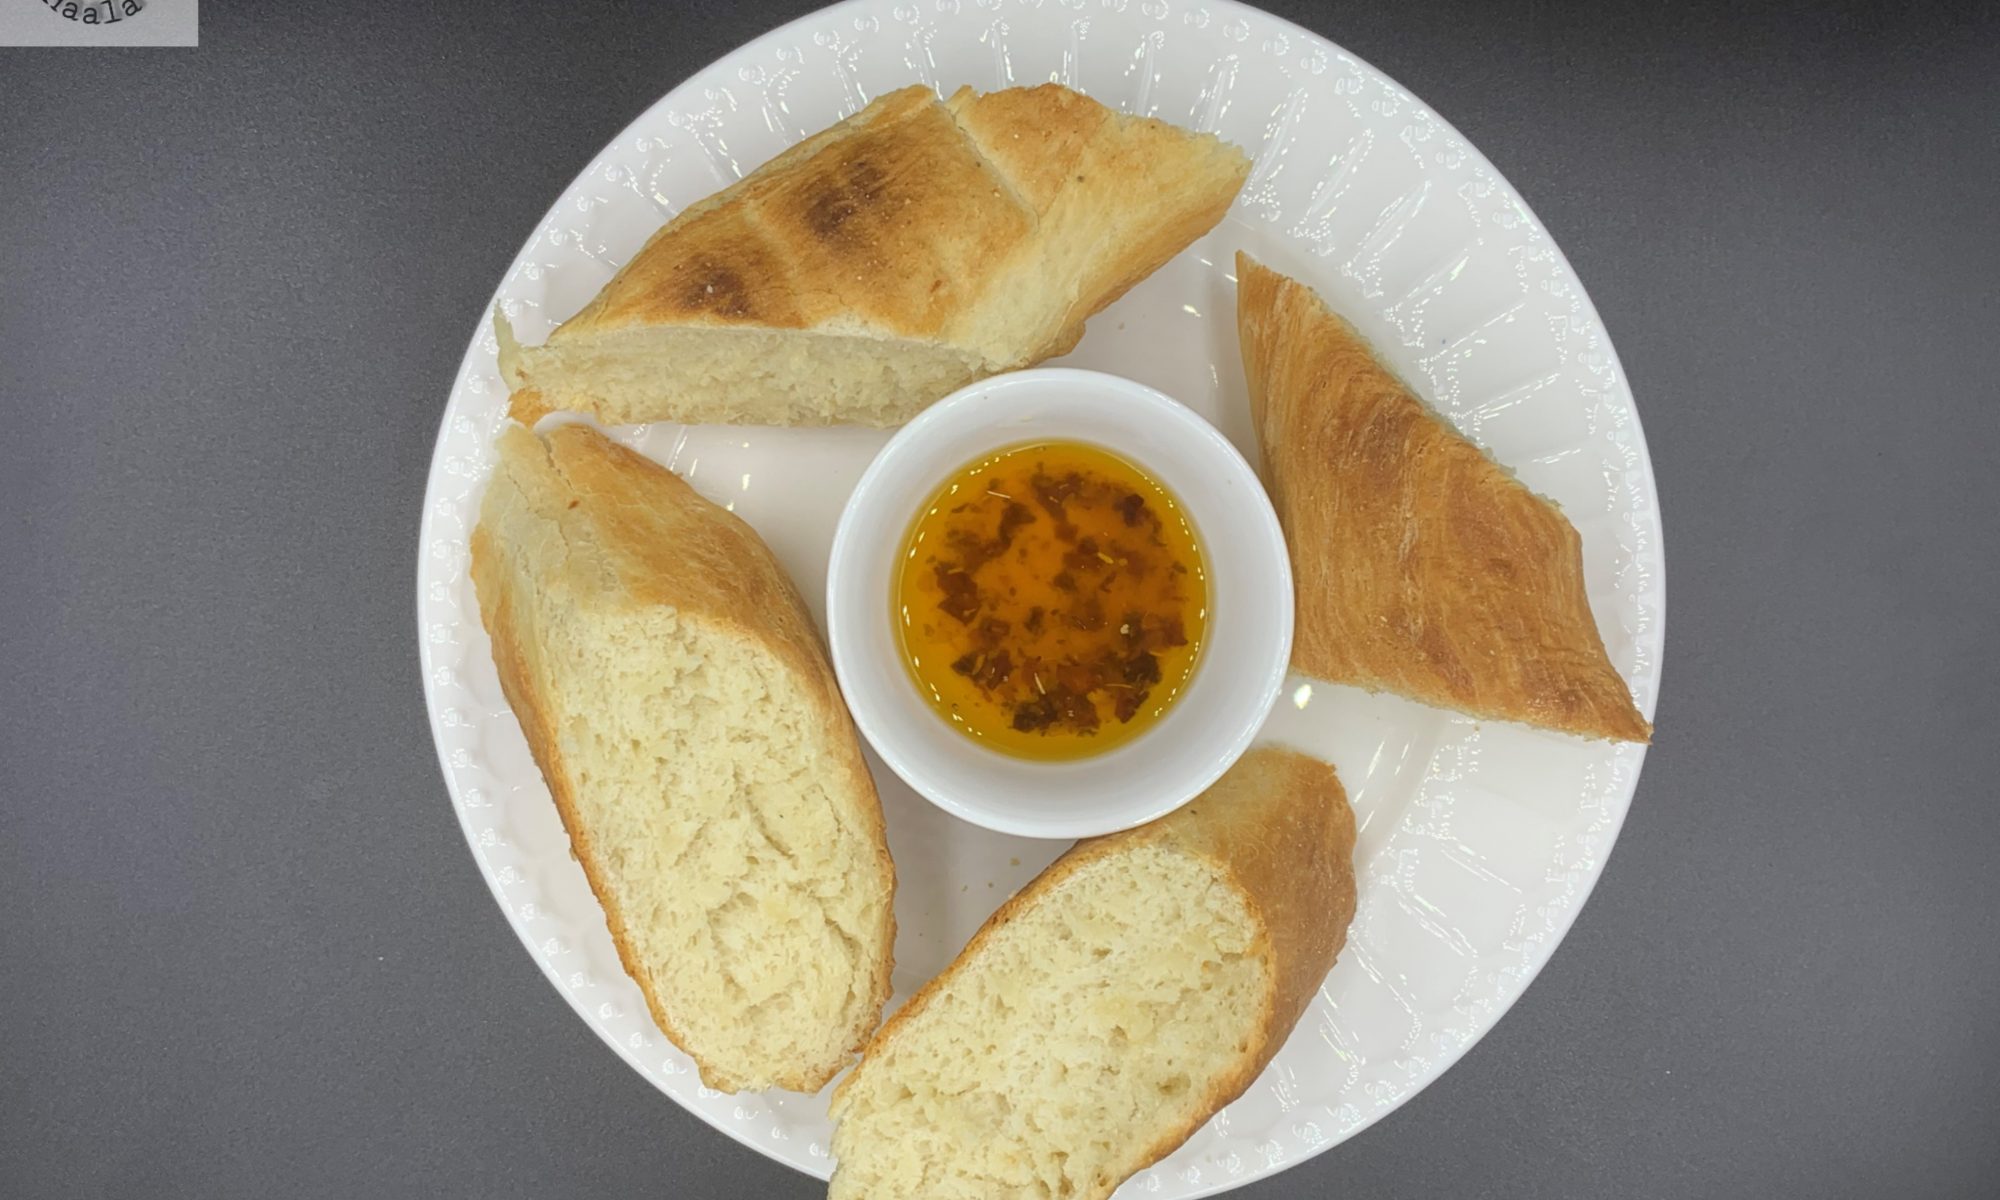
Place them in the oven and let them bake until deeply golden brown. They should feel light and dry on the outside, and when you tap them they should give a hollow sound.

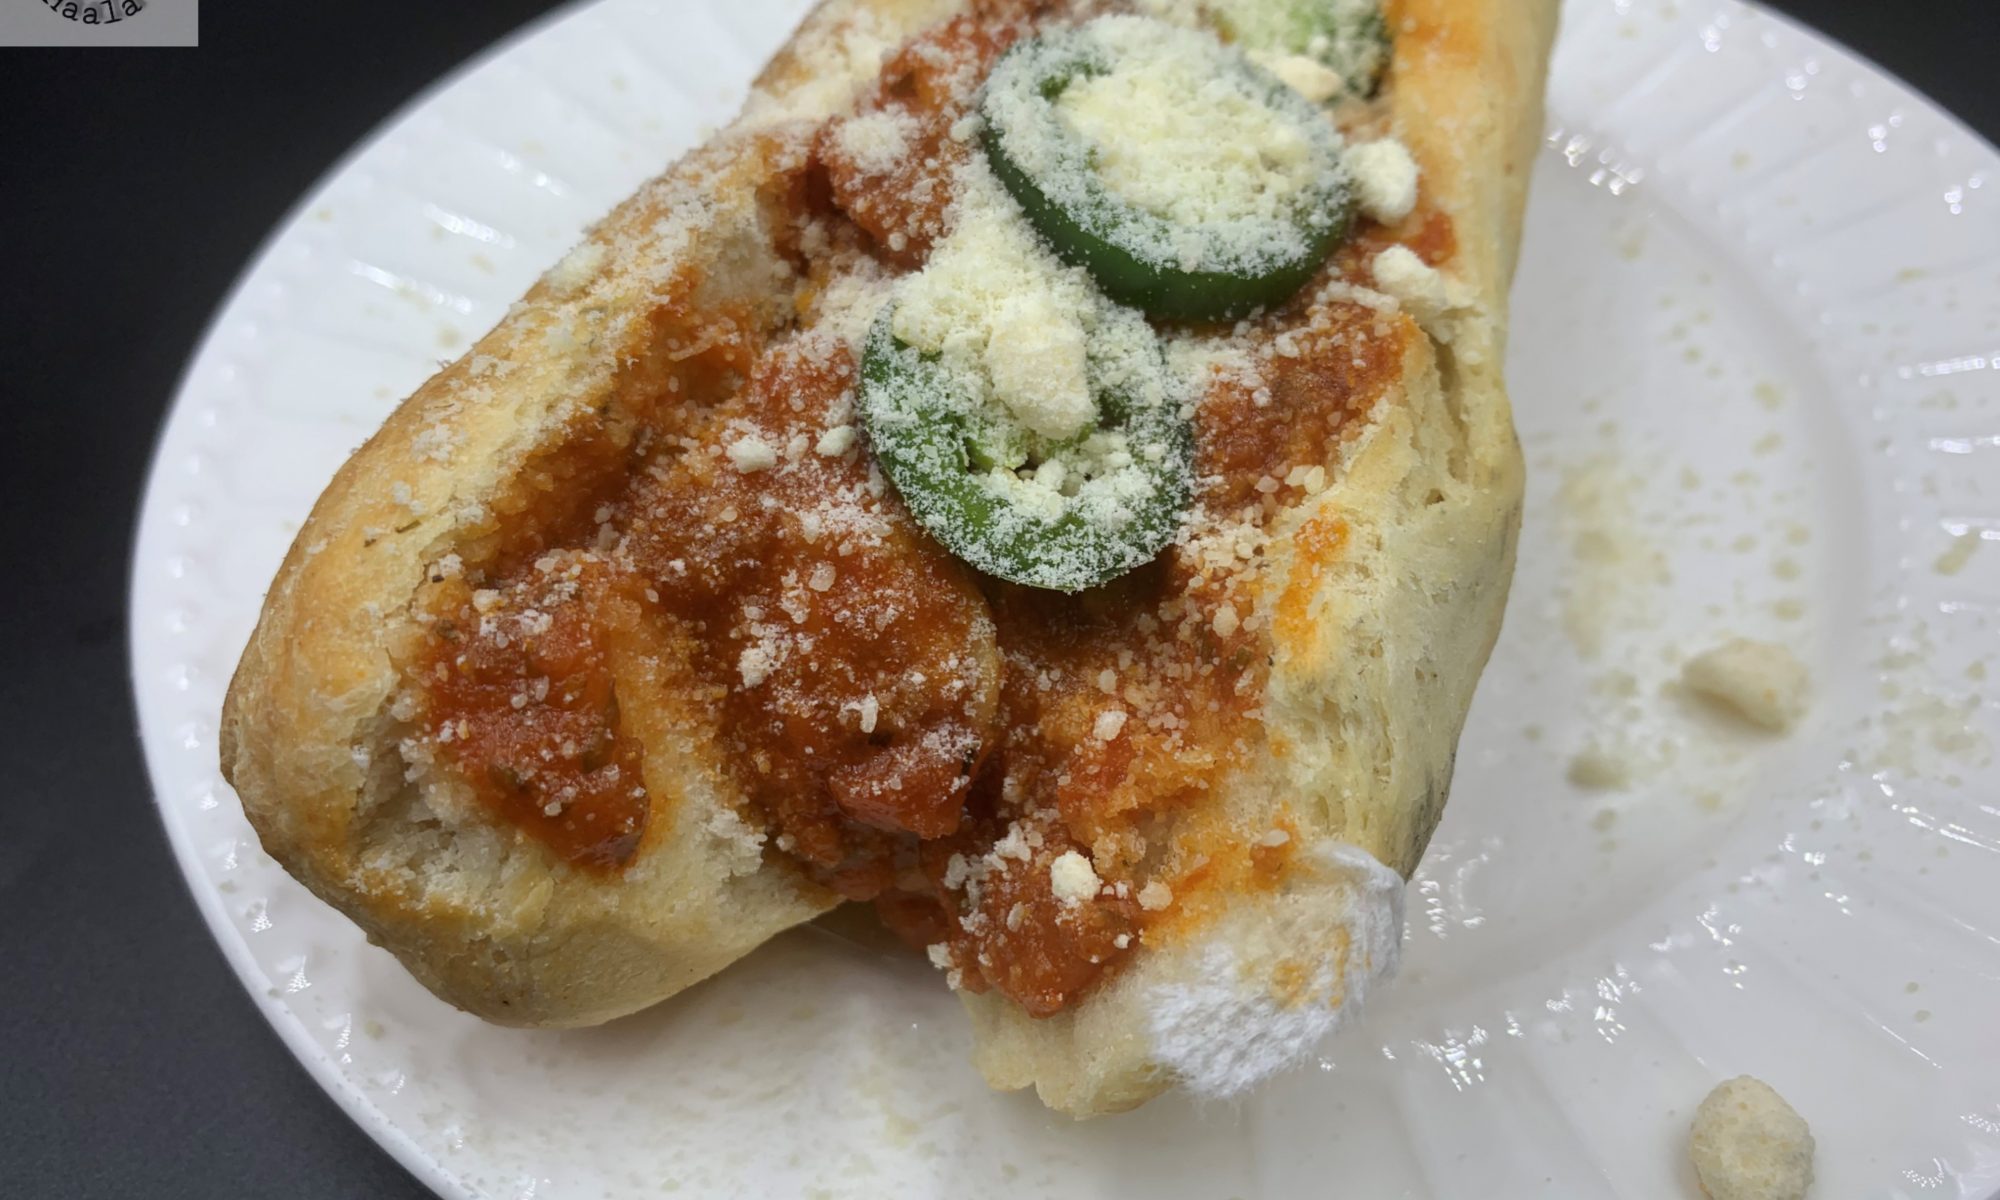
Slice it into 1/2-inch rounds and it’s perfect as a base for bruschetta or crostini. Or it can be used as a dipper for your favorite party dip. And we love it toasted with garlic butter, for garlic bread. So good with a pasta dinner!

Or just tear into it and eat it with a hot bowl of soup. So satisfying!

Roti Anda Boti

We love the combinations of Chicken and Roti, basically a Chicken Roll. My Mom used to make these amazingly delicious Tikka Boti which were inspired by something similar she had a Persian restaurant in Mumbai. Chicken Roll is always an easy go to recipe when you are finding it hard to decide what to cook. It’s a delicious recipe that is loved by kids and is always fuss free.

A regular Chicken roll is always great but, if you get to make some experiments with it, a little twist and change then your palettes love it more. Its basically the same Chicken roll but just made a little differently. This Chicken roll is less of a wrap

I added onions to a pan and Sautee till they were brown in color, further adding ginger garlic paste along with tomatoes and green chilies. I further added red chili flakes, tandoori powder, cumin powder and salt. Once the tomatoes are soft, add the chicken and mix well and cook till the Chicken is well cooked. The eggs are just plain whisked with salt and pepper and make them like thin crepes.

The difference comes in the Roti or the bread. Usually the Roti is cooked and then we add the cooked chicken to it. In this Chicken roll, I divided the dough to little portions, rolled it and then added the cooked chicken and added some dry cheese along with it. Wrap the dough and seal it from all sides and then pan fry it. As much as we feel that the taste might not be too different, it actually is and at the same time it is nothing close to the taste of samosa either. Its just completely different and outrageously delicious…The only way you find it is by trying it.

Pindi Chhole

This hearty, healthy and delicious dish is from Punjab, India. I initially thought that the name comes from the word Pind used for village in Punjabi. But, actually the name of the dish is from the place it was originated from. It is named Pindi Chana after the town Rawalpindi, which used to be a part of Punjab before India-Pakistan partition and later became a part of Pakistan. Pindi chhole is a recipe from Rawalpindi and now is proudly cooked everywhere and popularly known as Pindi Chhole.

This recipe is easy to cook, it makes for a wholesome meal when served with poori or Kulcha or Naan and an onion salad. Pindi Chana can be made with dried chickpeas, which needs to be soaked overnight and boiled until soft. The recipe also requires the use of chana daal along with chickpeas. I usually soak a large amount of chickpeas and boil them as well. I usually then divide them into smaller packs and keep them in the freezer for future use.

I never realized till I was much older that there were so many different ways of making chhole. I felt every family had there own version of making chhole, like with my Punjabi friends, their moms made chhole that didn’t have a lot of gravy and usually were a little dark in color and didn’t have too many tomatoes either. Where as, my mom always had her own version of making chhole with yogurt. The chhole recipe I follow is from a family friend and I make my chhole using tamarind, tomatoes and fennel seeds. And, then one day I came across Pindi chhole made by a close family friend and loved the flavors. This is when I found out that in most Punjabi families, people tend to boil chhole with whole spices and tea leaves which tends to darken the color of the chhole. Punjabi food anyways uses a lot of whole spice in their dishes and there always seems to be a very strong taste of cloves and cinnamon in their cuisine.

All in all this is one awesome chhole recipe. It goes really well with poori or parantha or kulcha. I serve them for breakfast usually with sooji ka halwa on the side, but that can always be when you have friends over or if its a special occasion, but these chhole with poori can definitely make it to your weekend brunch table. Enjoy!!!

Murgh Zafrani Tikka

These kebabs were a fluke cum delicious, they are juicy and soft. These were made while I was thinking of making some Kebabs for lunch and I couldn’t decide on what to make and finally the idea of going a little different than usual gave birth to this scrumptious invention. These kebabs have a pretty simple marinade and are pretty impressive for the way they taste compared to the effort that’s put in.

Some dishes need be improvised where as some super fab one where you just follow your heart and make them trusting your taste buds. This is one of those fab recipes which were made just following my heart and turned out a keepsake. To start with I made these kebabs using Chicken Breast. I have mentioned in my other recipes as well that Chicken breast tend to make dishes a little dry, specially kebabs. So, the thing that you can you can do to make your kebabs moist using Chicken breast is to add more ingredients that are cream based. Ingredients like Yogurt, cashew puree, cheese, cream and even buttermilk. In some cases even adding a little extra butter adds a lot of moisture to the kebabs. Therefore, Murgh Zafrani Tikka, you can pick any Boneless Chicken Thigh and leg meat or Chicken Breast. Your kebabs will be juicy, moist and absolutely delicious.

Addition of different spices was a little adventurous and I just followed my taste buds. Initially I marinated the chicken chunks in Ginger garlic paste, green chilies, Lemon juice saffron and salt. I left the juices to mix in for 30 minutes, which added a perfect flavor to the Chicken. Saffron added a lot of fragrance along with flavor. I am in love with saffron. It happens to be my favorite spice and I love to add it to my dishes be it sweet or spicy. The spice just gives out an amazing fragrance when added to your dish.

I further added Yogurt and spices. Cumin Powder, Tandoori Powder, White Pepper and Turmeric Powder were what I used since I wanted the flavor to be not too spicy and not too mild either and something that would enhance and bring out the flavor of Saffron. To add a little crunch I added some Besan which was dry roasted before adding. Adding a little Kasoori methi adds a different flavor to the kebabs.

You can always cook them on the pan too by adding a little oil or you can also use the Oil spray. Kebabs are something that cross out all the restrictions and can be made anytime anywhere. I fail to understand recipes that only require an oven. That should never be the case. So, oven, no oven, grill, no grill…as long as you have these kebabs marinated the right way and have fire, these kebabs can be cooked in no time. I generally do not serve them with the stick unless I make them for a kid’s party. If you are using the wooden skewers, always soak them in water for 20 minutes before adding your kebabs to it. Soaking in water doesn’t let them burn in the pan or oven while cooking.

These kebabs are very easy to make and perfect for beginners. Since it doesn’t require any grinding or blending, they are prefect if you want to add an extra dish to your table without putting in too much time into making it. These Kebabs are on the milder side so if you aren’t a fan of something outrageously spicy, this is a perfect recipe for you.