Murgh Darbari Tangdi Kebab

As the name suggests, this recipe traces its inspiration to the grand culinary traditions of the Mughal era — a time when food was not merely sustenance, but an art form. It is often believed that dishes like these may have been favorites in the royal courts of Emperor Akbar, where elaborate kitchens produced some of the most refined cuisines the Indian subcontinent had ever seen.

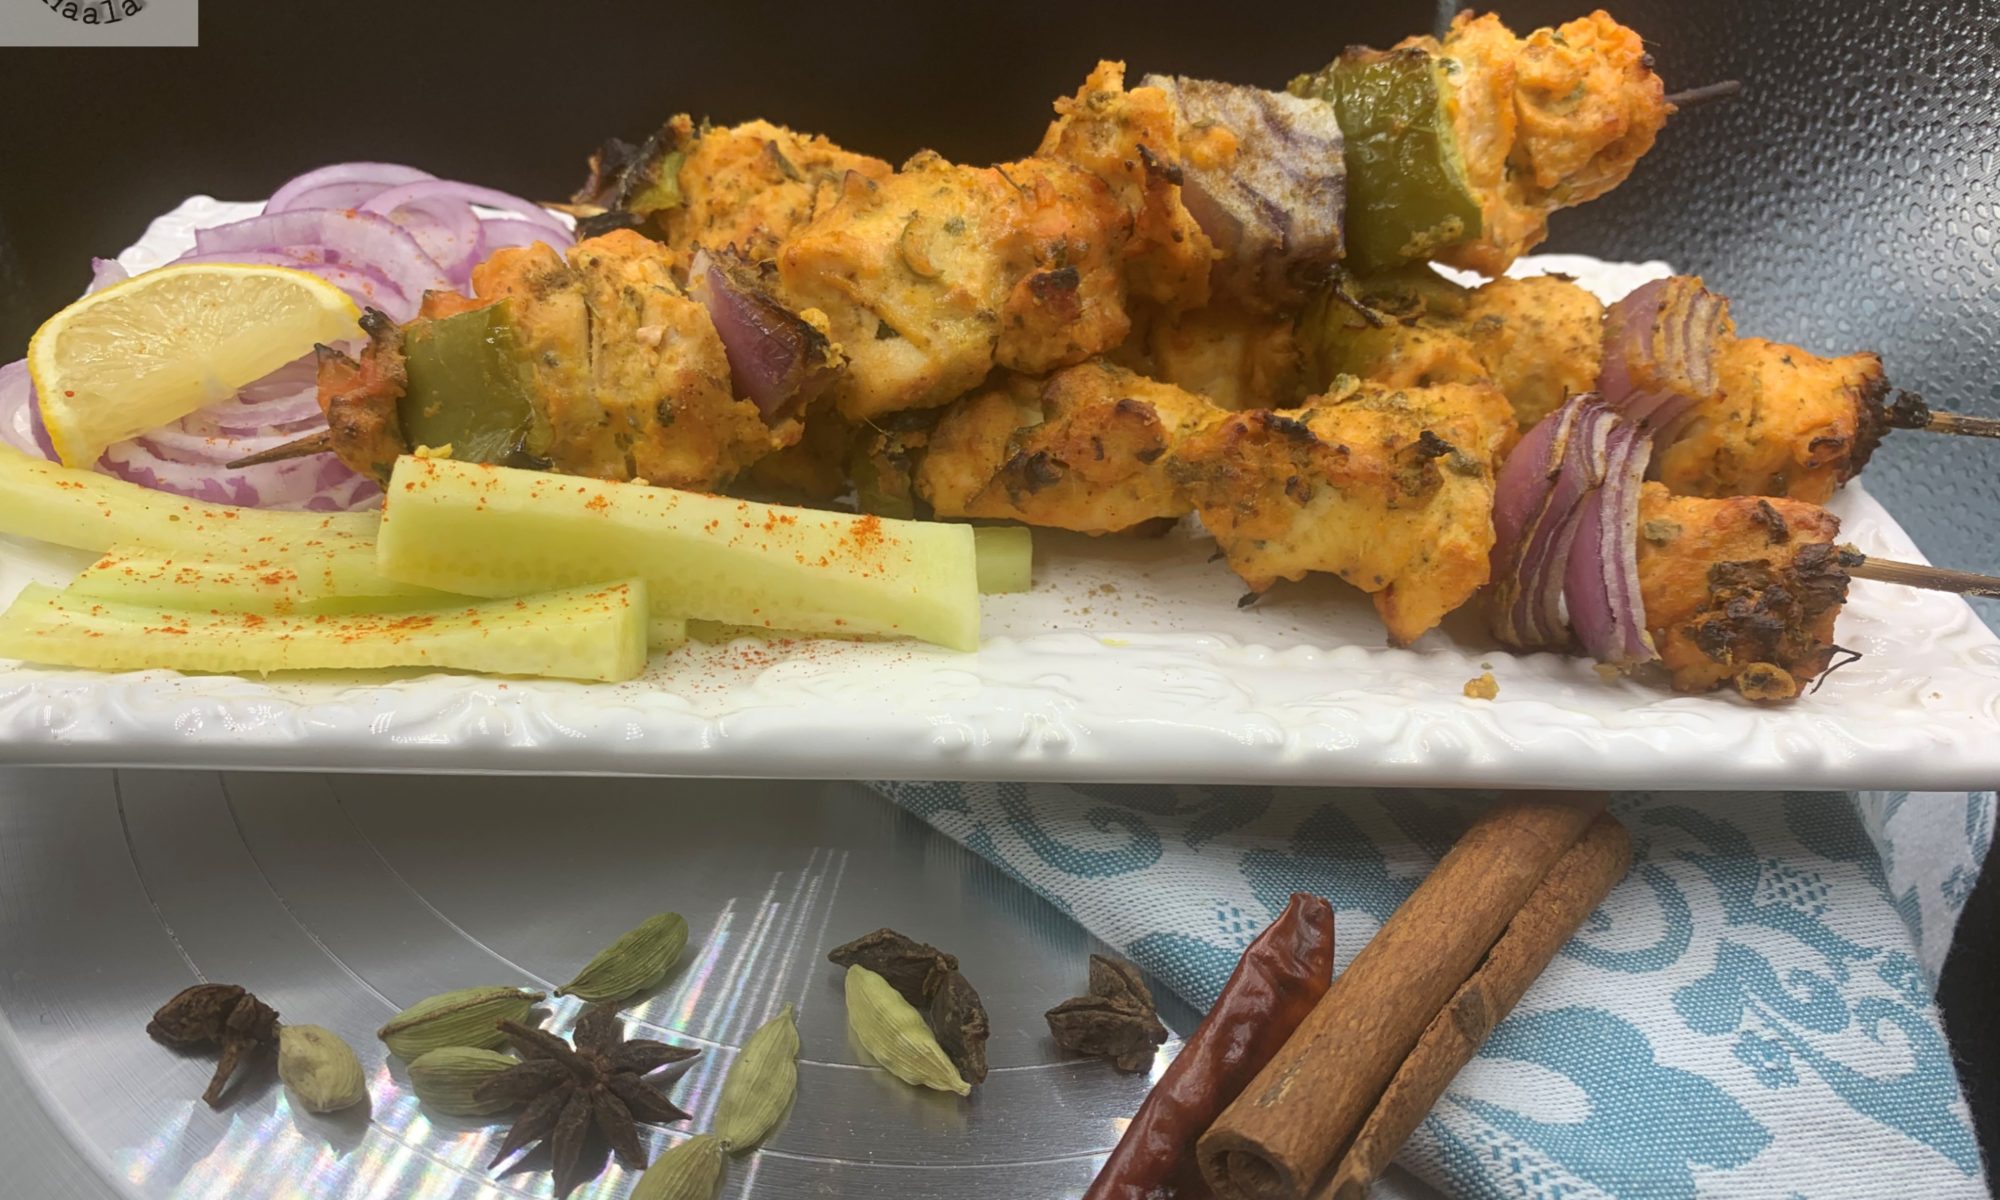
Exploring the history behind such recipes is just as fascinating to me as cooking them. Many of the whole spices we now consider inseparable from Indian cuisine — cinnamon, bay leaves, cardamom, cloves — became widely popular during the Mughal period. These were blended with indigenous ingredients already present in India, such as turmeric, chilies, and coriander, giving birth to deeply layered flavors that still define much of North Indian cooking today. The result was not just new dishes, but entirely new culinary traditions — kebabs, kormas, rich gravies, and the many forms of biryani we enjoy today.

What makes this period especially remarkable is the cultural exchange it fostered. The Mughal courts brought together Persian, Central Asian, and Indian influences, creating food that was luxurious yet rooted in local tastes. Many of the dishes we now call “classic” were, in essence, early forms of fusion cuisine — long before the term existed. Acceptance, adaptation, and creativity combined to produce flavors that have endured for centuries.

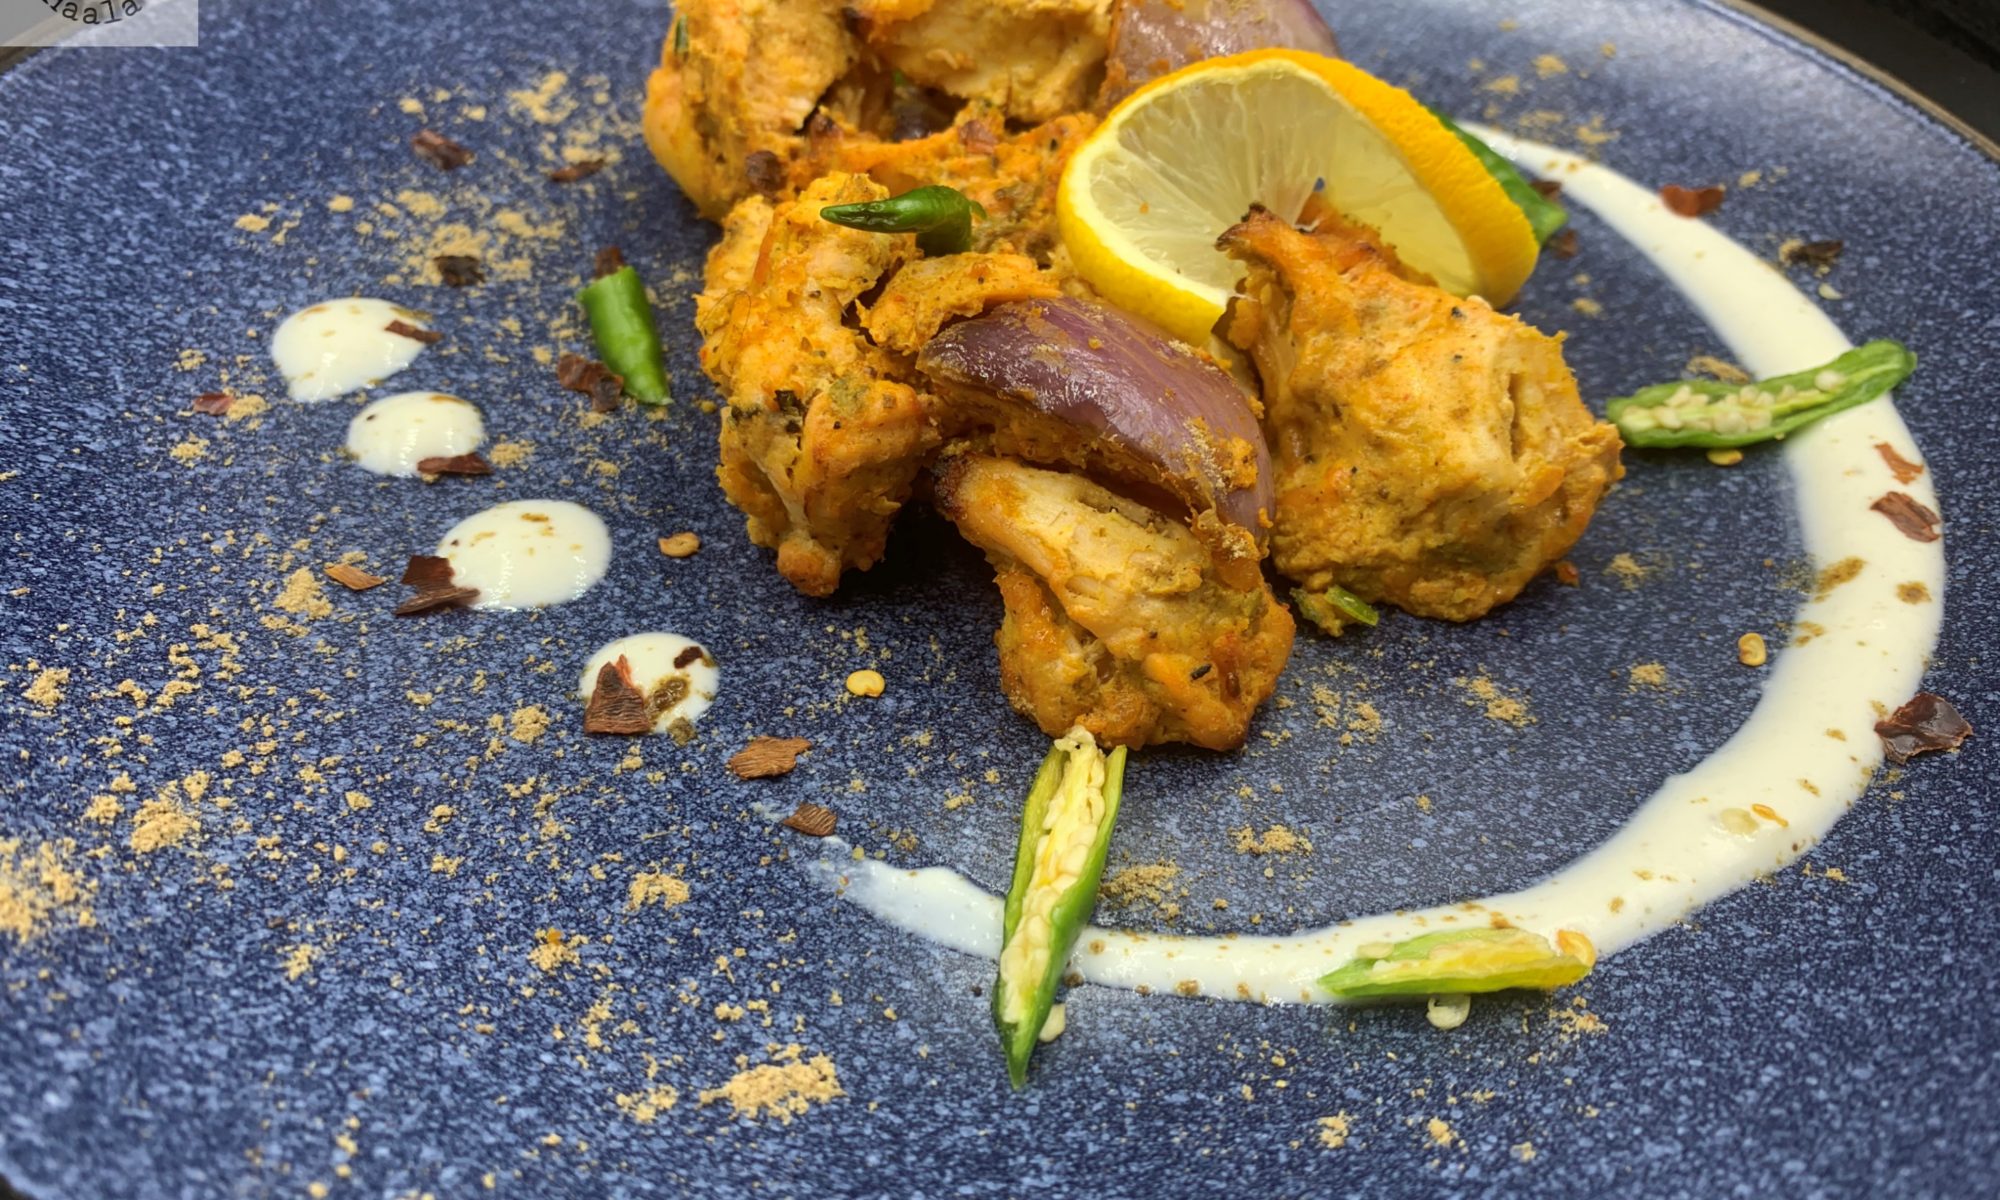
Kebabs themselves are often considered a gift from the Middle East to the wider world. Over time, they evolved in countless regional styles across India, each with its own spice balance, cooking method, and personality. Whether grilled over open flames, cooked on skewers, or pan-seared, kebabs remain one of the most beloved expressions of this culinary heritage.

The Mughal era also left a profound mark beyond food — in architecture, art, language, and cultural traditions. For me, it represents a time when diverse influences came together to create something enduring and beautiful. In India, food has always been a powerful bridge between cultures, religions, and communities. Festivals are shared, kitchens are opened to neighbors, and meals become celebrations of togetherness. It’s a reminder that cuisine is not just about ingredients, but about people, memories, and shared experiences.

Historical accounts suggest that Emperor Akbar had an exceptional appreciation for fine food, and the royal kitchens prepared an extraordinary range of vegetarian and non-vegetarian dishes tailored to his tastes. Queen Jodha is also said to have taken a keen interest in culinary matters, ensuring that meals reflected both royal grandeur and personal preference. While exact recipes from that era are rarely documented in detail, they offer enough clues to inspire modern recreations.

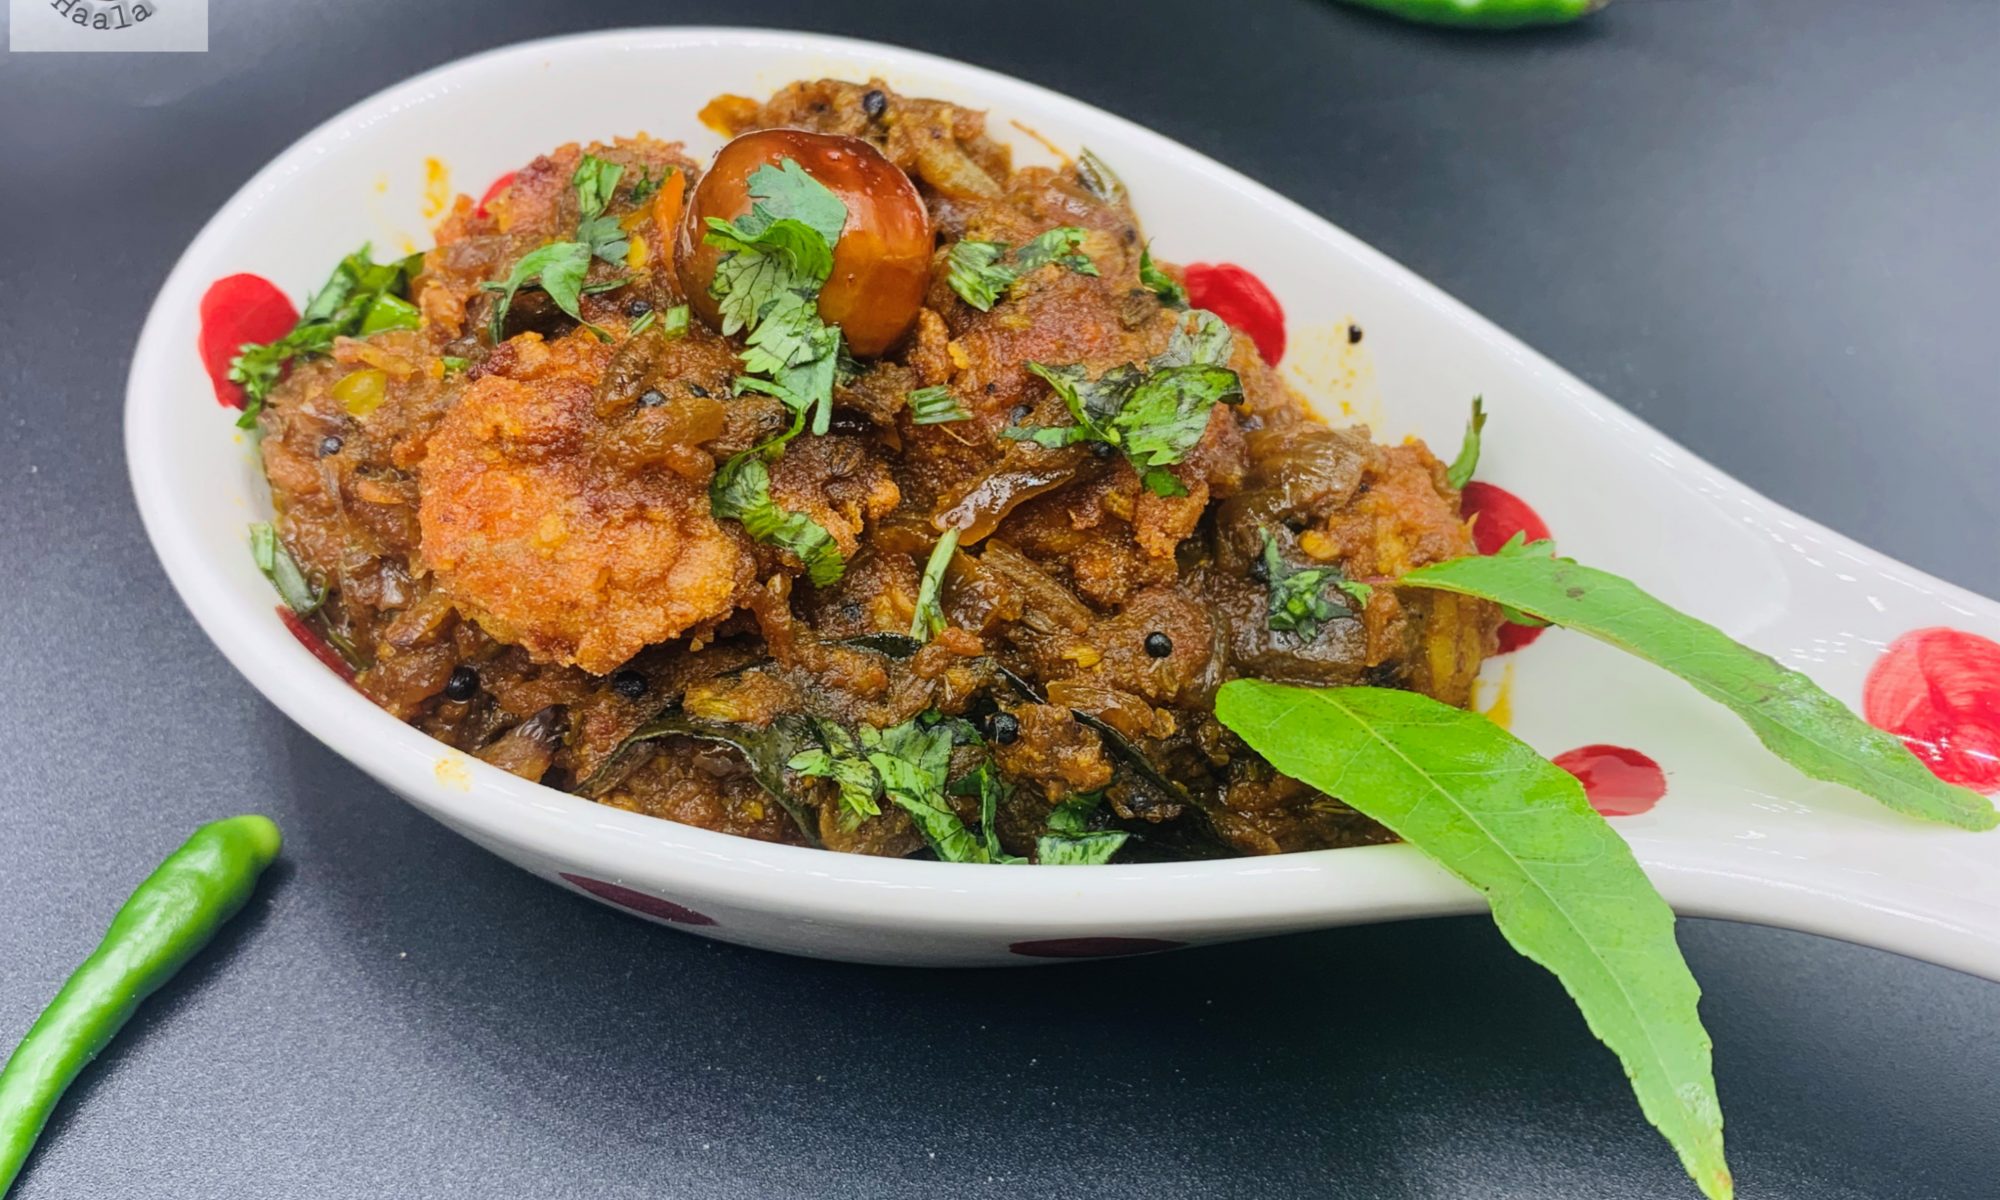
This kebab recipe is my interpretation of what such royal flavors might have been like — rich with aromatic spices, balanced yet indulgent, and deeply satisfying. While it may not be identical to the original dish served centuries ago, it aims to capture the spirit of Mughal cuisine: elegant, bold, and unforgettable.

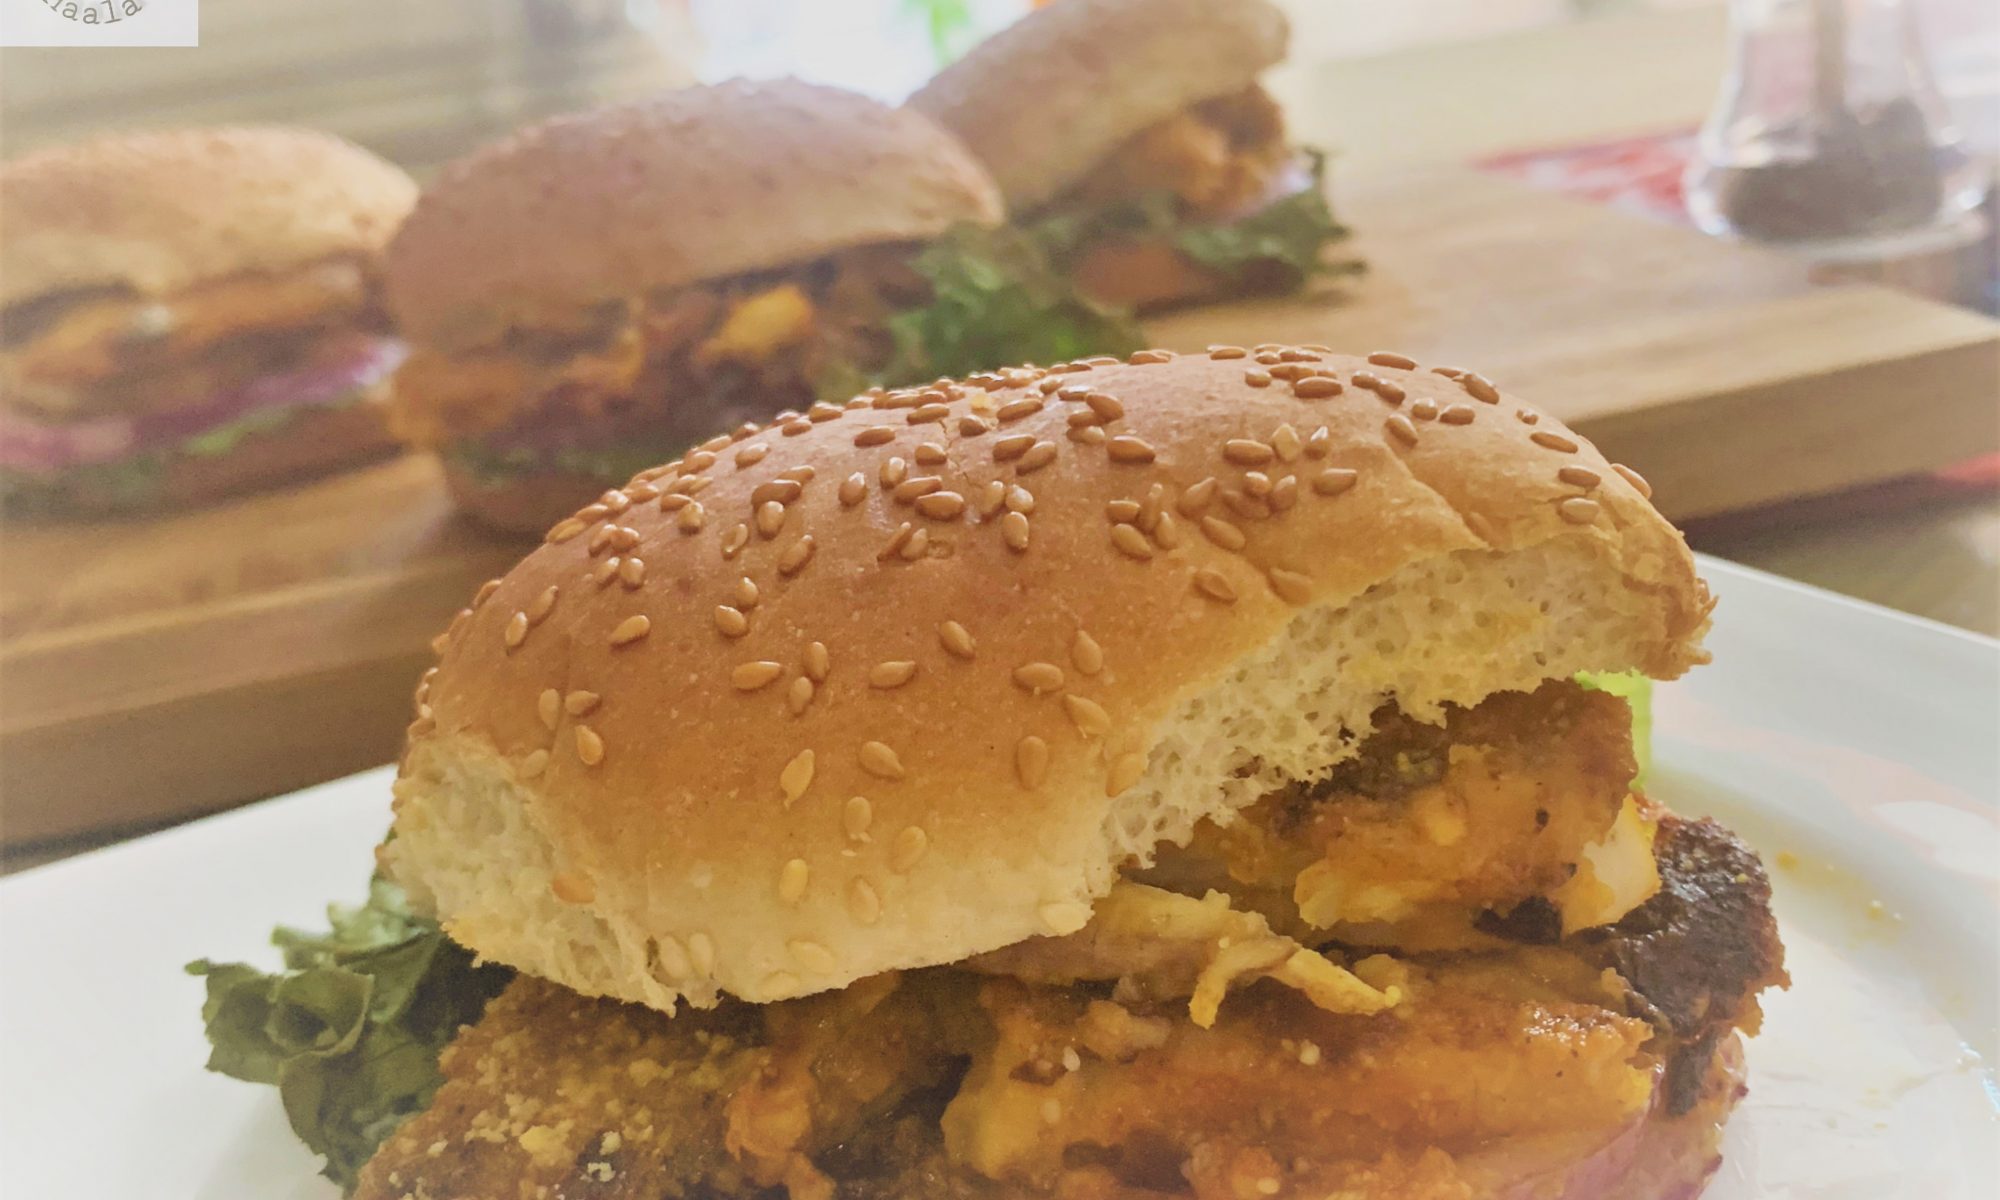
Each recipe I share may use familiar ingredients, yet the proportions, techniques, and combinations make every dish unique. The only true way to understand it is to cook it, taste it, and experience the flavors for yourself.

I hope you enjoy these kebabs as much as I did — a small, delicious journey back in time. 🍢✨

Lobster Curry

My love for Lobster Curry began in 2012, during our first visit to Kerala. We stayed on a houseboat in Alleppey, surrounded by the serene backwaters and blessed with the most perfect weather. It was around Christmas time — truly the best season to visit Kerala. During our stay, our hosts served an array of traditional Kerala dishes, especially seafood prepared in rich, aromatic coconut gravies. That’s where I tasted Lobster Curry for the very first time which I loved — and it was pure magic.

I had tried Lobsters before at several seafood restaurants, but they were always mildly cooked and flavored with nothing more than garlic and salt. The Lobster Curry in Kerala, however, was beyond my expectations — rich, flavorful, and absolutely unforgettable. The houseboat had three men who managed everything — from cooking to cleaning and maintenance — and they did it all with such warmth and care. Our time there remains one of the best vacations we’ve ever had. The weather, the calm of the backwaters, the walks surrounded by lush greenery, and the incredible hospitality made every moment truly memorable.

After tasting that unforgettable Lobster Curry, I just had to ask for the recipe — and our gracious host gladly shared it with me. Though the recipe was more of a rough guide than exact measurements, it was enough for me to understand the essence and recreate this wonderfully delicious dish back home.

The original recipe was cooked in coconut oil, but I made mine using olive oil since I don’t usually cook with coconut oil. I honestly don’t think it changes the flavor too much — it just makes the dish a little less “coconuty.” Since I still add coconut milk, the curry retains that perfect balance and richness that complements the rest of the ingredients beautifully. I did make a few other changes too, so I can’t really call this an authentic Kerala dish anymore — it’s more of my inspired version of it.

When I order lobsters for home delivery—which is, of course, the preferred option these days—I clean them myself. But if you’re picking fresh ones at a fish market, you can always ask them to crack the claws and cut the lobsters in half for you. I usually parboil the lobsters with a little turmeric powder and salt; it helps get rid of any musky smell.

To make the curry, I start by heating oil and adding black seeds (kalonji) and curry leaves, followed by finely chopped onions. Once the onions turn soft and transparent, I add ginger-garlic paste along with all the spices and some fennel powder. I find fennel powder brings a lovely freshness, especially to seafood dishes. Next, I pour in the coconut milk—or coconut purée—and tomato purée, stirring until everything blends together beautifully. Finally, I add the lobsters and let them simmer gently for about 10–12 minutes, until the curry thickens and the flavors come together perfectly.

The Lobster Curry might look complicated, but honestly, it takes less time to prepare than a regular chicken curry—and it looks absolutely stunning on the dining table. The best part is that this same recipe works wonderfully with crab too; just substitute the lobster for crab, and you’re good to go. I truly hope you enjoy cooking this dish and love it as much as my family and I do!

Chicken Quesadilla

These delicious wraps are filled with spicy pan-fried chicken and gooey cheese, coming together in just 30–40 minutes. It’s the kind of dish that’ll have your kids asking for seconds — and maybe even thirds! They’re easy to make, can be prepped partly ahead of time, and make for the perfect quick meal or snack. These little scrumptious bites are guaranteed to win hearts at the table.

For the chicken, you can use rotisserie chicken, leftover grilled chicken, or even kebabs — anything that’s already cooked works perfectly. I made mine in a Tex-Mex style. I sautéed some onions and green chilies, then added paprika, cumin powder, chili flakes, garlic powder, onion powder, and a touch of dried parsley. To spike it up, I mixed in a little apple cider vinegar and hot sauce. Cook everything together until the chicken dries up slightly and the sauce coats it completely — that’s when you know it’s ready for your wraps.

You can always make these quesadillas using store-bought tortillas, but I prefer making mine at home with a mix of all-purpose flour and corn flour. They’re actually quite easy to prepare — especially if you have a tortilla maker. Once your tortillas are ready, spoon some of the cooked chicken onto one half, sprinkle plenty of cheese, and fold them over. Bake in a preheated oven for about 10 minutes, just until the cheese melts and the tortillas turn lightly crisp.

For serving, you can cut the quesadillas in half — it makes them look neater and easier to eat. These quesadillas are deliciously filling, easy to make, and packed with flavor. Perfect for a quick lunch, dinner, or even a fun family snack.

Puraani Dilli Ka Burrah Kebab

Puraani Dilli or Old Delhi is an awesome place for food. I believe being a central place that connects Punjab, U.P., Rajasthan, Bihar and also being close to Kashmir, it has people from all neighboring states. Hence, there is a medley of food. My dad took a lot of trips to Delhi for work. Even we as a family, would be visiting the capital of India quiet often since back in the 80’s and 90’s, we didn’t have the concept of direct trains from one city to another. So, we would take a train to Delhi and then another one to the destination. Since, My maternal family lived in U.K., dropping someone off to Delhi or picking them up from Delhi or we visiting our maternal home was always a trip through Delhi.

Now, being a non vegetarian, purani delhi is the place to be. Despite the crowd, the pollution and uncountable hygiene issues, every non veg lover at some point visited “jama masjid area” to satisfy their cravings. We did that on almost every trip and my father tried it at least twice each time, if not more. Some very popular restaurants serve awesome and delicious kebabs and curries with sheermaal, roomali roti and finger licking biryani.

Amongst the various variety of kebabs, Burrah kebabs stole my heart. Made from lamb/Goat meat marinated for a few hours, these kebabs are juicy, crunchy and full of beautiful flavors. So I had to search for the recipe. Though the recipe that I found wasn’t close to what my taste buds witnessed as a kid but being a home chef I knew how to add and deduct things and come out with the exact taste.

Dilli ka Burrah Kebab also has a funny story connected to it. I suffered from Typhoid and I was forced fed all the food without oil or spice for days and when it got over and I fully recovered, the doctor asked me a simple question, “What is the first thing you would like to eat?” and I said, “Burrah Kebab”. Of course the doctor had no clue what a seven year old was saying but my parents couldn’t stop laughing realizing how tortured I was after the sickness.

This is a must try for people who love Mutton kebabs. Pretty easy to make and can be stored too.

Malabar Shrimp Curry

Shrimps are one of my favorite kind of seafood and I would always try shrimps with new kind of gravies or new styles of marinade and fry them or grill them in different ways. Mr. Parveez always preferred eating an actual fish to eating shrimps. He finds Shrimps to be a little tasteless. So, when I started making Shrimp curries, he was still not a big fan. He would eat, but you know not really enjoy it as much as how I would like him to.

We watch a lot of travel shows and during one such show, the host happened to be travelling around restaurants in Kerala and one such restaurant was cooking Malabar shrimp curry. Now before anything let me tell you this. We were watching this program around an hour or so before dinner time. While the chef in the restaurant was showing how he prepares his special Shrimp curry, we were glued to the TV and wished we could see it live in person and have a bite of that scrumptious looking curry. Anyways, just as I mentioned that it was around an hour or so before dinner. Looking at that curry, I was determined that I have to try making it. Funny enough I remembered that my freezer has a pack of frozen shrimps. I always believe in miracles and this might have been one such lucky day. I got down to making it that very moment. The curry came out amazingly delicious and a family favorite too. Now the chef had only given in a rough idea on how to make the curry and few things that I have added to my curry recipe was not a part of the show that we watched. So, you might not find this different from an authentic Malabar Shrimp Curry, but you will definitely get the hint of Malabar flavors and savor each bite.

I deveined the shrimps but left the tail on. I feel it makes the shrimps look prettier in a curry, but you can always take the tail off if you prefer. After washing and pat drying, I marinated the shrimps in Ginger garlic paste, Red chili powder, Fennel seed powder, Tandoori powder, salt and lemon juice for 15-30 minutes. I also added a bunch of curry leaves. Further added some Rice flour, All purpose flour and corn starch powder and deep fried the shrimps. Frying makes the shrimps crunchy and the texture with the curry sauce is very flavorful.

To make the curry, add mustard seeds and fenugreek seeds along with dry round red chilies. Once they splutter, add curry leaves and further add chopped onions. Add ginger garlic paste followed by black pepper powder, Turmeric powder, Red chili powder, coriander powder, fennel seed powder, salt and cumin powder. Add the Dry red chili paste, tomato puree and green chilies along with fried shrimps and dry fenugreek leaves.

This shrimp curry is pretty easy and would make a special place in your menu. Its goes along great with garlic naan or plain naan and also Kerala Parantha.

Roti Anda Boti

We love the combinations of Chicken and Roti, basically a Chicken Roll. My Mom used to make these amazingly delicious Tikka Boti which were inspired by something similar she had a Persian restaurant in Mumbai. Chicken Roll is always an easy go to recipe when you are finding it hard to decide what to cook. It’s a delicious recipe that is loved by kids and is always fuss free.

A regular Chicken roll is always great but, if you get to make some experiments with it, a little twist and change then your palettes love it more. Its basically the same Chicken roll but just made a little differently. This Chicken roll is less of a wrap

I added onions to a pan and Sautee till they were brown in color, further adding ginger garlic paste along with tomatoes and green chilies. I further added red chili flakes, tandoori powder, cumin powder and salt. Once the tomatoes are soft, add the chicken and mix well and cook till the Chicken is well cooked. The eggs are just plain whisked with salt and pepper and make them like thin crepes.

The difference comes in the Roti or the bread. Usually the Roti is cooked and then we add the cooked chicken to it. In this Chicken roll, I divided the dough to little portions, rolled it and then added the cooked chicken and added some dry cheese along with it. Wrap the dough and seal it from all sides and then pan fry it. As much as we feel that the taste might not be too different, it actually is and at the same time it is nothing close to the taste of samosa either. Its just completely different and outrageously delicious…The only way you find it is by trying it.

Pindi Chhole

This hearty, healthy and delicious dish is from Punjab, India. I initially thought that the name comes from the word Pind used for village in Punjabi. But, actually the name of the dish is from the place it was originated from. It is named Pindi Chana after the town Rawalpindi, which used to be a part of Punjab before India-Pakistan partition and later became a part of Pakistan. Pindi chhole is a recipe from Rawalpindi and now is proudly cooked everywhere and popularly known as Pindi Chhole.

This recipe is easy to cook, it makes for a wholesome meal when served with poori or Kulcha or Naan and an onion salad. Pindi Chana can be made with dried chickpeas, which needs to be soaked overnight and boiled until soft. The recipe also requires the use of chana daal along with chickpeas. I usually soak a large amount of chickpeas and boil them as well. I usually then divide them into smaller packs and keep them in the freezer for future use.

I never realized till I was much older that there were so many different ways of making chhole. I felt every family had there own version of making chhole, like with my Punjabi friends, their moms made chhole that didn’t have a lot of gravy and usually were a little dark in color and didn’t have too many tomatoes either. Where as, my mom always had her own version of making chhole with yogurt. The chhole recipe I follow is from a family friend and I make my chhole using tamarind, tomatoes and fennel seeds. And, then one day I came across Pindi chhole made by a close family friend and loved the flavors. This is when I found out that in most Punjabi families, people tend to boil chhole with whole spices and tea leaves which tends to darken the color of the chhole. Punjabi food anyways uses a lot of whole spice in their dishes and there always seems to be a very strong taste of cloves and cinnamon in their cuisine.

All in all this is one awesome chhole recipe. It goes really well with poori or parantha or kulcha. I serve them for breakfast usually with sooji ka halwa on the side, but that can always be when you have friends over or if its a special occasion, but these chhole with poori can definitely make it to your weekend brunch table. Enjoy!!!

Murgh Zafrani Tikka

These kebabs were a fluke cum delicious, they are juicy and soft. These were made while I was thinking of making some Kebabs for lunch and I couldn’t decide on what to make and finally the idea of going a little different than usual gave birth to this scrumptious invention. These kebabs have a pretty simple marinade and are pretty impressive for the way they taste compared to the effort that’s put in.

Some dishes need be improvised where as some super fab one where you just follow your heart and make them trusting your taste buds. This is one of those fab recipes which were made just following my heart and turned out a keepsake. To start with I made these kebabs using Chicken Breast. I have mentioned in my other recipes as well that Chicken breast tend to make dishes a little dry, specially kebabs. So, the thing that you can you can do to make your kebabs moist using Chicken breast is to add more ingredients that are cream based. Ingredients like Yogurt, cashew puree, cheese, cream and even buttermilk. In some cases even adding a little extra butter adds a lot of moisture to the kebabs. Therefore, Murgh Zafrani Tikka, you can pick any Boneless Chicken Thigh and leg meat or Chicken Breast. Your kebabs will be juicy, moist and absolutely delicious.

Addition of different spices was a little adventurous and I just followed my taste buds. Initially I marinated the chicken chunks in Ginger garlic paste, green chilies, Lemon juice saffron and salt. I left the juices to mix in for 30 minutes, which added a perfect flavor to the Chicken. Saffron added a lot of fragrance along with flavor. I am in love with saffron. It happens to be my favorite spice and I love to add it to my dishes be it sweet or spicy. The spice just gives out an amazing fragrance when added to your dish.

I further added Yogurt and spices. Cumin Powder, Tandoori Powder, White Pepper and Turmeric Powder were what I used since I wanted the flavor to be not too spicy and not too mild either and something that would enhance and bring out the flavor of Saffron. To add a little crunch I added some Besan which was dry roasted before adding. Adding a little Kasoori methi adds a different flavor to the kebabs.

You can always cook them on the pan too by adding a little oil or you can also use the Oil spray. Kebabs are something that cross out all the restrictions and can be made anytime anywhere. I fail to understand recipes that only require an oven. That should never be the case. So, oven, no oven, grill, no grill…as long as you have these kebabs marinated the right way and have fire, these kebabs can be cooked in no time. I generally do not serve them with the stick unless I make them for a kid’s party. If you are using the wooden skewers, always soak them in water for 20 minutes before adding your kebabs to it. Soaking in water doesn’t let them burn in the pan or oven while cooking.

These kebabs are very easy to make and perfect for beginners. Since it doesn’t require any grinding or blending, they are prefect if you want to add an extra dish to your table without putting in too much time into making it. These Kebabs are on the milder side so if you aren’t a fan of something outrageously spicy, this is a perfect recipe for you.

Murgh Malai Tikka

These are most juiciest and softest kebabs I have ever made. Yet they are amazingly flavorful. My story for Murgh Malai Tikka is connected to my older son. My older son, who is a handsome teenager now used to have GERD as a kid. For those of us who have kids suffering from refluxes and unable to keep their food down, we know the pain. For those who have kids who are picky eaters, we know the struggle. Unfortunately, for my son, he was both a picky eater and suffered from a reflux and that continued for the first 2 years of his life. But, as they say there is always a ray of good hope and things started to get better once he turned 2.

Now once he started eating real food, his choices went more towards dishes that were spicy but considerable mild at the same time. That was when during one of our outings he tried Malai Tikka and he was so much in love that we placed another order of the dish, which of course he didn’t touch because we forgot that he was two and as much as we loved to feed our super fussy toddler, his tummy could only take so much. But, this was the time when I decided that I should start making my own Malai tikka kebabs at home.

And of course, like everything else dishes also require experiments and some times way too many. So, with this one my initial experiments weren’t that bad but they weren’t successful. The first try, I made them with Chicken breast. Although with some kebabs Chicken breast comes out dry, but honestly with this recipe make one of the most moist kebabs ever. Chicken breast is a great choice for curries and for dishes that require you to mince the chicken, but this is something tried and tested, while making Murgh Malai tikka, you can pick any Boneless Chicken Thigh and leg meat or Chicken Breast. Your kebabs will be juicy, moist and a taste to die for! The second mistake was to only rub in yogurt which didn’t make them too different from the other ones that I was already making.

Secondly the addition of different spices also was a little adventurous but finally a few experiments later I discovered that the key to a perfect Malai Tikka wasn’t just Yogurt and cream but also cheese. A little bit of shredded cheese might sound weird and you might feel that cheese is the last flavor you want to taste in you desire when you bite into your Malai Tikka, but trust me, no one ever knows. I guess its a pretty well guarded secret…LOLzzz. Well, now you know. The cheese needs to be shredded and you can only add Mozarella which isn’t too strong in taste. Adding anything like Cheddar will definitely ruin the taste.

I make these tikkas by marinating them in Yogurt, Cream, Ginger garlic paste, Shredded cheese, Black pepper, White pepper, Cumin powder, Red chili powder, Salt, Turmeric Powder, Tandoori Powder and cashew paste. Besides that I also add some fresh chopped Coriander leaves and Green chilies. I believe there is nothing that can enhance the flavor of spices more than fresh herbs. Though I make these kebabs in the oven, but they have been grilled to perfection on our outdoor grill as well by Mr. Parveez and they come out perfectly juicy and delicious. You can always cook them on the pan too. Kebabs are something that cross out all the restrictions and can be made anytime anywhere. I fail to understand recipes that only require an oven. That should never be the case. So, oven, no oven, grill, no grill…as long as you have these kebabs marinated the right way and have fire, these kebabs can be cooked in no time.

I generally do not serve them with the stick unless I make them for a kid’s party. If you are using the wooden skewers, always soak them in water for 20 minutes before adding your kebabs to it. Soaking in water doesn’t let them burn in the pan or oven while cooking.

These kebabs are very appealing and inviting and an instant hit. They melt in the mouth, while the spices give you a light kick, the cream base cools your taste buds down making these irresistible little chunks soft and juicy and delicious enough for you to lose the count of how many you relished.

Haala’s Fish Burger

We love Fish in all kind of different ways. We love it grilled, curry, fried, steamed, baked. Any which way, we love it. Since we cannot eat non halal food outside, it refrains us from eating Chicken or meat burgers outside and I ended up making my own in different styles. Yes! I make around 4-5 different kinds of Chicken and meat burgers at home. Now, you know even if you know how to cook 1000 different kinds of meals, you kids would still want something more and you have to super creative at times to satisfy those little minds.

So, after completing my creative journey on satisfying the “not so little” tummies with my chicken and meat burgers, the demand came on to Fish Burgers. My first question was that why would I make something that we can easily eat outside to which the reply was an explanation…simple one and harsh too… It’s a time to stay at home and we aren’t going out to eat either. And, of course that was enough to convince me into making Fish Burgers.

I used Tilapia Fish fillets. You can use any other fish fillet of your choice. Going for a fish which does not have a very overpowering flavor is always better when you marinate and roll it in flour. I personally feel that any fish like Salmon or Kingfish will only taste nice in a burger if you spice them up and fry them without rolling them in flour. It’s my personal outlook and you can always choose to differ. I mixed in the spices with the fillet, rolled them in a mix of flour and corn starch powder. Later pan fried them. Once cooked and crunchy from both sides. Spread some butter on both half of the butter and just heat them a little on a pan. Toasting the burger is optional, so you can always omit this step. You can also grill place them in between burger buns with Onion, Tomato, Lettuce, garlic mayo sauce and Hot sauce. Sprinkle some dry parmesan cheese powder.

These burgers don’t take too much time and very satisfying as well. You can also serve the fish fillet with the veggie only without the burger as a fish salad.