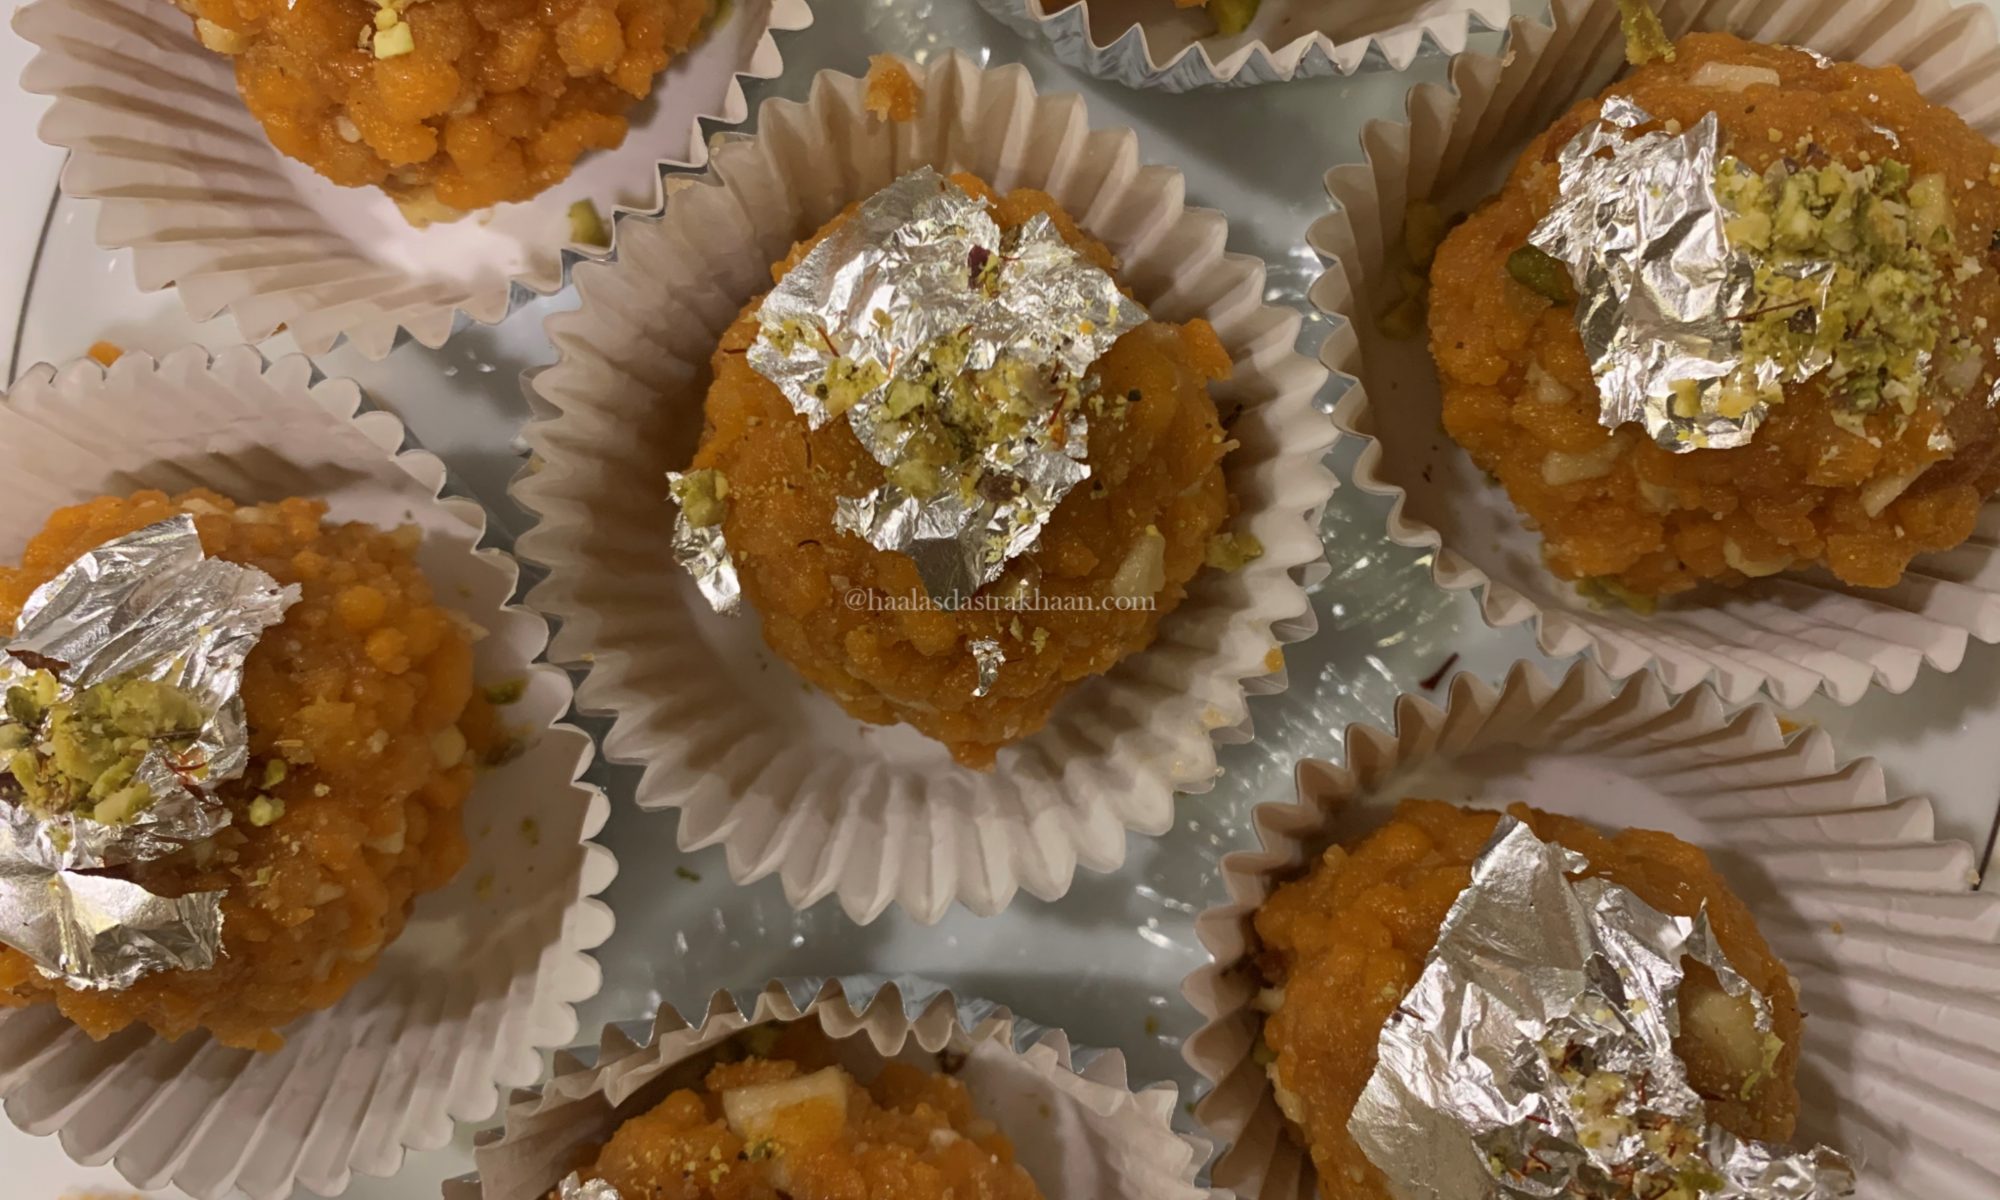
Boondi ke Laddu

Boondi Laddu is an Indian sweet. Pretty commonly made and easily available in all sweet stores, well almost. They are different from Motichoor Laddu since the boondi isn’t tiny. Motichoor Laddu has a different preparation method as well. Getting back to Boondi ke Laddu. I have a special connection with them, which I feel every kid brought up in India has. Every Independence Day and Republic day, schools in India have it mandatory for children to come to school and attend the flag hoisting ceremony along with programs that teach us the importance of freedom and also pass the information of how our freedom fighters worked together and fought to gift us a free country.

Boondi ke Laddu was a staple sweet distributed to all the kids at the end of the ceremony. Not just that, every Ramadan when the 27th Shab-e-qadar was celebrated and around that time the reading of the Quran in the local mosque, Boondi ke Laddu were distributed by my father. There were so many occasions and this sweet seemed to be the perfect thing for distribution and I have never met anyone who didn’t like them.

I never saw anyone ever make them at home but since we are all now in the USA and the Indian sweet stores here do not make these Laddus, so I had to get down and make them at home. I searched a few blogs and also some food websites, but the pictures they had and the explanation they had were more of Motichoor Laddu. See the fact is that at times you don’t want anything fancy but you just want to relive your childhood or you want to just get a taste of your country.

I tried making the Boondi Laddu a long time ago but the boondis came out long and they could not be bonded. Then during one of my visits to India, my Rakhi brother took me to a store that makes specialized ladles used for making boondis. I then tried making the Laddus again after coming to USA. Though I don’t think anything you make here can ever bring back the same happiness as being in your motherland and enjoying it since you would still miss the people you would enjoy those foods with. But as they say, you cannot fight your destiny, but you can always enjoy things that are around you and do everything that’s under your control.

These Laddus will definitely remind you of your childhood days. Though they require a little extra effort and it gets a little messy too, but it’s all worth the effort.

Kolkata Chicken Roll

We love Chicken rolls. Those of you who read my blog and follow my recipes would know that I love different styles of Chicken wraps, be it a Chicken Roll or Burrito or Tacos. I think the love for Chicken rolls came from my Mom. During one of her trips to Mumbai, she had tried some Mutton Tikka boti rolls at a Parsi eatery and tried reinventing them at home which is actually loved by the whole family.

So, when I came across a wonderful pictures of Kolkata Chicken Roll, I had to give it a try. The flavor of Kolkata roll is not just different, it actually bombards your taste buds with a joy ride of different things. From what I have read, its pretty renowned and a popular street food in Kolkata. Though I have never been to Kolkata, there is something about the food and culture that connects me to it and I find it amazingly attractive. Recipes like this are so easy and fuss free that while it connects you to your roots, which is just so important for people like me who live so far off from their home country, but also makes it easy for your kids to eat. Its healthy, nutritious and perfect for on the go too.

I grew up eating and loving my mother Tikka Boti Roll, which she initially only made with meat but then also started making with Chicken and I loved both. I have always been a fan of being able to make something that was good for road trips. See, some trips allow you to stop by at hotels on the way, but not all and for those trips or those after game hunger pangs while you might be stuck in heavy traffic, these are the recipes that just don’t come handy but also are flavorfully satisfying.

I marinated the Boneless Chicken with Salt, Ginger garlic paste, Lemon Juice and Yogurt. Spices I used were Fenugreek leaves, Tandoori powder, Red chili powder, cumin powder and fennel powder. Chicken can be marinated and left in the refrigerator overnight but if you are short on time, it can also be marinated for 30-45 minutes.

This recipe might not be exactly same as what you might have experienced in Kolkata, if you have been lucky enough to try the street food there, but after the numerous trials and efforts made by me and going through uncountable recipes of different kinds, I managed to stick to this one for the Kolkata Chicken rolls. I am not too sure how the Chicken rolls are different from the Kolkata egg rolls, but my mom would always spread some egg was on the Roti and fry it for the Tikka Boti so I did the same thing for my recipe and I feel the taste is deliciously enhanced. This recipe is inspired by numerous flavors that I have tried all my life and I feel with the numerous trials that I have made, I am able to give this dish a flavor different from my regular Chicken rolls. Hope you try it, like it and enjoy it as much as my family and I do.  

Pyaaz Ke Samose

I am from Rajasthan and I grew up eating Samosa. I always loved the potato samosa or Aaloo ke samose. Different samosa shops had completely different flavors, loved some, hated some but the outer crust was always enjoyed. In fact, for a very long time I only enjoyed the outer crust of the samosas and only loved the Kheema samosas made by my mom. I just never enjoyed any samosa filling when the filling did not have much spice or if it tasted bland. Later while trying different Samosas, I realized that the spicy ones were always what I loved.

After I got married, during one Ramadan in Bangalore, we tried the Ramadan special Onion Samosa or Pyaaz ke Samose and just loved them. The funny thing is that people feel that Ramadan for Muslims is only about Non vegetarian food which isn’t true. We have a mix of vegetarian and Non vegetarian foods during Ramadan and we enjoy it all. These samosas are only made during Ramadan, thought there are a few Muslim shops who make them besides Ramadan too, but trust me the flavor that the month of Ramadan has in special foods is not something we get during other times.

Now since we don’t get these samosas here, I decided to make them at home and a few trials and errors and they came out just the way we like them. If you like onions samosa and like to make them at home, Please do try these out. Hope you enjoy them just like we do.

Badusha

Some sweets are connected to beautiful festivals. They always remind us of occasions and celebrations. I always connect Badusha or Balushahi with Diwali. I had friends who would serve homemade and sometimes store bought Badushas and they would be loved by everyone. I know this post should have actually been a Diwali special but sweets don’t need an occasion, they just need a sweet craving and zest and time to make a sweet dish.

Diwali is over but still posting this delicious balushahi recipe as I can’t resist my cravings and eternal love for Indian desserts or mithai. Since we don’t get Badusha in USA as it ain’t that popular here, mainly I feel its because the people have not tried it. So, I decided on making my own, multiple unsuccessful trials but I just had to make it perfect and I am glad I did. The temptation was too strong to let it go.

My mom is a big fan of this sweet dish. In fact I have heard stories that this was one of the sweet dishes made on my parent’s wedding. There is an old sweet market in my home city Jodhpur called “Pongal pada” and the street has variety of Badushas in different colors and textures and are called Maakhan Bada [meaning sweets made using butter]. Though Badusha is soaked in sugar syrup, the Maakhan Bada is covered with thick coated sugar, something close to fondant but slightly hard.

Once I cracked the recipe of the Badusha, there was no looking back. Its easy, flaky and your desire to eat just one, Did I say eat just? No one eats just one Badusha. Never!!! Its Balushahi in North India and called Badusha in South India. So, no matter what you call it, do try the recipe and make your own. These come out awesome, flaky and light. Once you try them, you will never bother getting them from the market sweet store anymore. Hope you like and enjoy them as much as I did.

Mutton Ghee Roast

With the wide variety of Kebabs that we make, we love kebabs made from meat the most. I love the way meat Kebabs are always so juicy and tender and absorb all the flavors so naturally. The texture of meat and the spices blend in so well together. I am sure if you look into details of cooking that when it comes to Kebabs, meat Kebabs definitely make to the top of the list. I have heard a lot of people liking Beef too, but since I have never cooked or consumed beef, I don’t really have an idea. But I do think that since Beef has a lot of fat, cooking with its own fat must be adding more flavor to it.

Coming back to Ghee Roast. I came across some cuisine where they mentioned the dish and showed how the meat is boiled till it’s cooked. after roasting the whole masalas, they are ground to a powder, and then the meat is cooked in ghee with spice powder, onions, curry leaves, and green chilies. This dish is pretty easy to make and makes it to my top ten list of easy and flavorful kebabs.

The best thing about these kebabs is that they can be partly premade a few days in advance as well. You can boil the mutton a few days in advance and refrigerate or freeze it, depending on how many days you want to use it. Similarly, you can always dry roast the whole masala and grind them and store them in a dry and airtight container. These kebabs are juicy, moist, flavorful, and go really well as a side dish or by itself. If you are a fan of meat kebabs, you will love the scrumptious chunks of flavorful meat. Enjoy!!!

French Baguette

My boys love eating bread. Specially if the bread is served straight out of the oven. Baguette, the long delicious French Bread seems to be a family favorite. Every restaurant that served a good bread had us visiting them more often. Every time we bought French Baguette from our favorite baker, I would reheat it in the oven to make it taste fresh, which was great but not the same. And, that’s when I thought I should try making my own baguette at home. Honestly, looking at so many different recipes, I felt that Baguette wasn’t all that fancily difficult and I decided it was time I just make it.

Now, when I think of France, I think of high end fashionable people, Eifel Tower and also a girl riding a bicycle with a basket full of long loaves of French bagutte Those long loaves are called “baguettes.” (The term comes from the Latin word for “stick.”) They are iconic, and France’s reputation for incredibly crusty and delicious baguettes is known far and wide.

They say that nothing can come close the bread you can get in France. I’ve never been, so I can’t say for sure, but I think you’d stand the best possible chance if you make it yourself. I mean, how could anything be better than a freshly baked loaf of bread? That crackly crust, the tender, airy crumb inside, steamy and yeasty and just begging to be torn into.

This recipe has just 5 ingredients: water, Oil yeast, flour, and salt. But the results are magical. And it’s all because of the technique. Start by dissolving the yeast in warm water. While that is doing its magic, combine the flour and salt. Create a little well in the center, and add in the yeast. Stir it around, taking flour from the outside edge and bringing it into the well, a little at a time. Keep stirring, and adding Oil followed by water as needed, until a shaggy dough forms. You can also use a stand mixer. Now just cover it loosely, and let it rest. For this type of bread, there’s not a lot of kneading involved. It only needs a few quick folds, to become smooth. Place the dough into a greased bowl and cover it tightly. Allow it to proof (or rise) in a warm place until doubled in bulk.

Divide the dough into 4 equal portions, and shape into long logs (about 15 inches long) with pointed ends. Cover with oiled plastic wrap, and allow to rise a second time. While the baguettes are rising, fill a baking pan with water and place it in the bottom of your oven. Preheat the oven and allow it to fill with steam from the water. This is the key to a crusty baguette. Once the loaves have finished their second rise, remove the plastic wrap and sprinkle them with a little flour. Then quickly slash them with a sharp knife. This is not just decorative, but it also allows the crust to crack and the bread to expand in a more controlled way.

Place them in the oven and let them bake until deeply golden brown. They should feel light and dry on the outside, and when you tap them they should give a hollow sound.

Slice it into 1/2-inch rounds and it’s perfect as a base for bruschetta or crostini. Or it can be used as a dipper for your favorite party dip. And we love it toasted with garlic butter, for garlic bread. So good with a pasta dinner!

Or just tear into it and eat it with a hot bowl of soup. So satisfying!

Goat Paaya

Goat Paaya or Goat Trotters is a widely loved dish in the Muslim community. It’s made in several different ways around the world, but no matter how its made, I have always seen people enjoying it with every bite. Mostly served for breakfast, Paaya is usually served with Bheja and Naan/ Roomali Roti. Paaya will be in the favorite list in any hardcore non vegetarian.

It is a dish that can be made any time of the year but during festival of Eid ul Adha, It is a must for Breakfast on the second day. It takes pretty long to cook, so in times of today when everything is made in a rush, use of pressure cooker is a must. Long before the pressure cooker, Paaya was a dish made with slow cooking and was made over coal fire and usually took around 12-15 hours to cook. A lot of people like my Late Father used to love consuming it as soup. It makes a pretty healthy and flavorful Shorba / curry.

I believe the fashion of cooking Goat Trotters must be from the Muslim rulers who travelled from other countries. A lot of dishes from the Middle east have resemblance to dishes cooked in India/Pakistan/Bangladesh. Not just Non vegetarian but even sweet dishes like Jalebi and Gulab Jamun or for any sweet dish that uses Orange blossom/ Kewra water/ Rose water are also a gift from the Middle east to us, along with Biryani. The fact is that they always traveled with a huge army and therefore made sure that every part of the animal slaughtered should be used. Goat trotters are pretty high in Cholesterol, so they aren’t a great breakfast choice for anyone in today’s date and time since our lifestyle is very sedentary, but back in days for people who did so much of physical labor and most distance were traveled on foot, this dish was not just delicious, but also nutritious and filling.

Like I always say, every dish has a story, so let me share my memories with “Paaya”. As a kid I always saw my Mom make Paaya for breakfast and the whole family, except me relish it. For some reason I am not a big fan of liking the flavor of Bone Marrow in my food. Nevertheless, to make my father happy I would slide a few bites down my throat, until one day he realized that it was tough for me and he let me slide. Paaya is specially cooked for breakfast at all Muslim restaurants that are popular for authentic Muslim food. Most of these restaurants are located in highly populated Muslim areas, like Jama Masjid in Delhi, Frazer town in Bengaluru and Mohammed Ali Road in Mumbai. I am sure there are these areas in almost all cities, I am mentioning these because these are places I have been to and relished all the awesome delicacies. My breakfast has always been bheja fry and Nahari though the family had their love for Paaya. My faher would always order what we liked and those times were a lot of fun. After marriage, I learnt that Mr. Parveez likes Paaya too and since we do not have similar arrangements of eating and enjoying authentic Muslim breakfast therefore, I started making it at home.

Paaya isn’t a difficult dish to make. It’s a heavy stew created from trotters/ feet of goat or lamb. The bones of the Goat leg are rich in gelatin marrow and are barely covered with meat once cleaned, they are just rich in bone marrow which secretes once cooked. Most people/families have their own variation of cooking Paaya, and knowing that India is so culturally varied, every other place has their own cooking style and recipes based on the local ingredients and flavors they are used to. In North India, paaya is served as a breakfast with Tandoori Roti / Roomali Roti. Is believed to be nourishing and is served to patients when sick and is kind of mandatory for new mothers, specially during the early days when her body is going through the recovery process. I usually use a pressure cooker to cook them, but you are more than welcome to cook it in a traditional way. Though time consuming, but its extremely flavorful. I do try the slow cooking method as well when I have more time in hand. Either way, its delicious, so don’t think that you are missing out on flavors if using the pressure cooker.

If you are thinking of making an authentic Muslim breakfast or cooking a non vegetarian breakfast that’s a little different, Paaya is what you need. Serve it with brain fry/ Bheja Fry and people will be praising your breakfast spread for years and looking forward to more. The recipe is in complete detail and if you follow the steps correctly, you will make a perfect dish. Again, spices make a dish flavorful, but cooking with love is what makes it delicious. Enjoy!!!

Hyderbadi Lukhmi Dough

Hyderabad is also popular for its Biryani and Khubani ka Meetha. Along with that, there are loads of other popular Muslim dishes that are very popular in Hyderabad but probably not that popular outside Hyderabad. One of those dishes is Lukhmi. It is a typical rectangle/square samosa kind, which has a filling of mince meat or Chicken. Its regarded as savory or starter of the cuisine of Hyderabad. It is a local variation of samosa. Though have never visited Hyderabad, but I do want to visit it one day. 2 simple reason to it, one of course is Hyderabadi cuisine and second is the Falaknuma Palace that simply became more popular after my favorite Bollywood actor’s sister got married there…LOLzzz. I know sounds crazy, but speaking my heart out is what I do on my blog and it is what it is. So, going through popular Hyderabadi cuisine is when I came across Lukhmi and that’s when I decided to make it. My boys who are big fans of Samosas, I was kind of unsure if they’d enjoy Lukhmi. Honestly, since none of us had ever tried it before, I wasn’t even sure how it will turn out to be. But, to my amazement, not only did they love it, they went a step further by asking me to make this more than samosas, which honestly is a shock to me because my kids can kill for my chicken samosas…Okay!! May be not kill, but definitely injure someone enough if anyone dares to even look at their samosa, forget eating…LOLzzz.

 Hyderabadi cuisine has a variety of scrumptious snacks, and Lukhmi, the flaky savory stuffed with spicy minced meat/chicken is definitely one of them. A popular starter at Hyderabadi marriages, this dish also works well for a quick pair for teatime with family or friends. The name lukhmi originates from the word luqma, which means a small bite in Urdu. Unlike the samosa, lukhmi is usually a flat square/Rectangle shaped flour parcel with a flaky and crisp upper crust and stuffed with beef, chicken or mutton-based filling. You have the snack in other shapes like triangles in some cafes and a vegetarian version mostly  with potato filling is also available.

It is usually served with chopped onions and green chilies or chutney. To prepare lukhmi, all purpose flour/ Maida is kneaded with milk, butter and a little water. The mince or vegetarian filling is cooked separately, with turmeric, onions, ginger, garlic and spices. After resting, the dough is rolled out into a huge rectangular roti. More butter is added in between rolling the Roti and refrigerating it for 20 minutes or a little more. This process is repeated 3-4 times in order to create more flakes or layers to the Lukhmi. After the final process, the Roti is cut to multiple squares. Finally, these multiple small squares each housing a filling pocket forming a Lukhmi.

The edges are closed by pressing them often with a fork, and the stuffed parcel is deep fried in oil. As the color of the patty changes to golden while frying, the lukhmi is ready for consumption. The snack had lost some of its popularity over several decades, as many places in the old city stopped serving it. However, it has made a comeback of sorts in the last few years with an increased interest in lost Hyderabadi recipes.

I really enjoyed making these beautiful and scrumptious pockets of goodness and these are now a family favorite for me. I hope you like them too. If you need help with variations, please feel free to ask. Enjoy!!!

Aate ka Halwa

This sweet dish takes me back to my childhood days. Though this sweet dish is the most easiest and simple sweet dish you could ever make, but you know how somethings are simple yet delicious.

A delicious 4 ingredients Indian Dessert, Aate Ka Halwa is very easy to make and is quite scrumptious. Loaded with ghee and dry fruits, Atta Halwa or Wheat Halwa is definitely indulgent. This is easy to make at home with some simple tricks. It is usually served for breakfast or before bedtime to keep the body warm. You can also serve it as dessert after meals.

Although you can use any whole wheat flour available to make this halwa, making it using coarsely ground flour will give you the best result. If you have access to freshly milled flour, then the results will be best. This halwa should be made in ghee or clarified butter for the best result. If ghee is not available, then you can use unsalted butter, but not oil. If you are conscious and prefer your halwas in Oil, then I would say that you are depriving yourself with real taste of Halwa. Secondly, I see a lot of people use White sugar and Brown sugar, but the actual Aate ka halwa is made with Gudd/Jaggery.

My mother has often made this Halwa during weekends, specially in winters for breakfast. I loved the fact that it would be ready on demand and everyone at home enjoyed and loved it. Its always made our weekend more special and sweet. As much as I did try, I do not think I can make it as delicious as how my mother made it, but its still pretty close.

You can easily store the halwa in an airtight container in the refrigerator for 3-4 days. When you want to consume, just take it out and heat for a few minutes before serving. You can also freeze it in freezer-safe container for up to 3 months. My steps are simple and I keep it as basic as I can so it’s easy to follow and the taste connect us to the authentic flavor too. Enjoy!!!

Bengali Fish Curry

I do not have an idea about what connects me to Bengal, but I am one big fan of their cuisine. It all started from the Kolkata Chicken Roll, went on to Biryanis, from their to their mind blowing Bengali sweets and now to the awesome fish curries that they make.

Honestly, I am a no fish curry person. I have no idea why, but I could just never bring myself down to liking fish curries. God bless my Late Father, he was a big fan and always looked forward to the fish curries my mom made. Jodhpur, the city I belong to does not get fresh fishes very often. The chicken market also sold fish when the season would be on and my father happened to be one of their regular customers. My father would always get enough to be made into curry and to be fried as well. I would never try the fish curry and would love the fried fish and that’s how it continued.

When I got married, Mr. Parveez loved the fish fried on the side with Daal-Chawal, but he also loves his Fish curry, so he would make his favorite fish curry just few times a year. I tried my level best to like it but its just something that puts me off. Then, one fine day comes in the phase of me finding my new love in Bengali cuisine and you know how Bengali food and fish go hand in hand. So, I came across this wonderful recipe of Bengali fish curry. now, honestly my search was for an authentic “Machhar Jhol” recipe and my search is still on. But this fish curry is the closest I could get to an authentic Machhar jhol.

This fish curry is also made in Bengali style and the taste is amazingly delicious. The flavor is mild and different from the regular fish curries. The recipe is pretty simple and easy to make, and the the recipe does not require any fancy ingredients either. I made this curry using Tilapia fillet, but you can use Halibut, Sea Bass or any other fish of your choice. The fish should be slightly mild for this recipe, so whichever fish you pick, it should not be extremely fishy in taste. Enjoy!!!