Lucknowi Mutton Korma

Lucknowi Mutton Korma: A Dish That Feels Like Royalty

There’s something about Lucknowi food that feels like poetry—graceful, layered, and deeply comforting. The first time I made Lucknowi Mutton Korma, I wasn’t just cooking a dish—I was stepping into a legacy. A legacy of Nawabi kitchens, slow-cooked flavors, and the kind of elegance that doesn’t shout, but lingers.

This korma isn’t fiery or bold—it’s gentle, aromatic, and rich in a way that feels regal. The mutton is simmered until tender, wrapped in a velvety gravy made from browned onions, yogurt, and a delicate blend of spices. I add a touch of cashew-almond paste for depth, and finish it with saffron and kewra water—because some dishes deserve that final flourish.

What I love most is how this dish invites patience. It asks you to slow down, to let the flavors build quietly. And when you finally lift the lid, the aroma alone tells you it was worth the wait.

In our home, this isn’t just a recipe—it’s a celebration. Of heritage, of craft, and of the joy that comes from cooking with intention.

The Royal Flavors of Lucknow

Lucknow is renowned for its delicious and lip-smacking food. The biryanis and curries perfected in the kitchens of the Nawabs are what elevate India’s non-vegetarian cuisine to something truly regal. These dishes aren’t just meals—they’re legacies, passed down through generations of khansamas (royal chefs) who mastered the art of slow cooking, delicate spicing, and luxurious presentation.

While the Nizams of Hyderabad and the Mughals of Delhi also left behind rich culinary traditions, Lucknow’s Awadhi cuisine stands apart for its subtlety and refinement. The Nawabs of Awadh developed a style that was less fiery than Mughlai food, yet deeply aromatic and layered. Think of melt-in-the-mouth Galouti Kebabs, saffron-laced Lucknowi Biryani, and creamy Mutton Korma—each dish a testament to patience, precision, and poetry on a plate.

The influence of Persian techniques, Mughal grandeur, and local ingenuity combined to create a cuisine that’s both opulent and soulful. From the use of kewra water and rose essence to the slow dum cooking method, every detail was crafted to please not just the palate, but the senses.

Lucknowi Mutton Korma: A Royal Affair

  • Origin: Rooted in the kitchens of Awadh, this korma was traditionally served during royal feasts and special occasions. It’s known for its subtle spice profile and luxurious texture.
  • Key Ingredients:
    • Mutton (bone-in)
    • Yogurt for the velvety base
    • Browned onions for depth
    • Cashew-milk powder-almond paste for richness
    • Fragrant spices: cardamom, cloves, cinnamon, mace
    • Kewra water and saffron for that signature aroma
  • Flavor Profile: Mild yet complex, with a gentle heat from Kashmiri red chilies and a nutty, creamy undertone. The spices are aromatic, not overpowering, allowing the mutton to shine.

Mutton Kofta Curry

A Dish My Father Loved

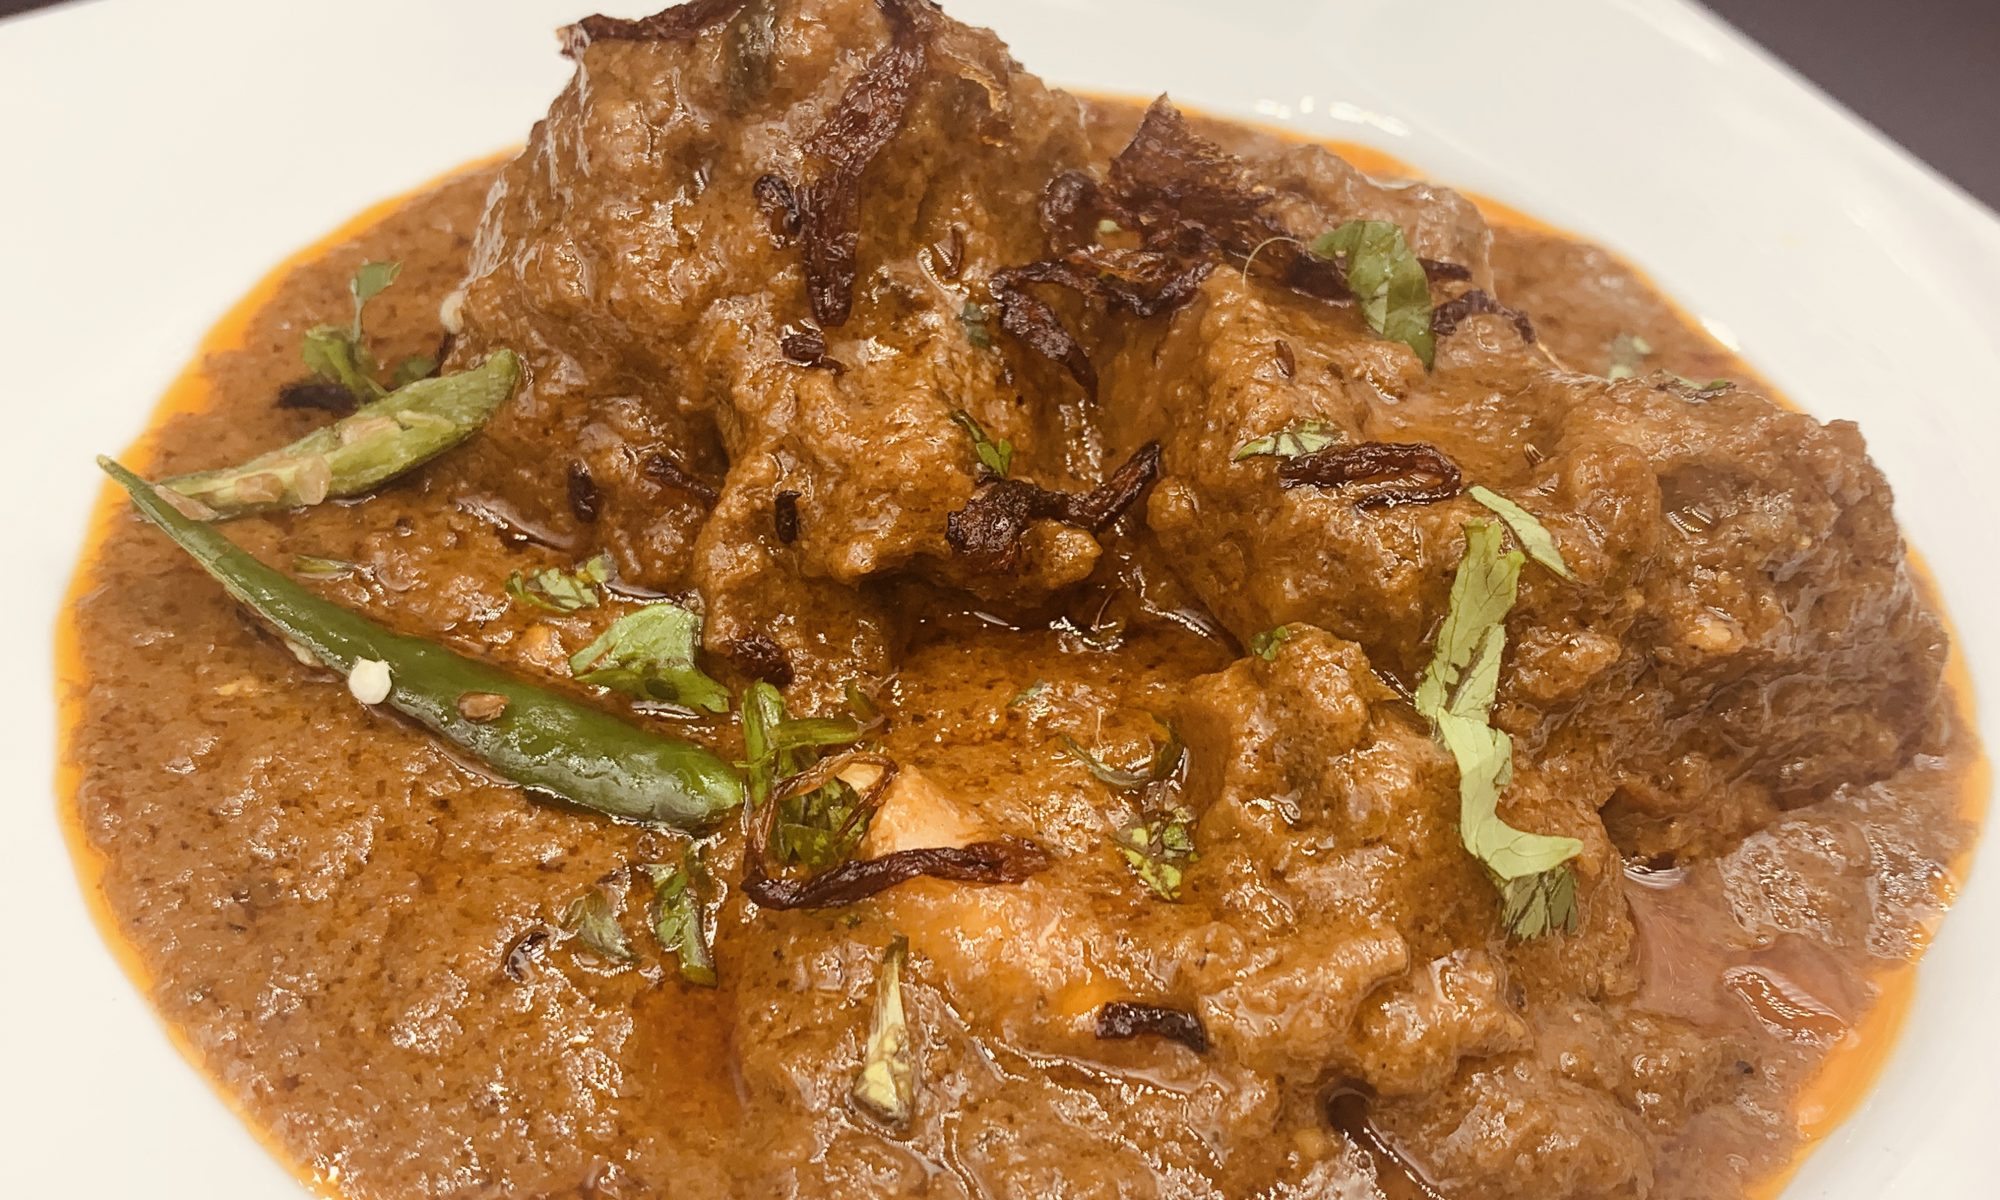
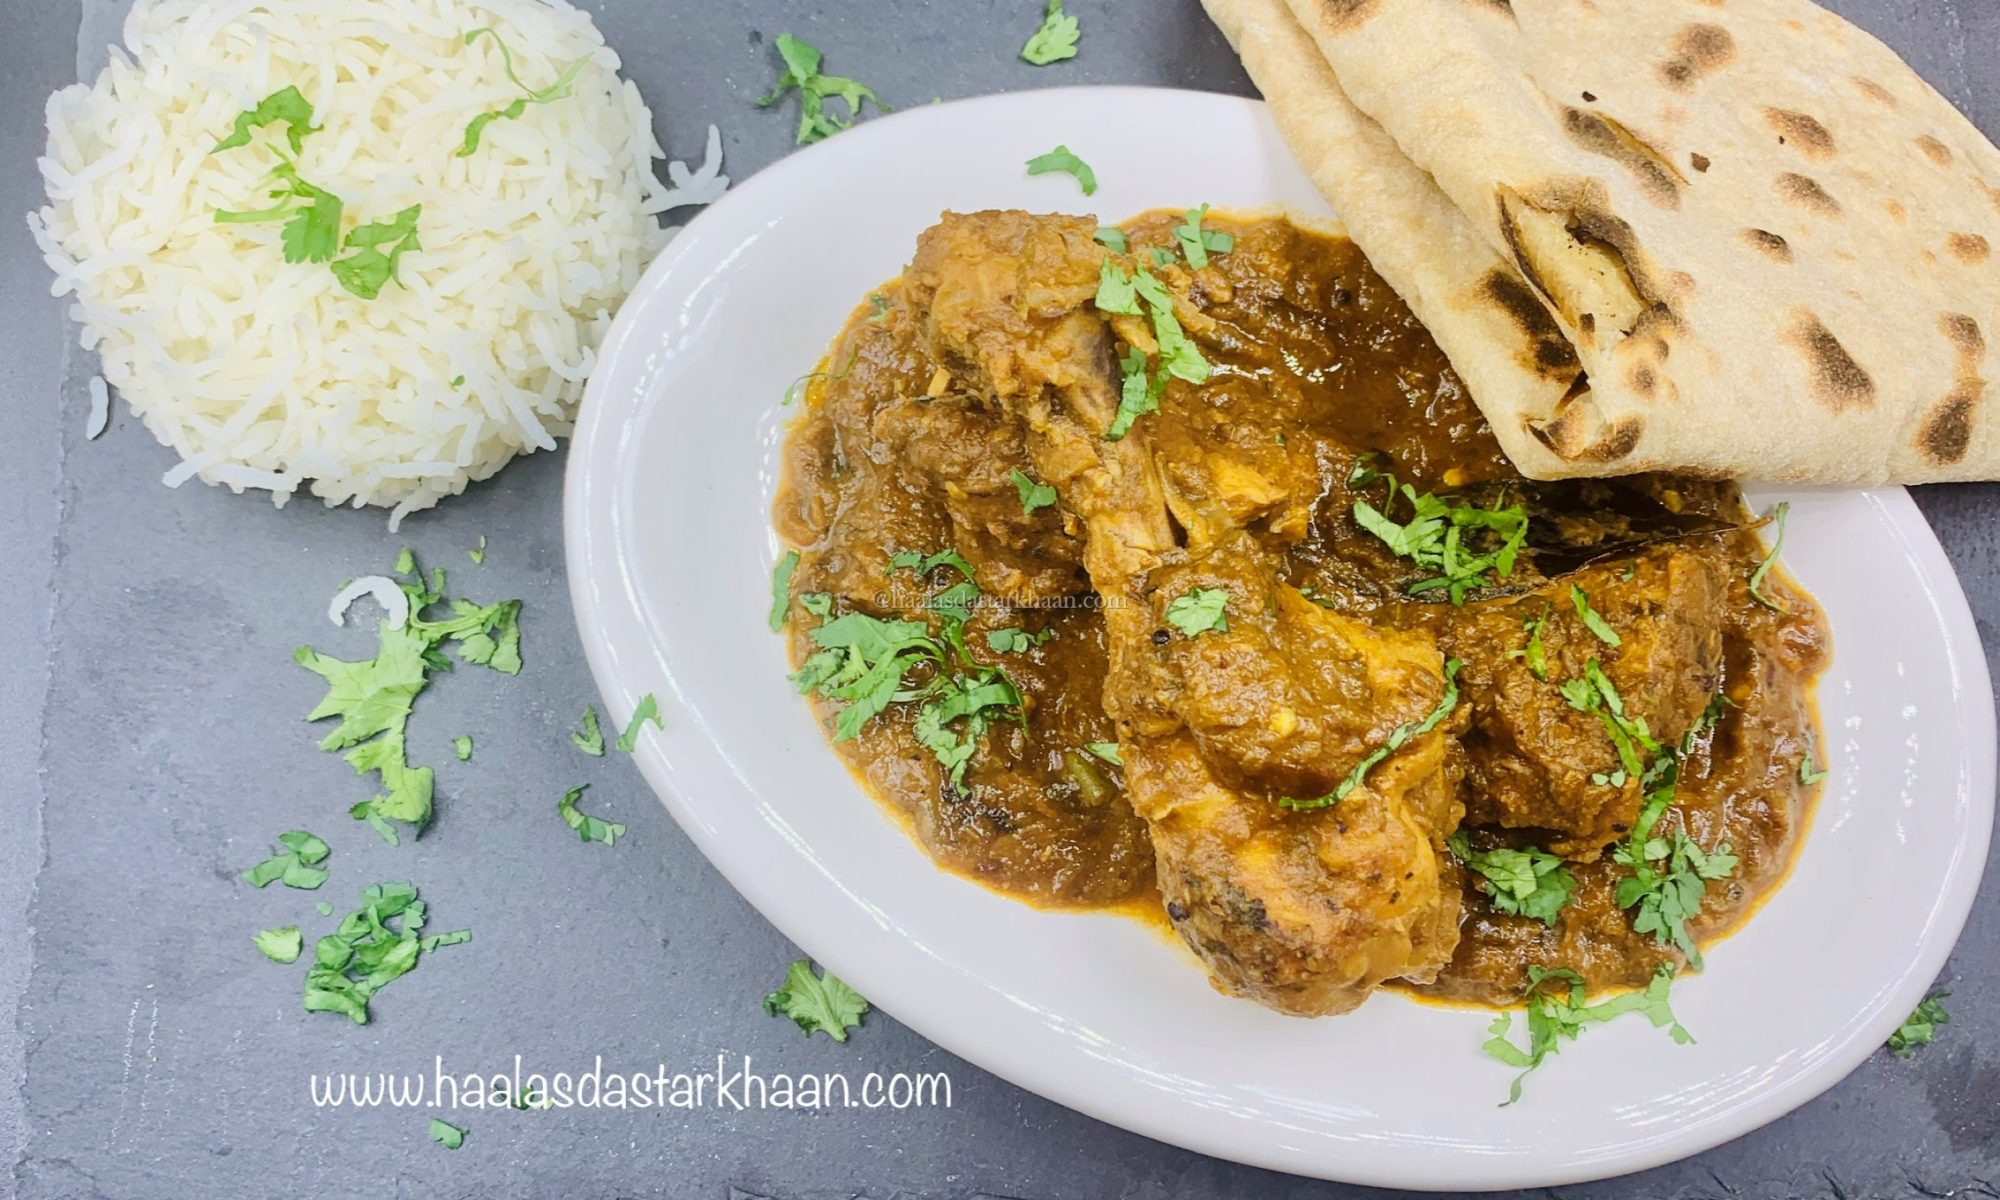
Mutton Koftas—minced meatballs simmered in a rich, spicy gravy—were one of the special dishes my mother made when I was growing up. I remember the aroma filling our home, the warmth of the kitchen, and my father savoring every bite with quiet joy.

For me, it was a dish I liked, but never craved. It wasn’t something I’d ask for on my birthday or during celebrations. But for my father, it was comfort food. If you asked him to name a favorite, I’m certain Kofta Curry would be near the top of his list.

Even though it wasn’t my personal favorite, it became special because of him. It’s funny how food does that—how a recipe becomes a memory, a connection, a tribute.

Koftas: A Journey Through Empires and Kitchens

Koftas—minced meatballs seasoned with spices—have traveled far and wide, leaving their mark on countless cuisines. Though their exact origin is hard to pin down, the word kofta comes from the Persian kufta, meaning “to pound” or “to grind”—a nod to the preparation of the meat2.

While early Arab cookbooks featured lamb koftas glazed with saffron and egg yolk, it was the Mughal Empire that brought this dish to the Indian subcontinent, transforming it into a rich, spiced curry. In India and Pakistan, koftas evolved into a variety of gravies—bland, spicy, creamy—each tailored to regional tastes and ingredients.

Today, koftas are beloved across the Middle East, Balkans, Central Asia, and North Africa. From Turkish köfte to Greek keftedes, Moroccan lamb koftas to Indian nargisi kofta, each version tells a story of cultural exchange and culinary creativity.

Whether grilled, baked, or simmered in gravy, koftas remain a dish of comfort and celebration. And in your kitchen, Haala, they carry the added weight of memory—your father’s joy, your mother’s touch, and your own evolving relationship with the dish.

🍖 Bangalore Kofte: A Recipe Rooted in Love and Reinvention

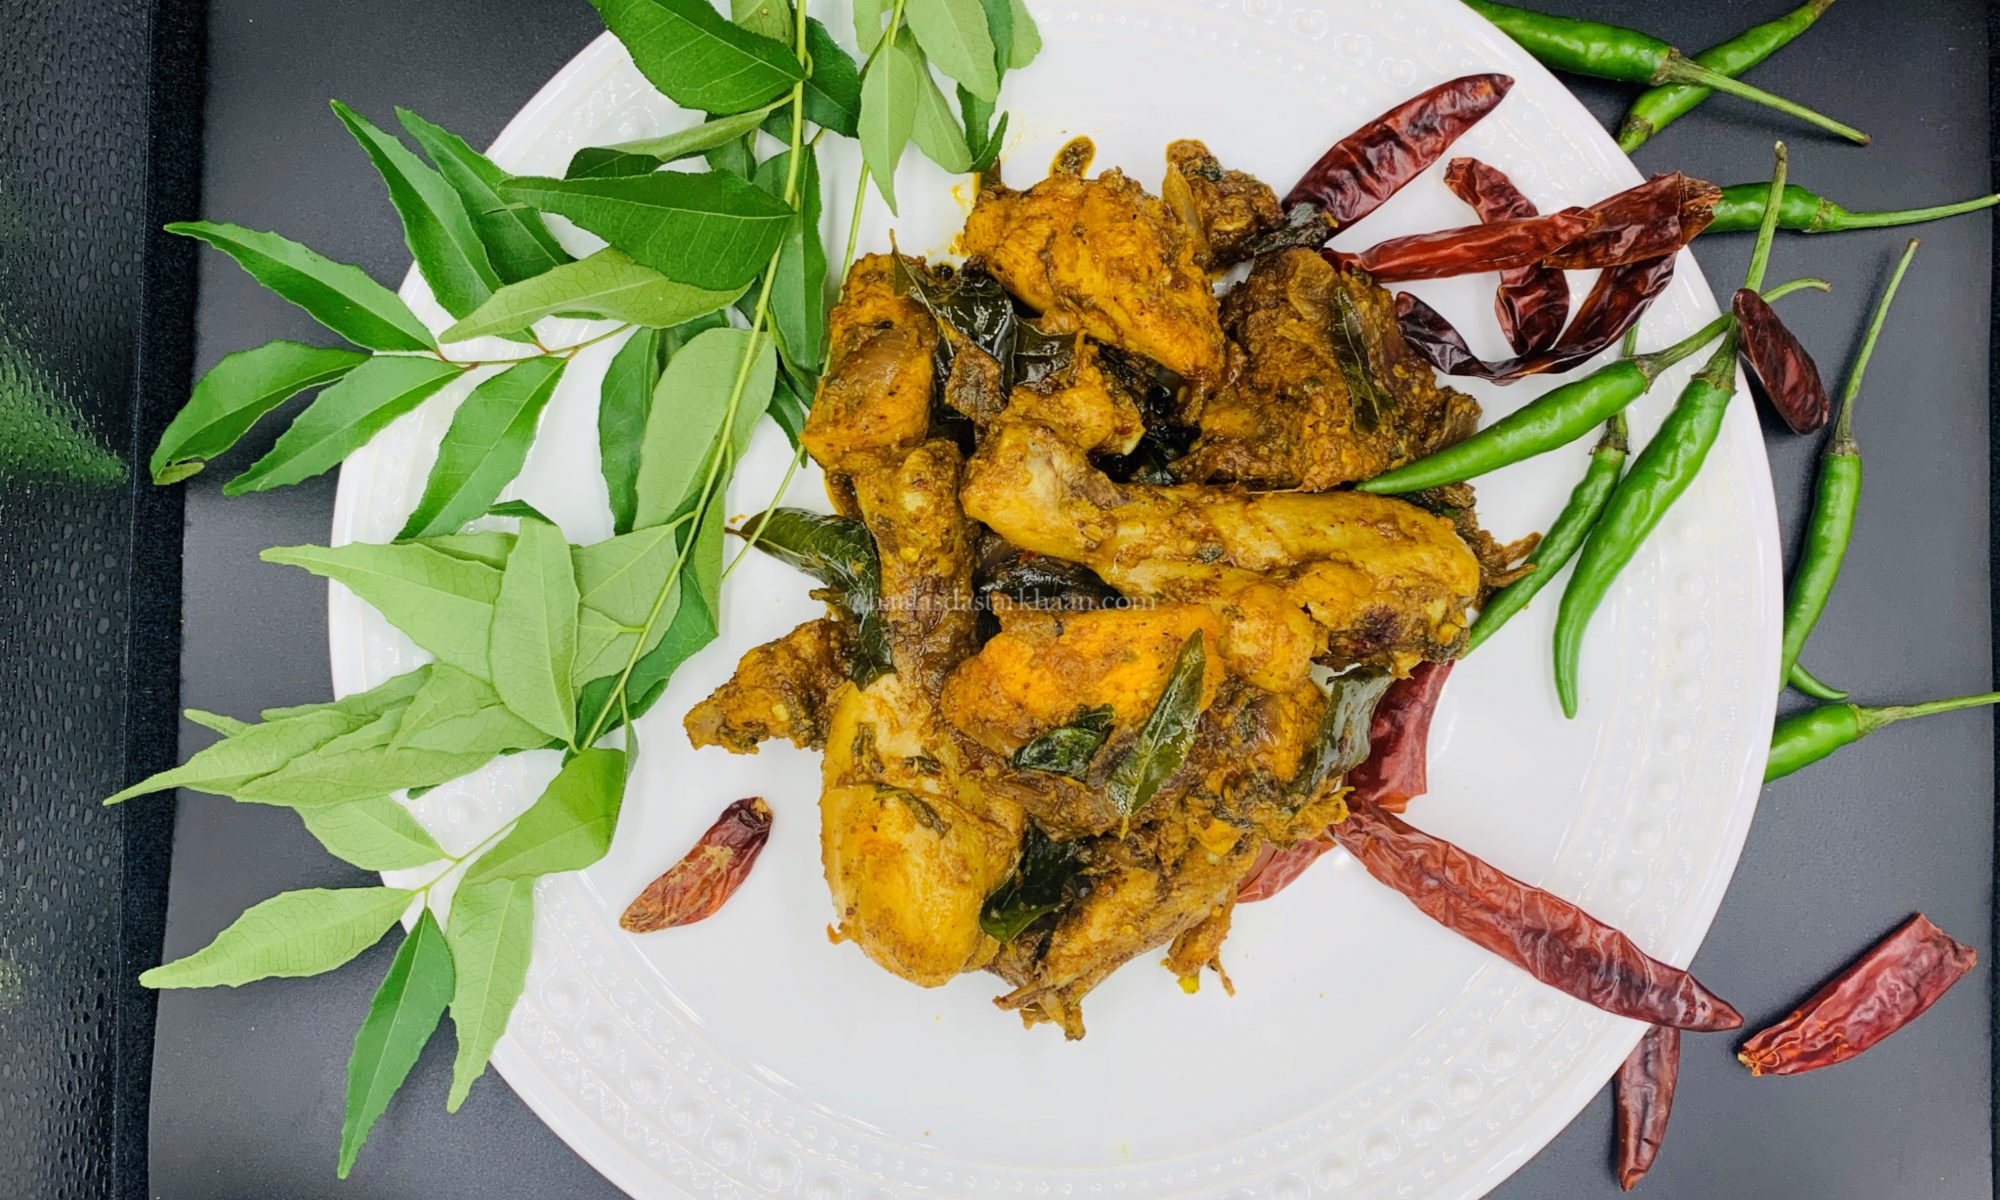
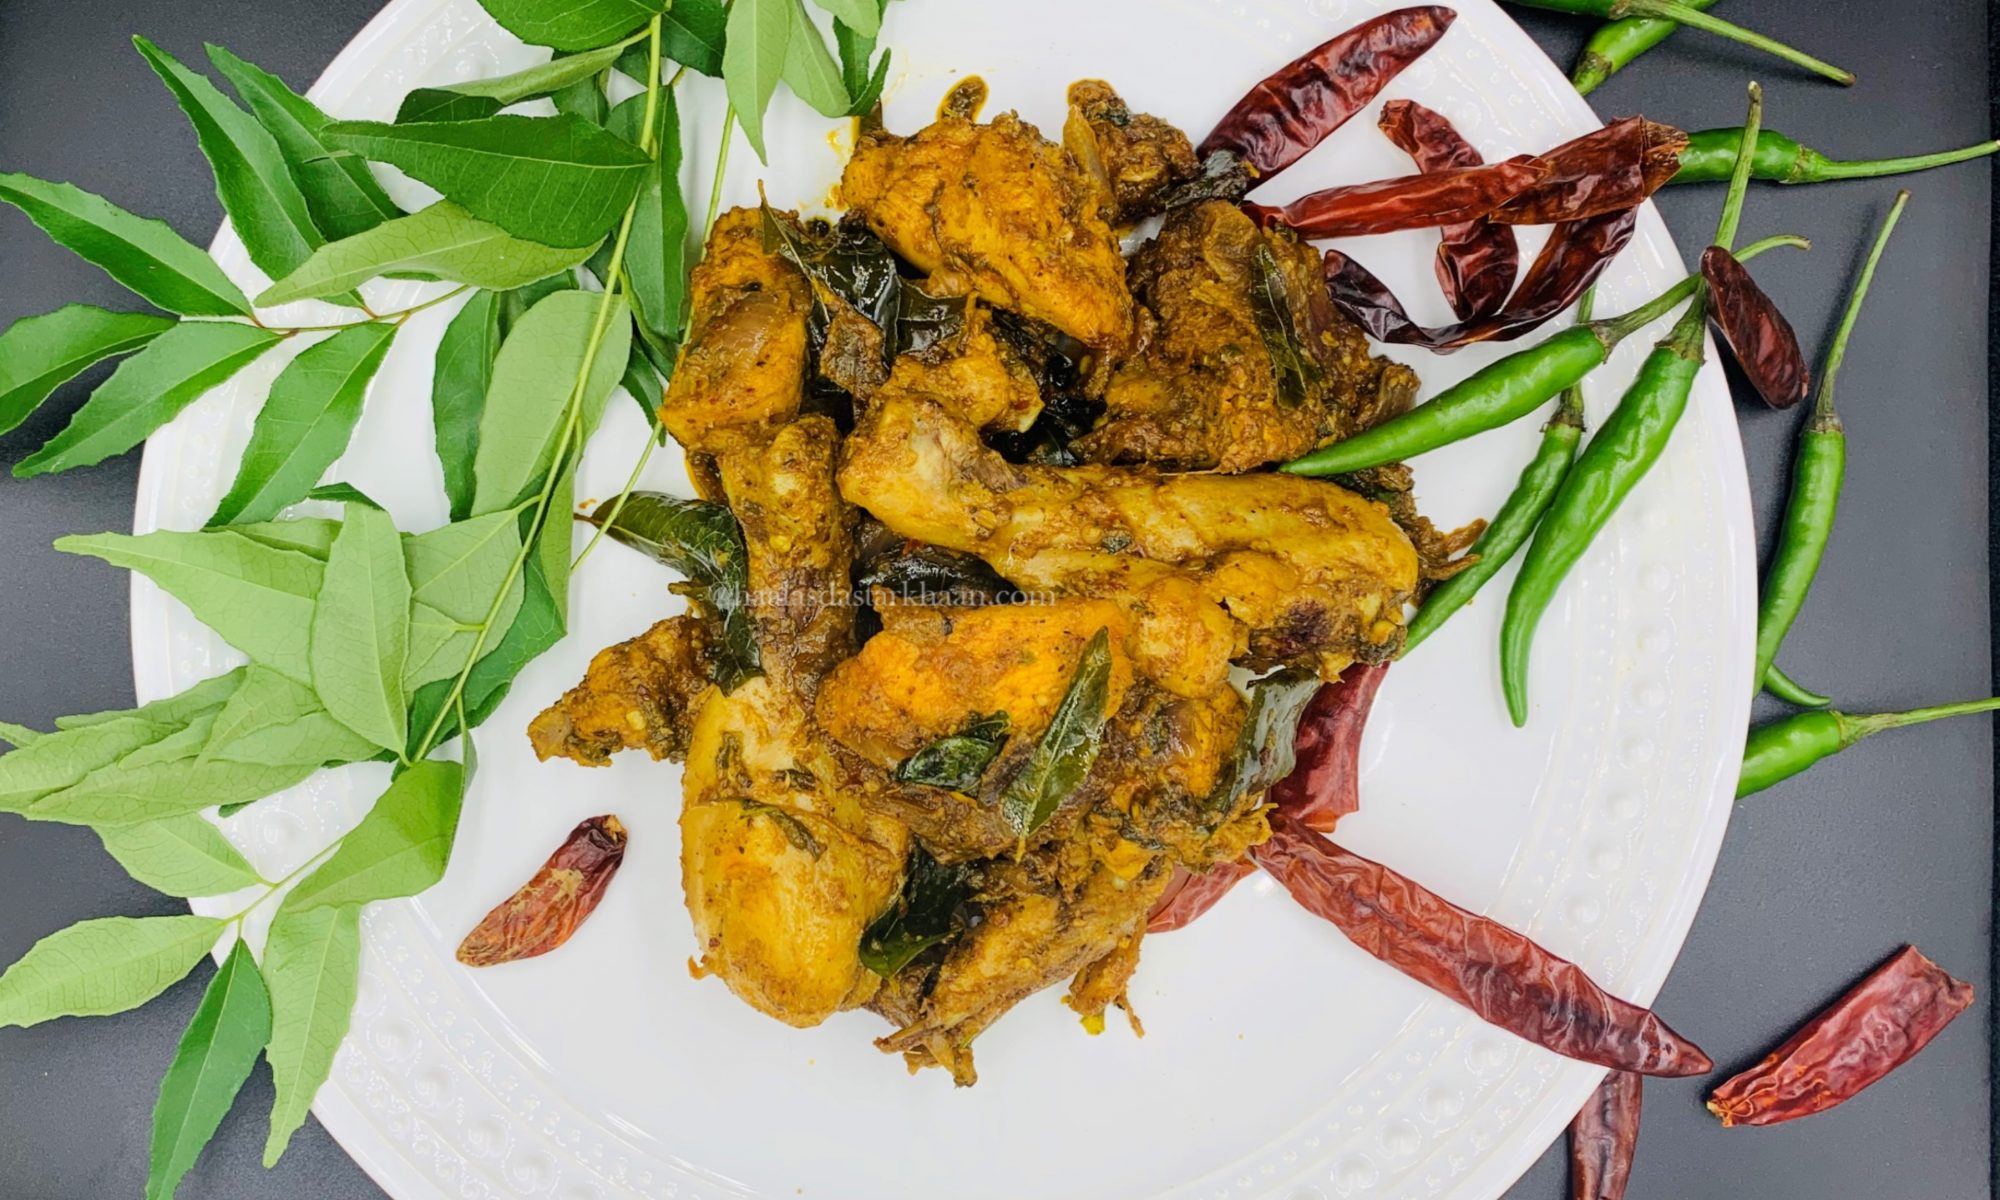
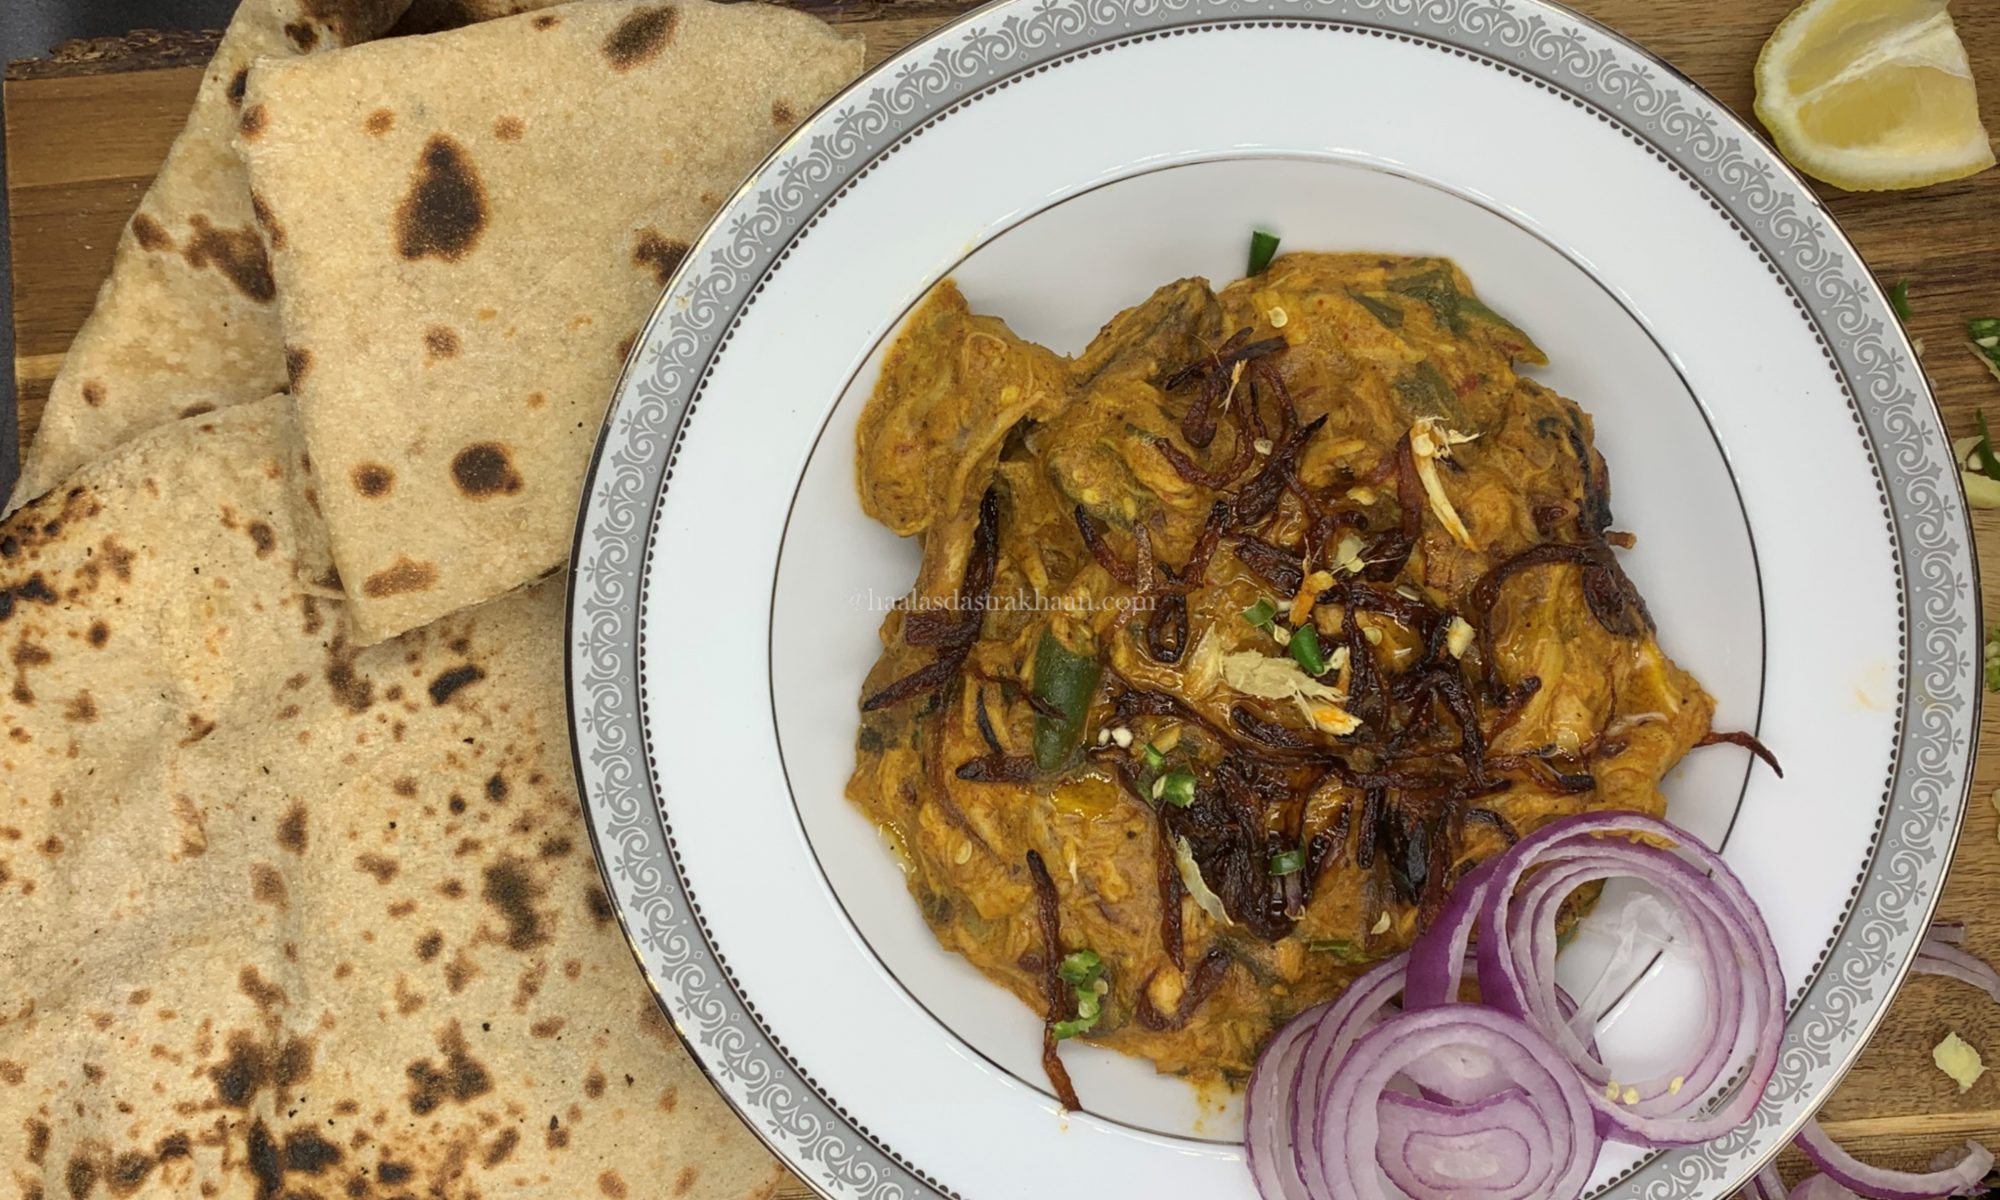
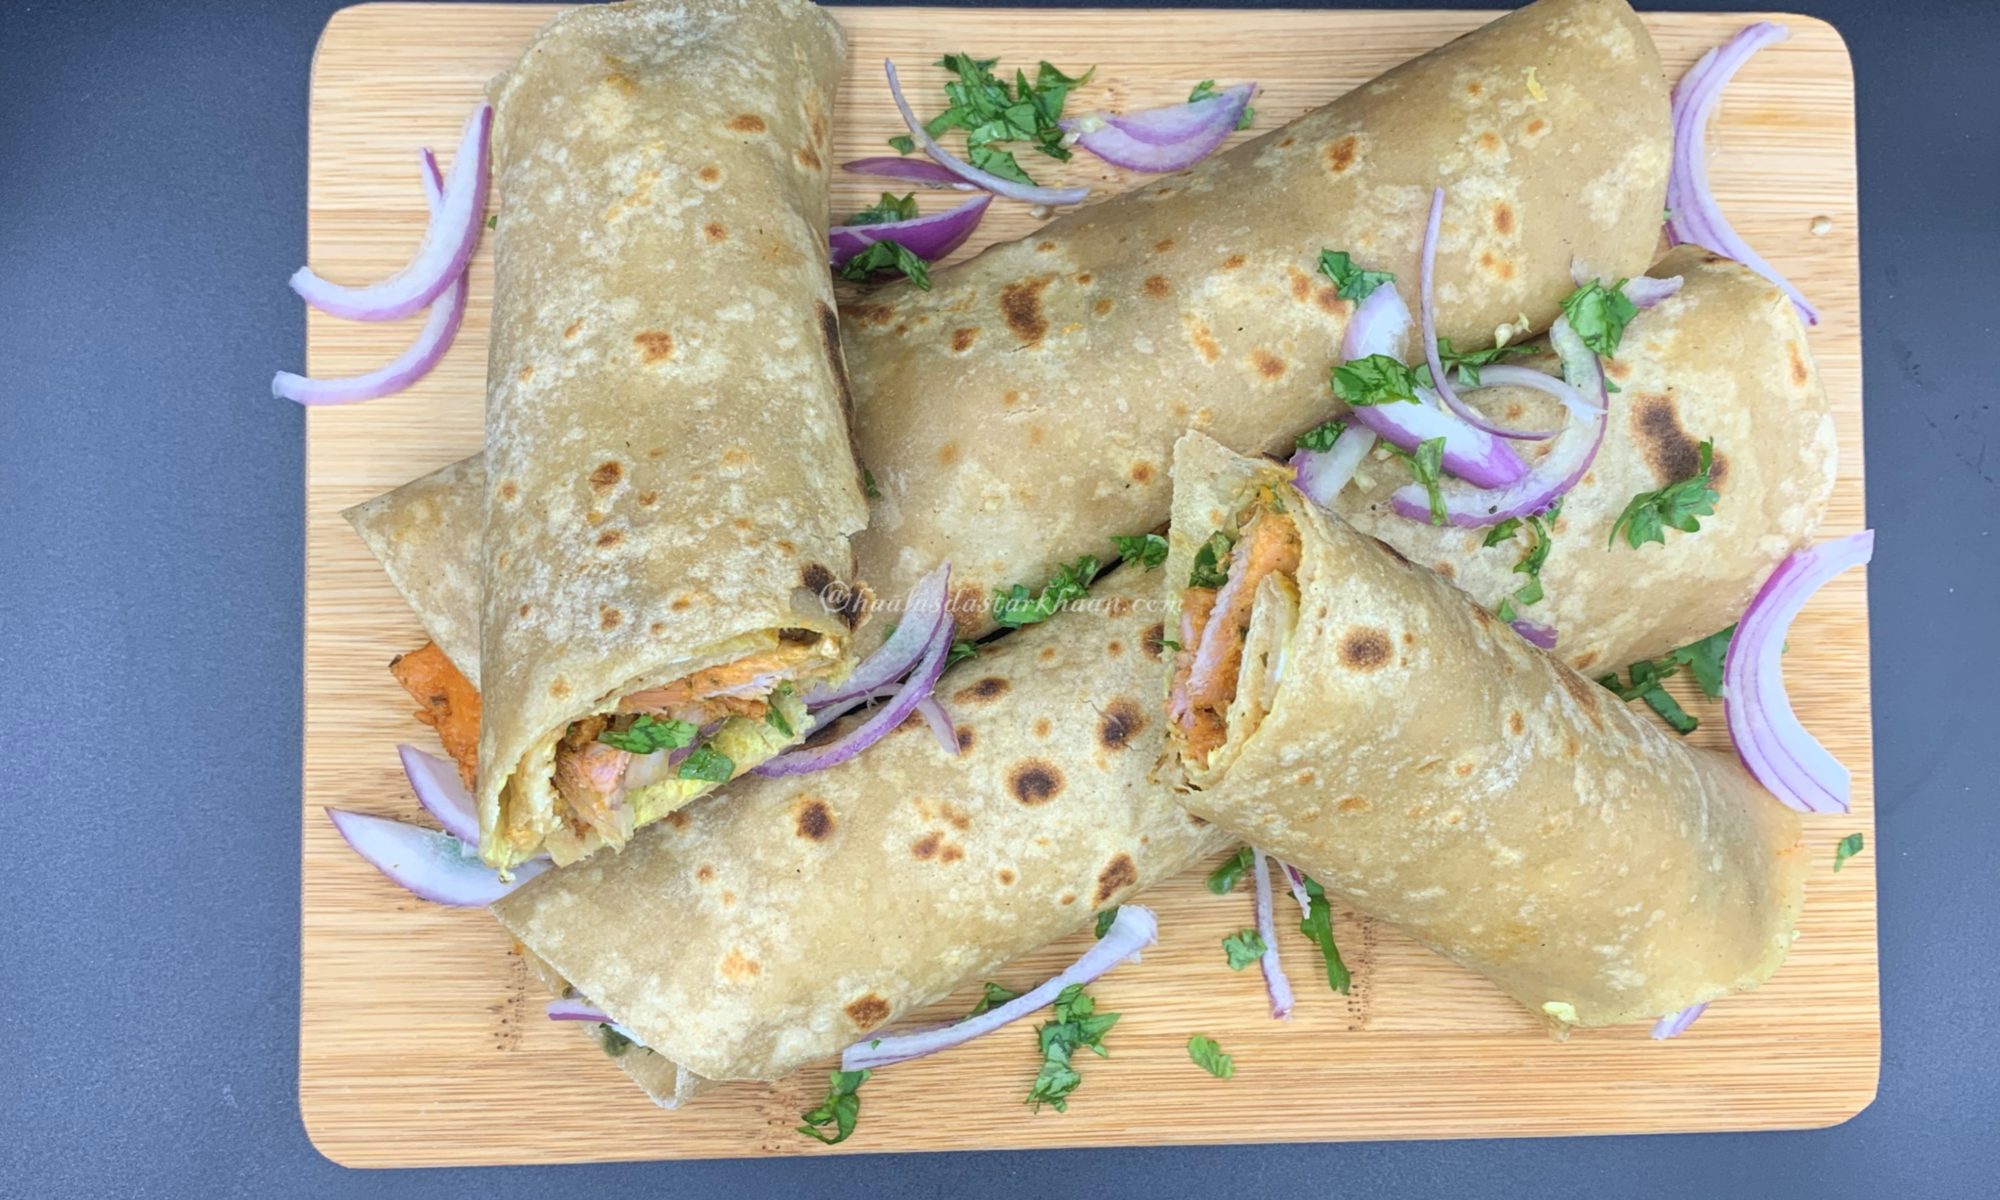
After we got married, Mr. Parveez introduced me to Bangalore Kofte—a dish made with minced mutton, seasoned with spices, gently steamed, and then fried to perfection. These koftas are often served on their own, or paired with a warm parantha or roti. In our family, they’re a cherished part of Eid-ul-Adha celebrations, loved by everyone at the table.

Learning to make them was more than just mastering a recipe—it was a moment of connection, a passing down of flavor and tradition. But as my culinary journey unfolded, and I began exploring new dishes and revisiting familiar ones, I found myself drawn to reinterpret the flavors I grew up with.

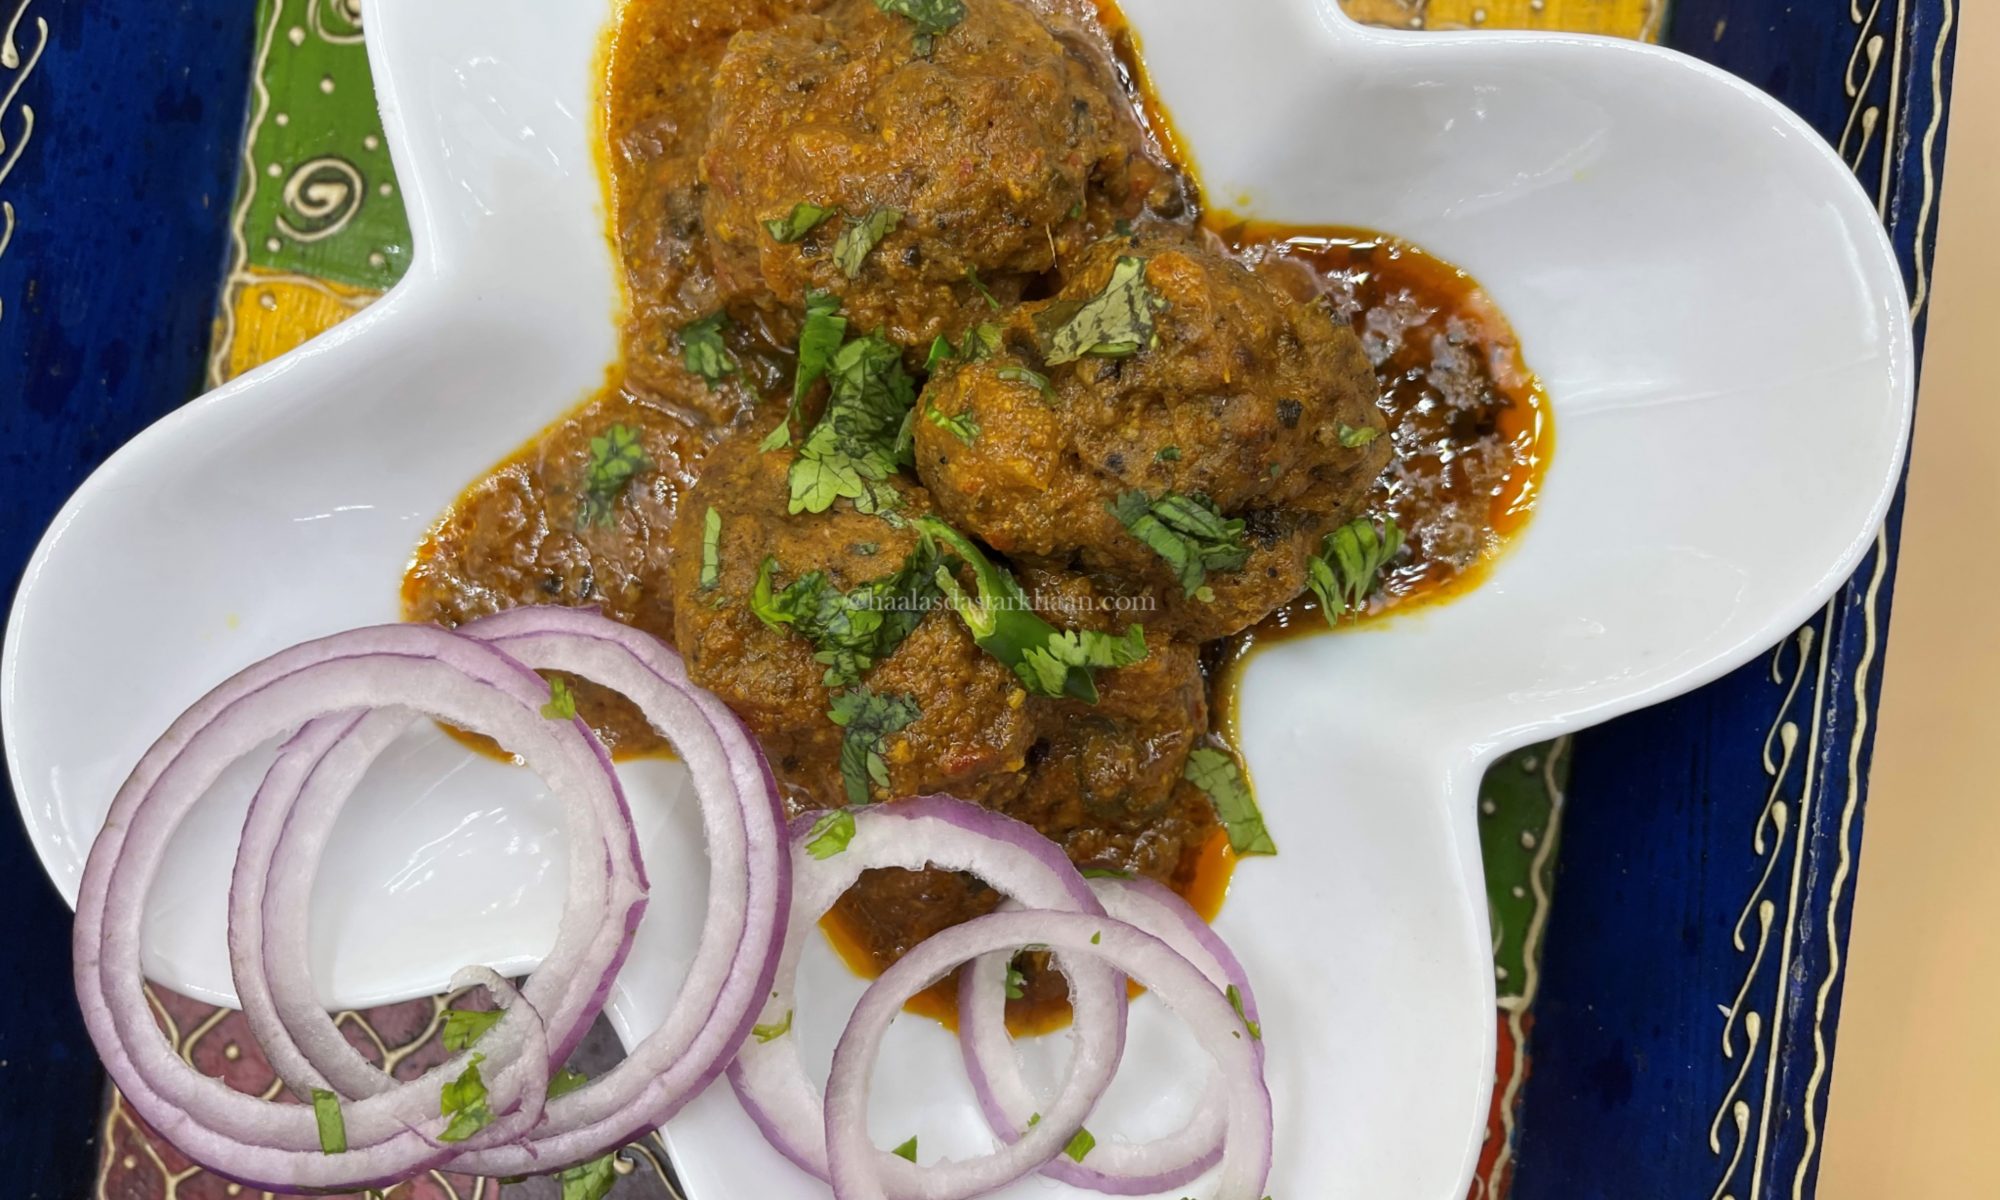
So I returned to the kofta, this time through the lens of Kofta Curry—infusing it with the spices, textures, and stories I’ve gathered along the way. It’s a dish that reflects not just where I come from, but how far I’ve come.

And now, I’m sharing it with you. Because every recipe carries a memory, and every bite is a step in the journey.

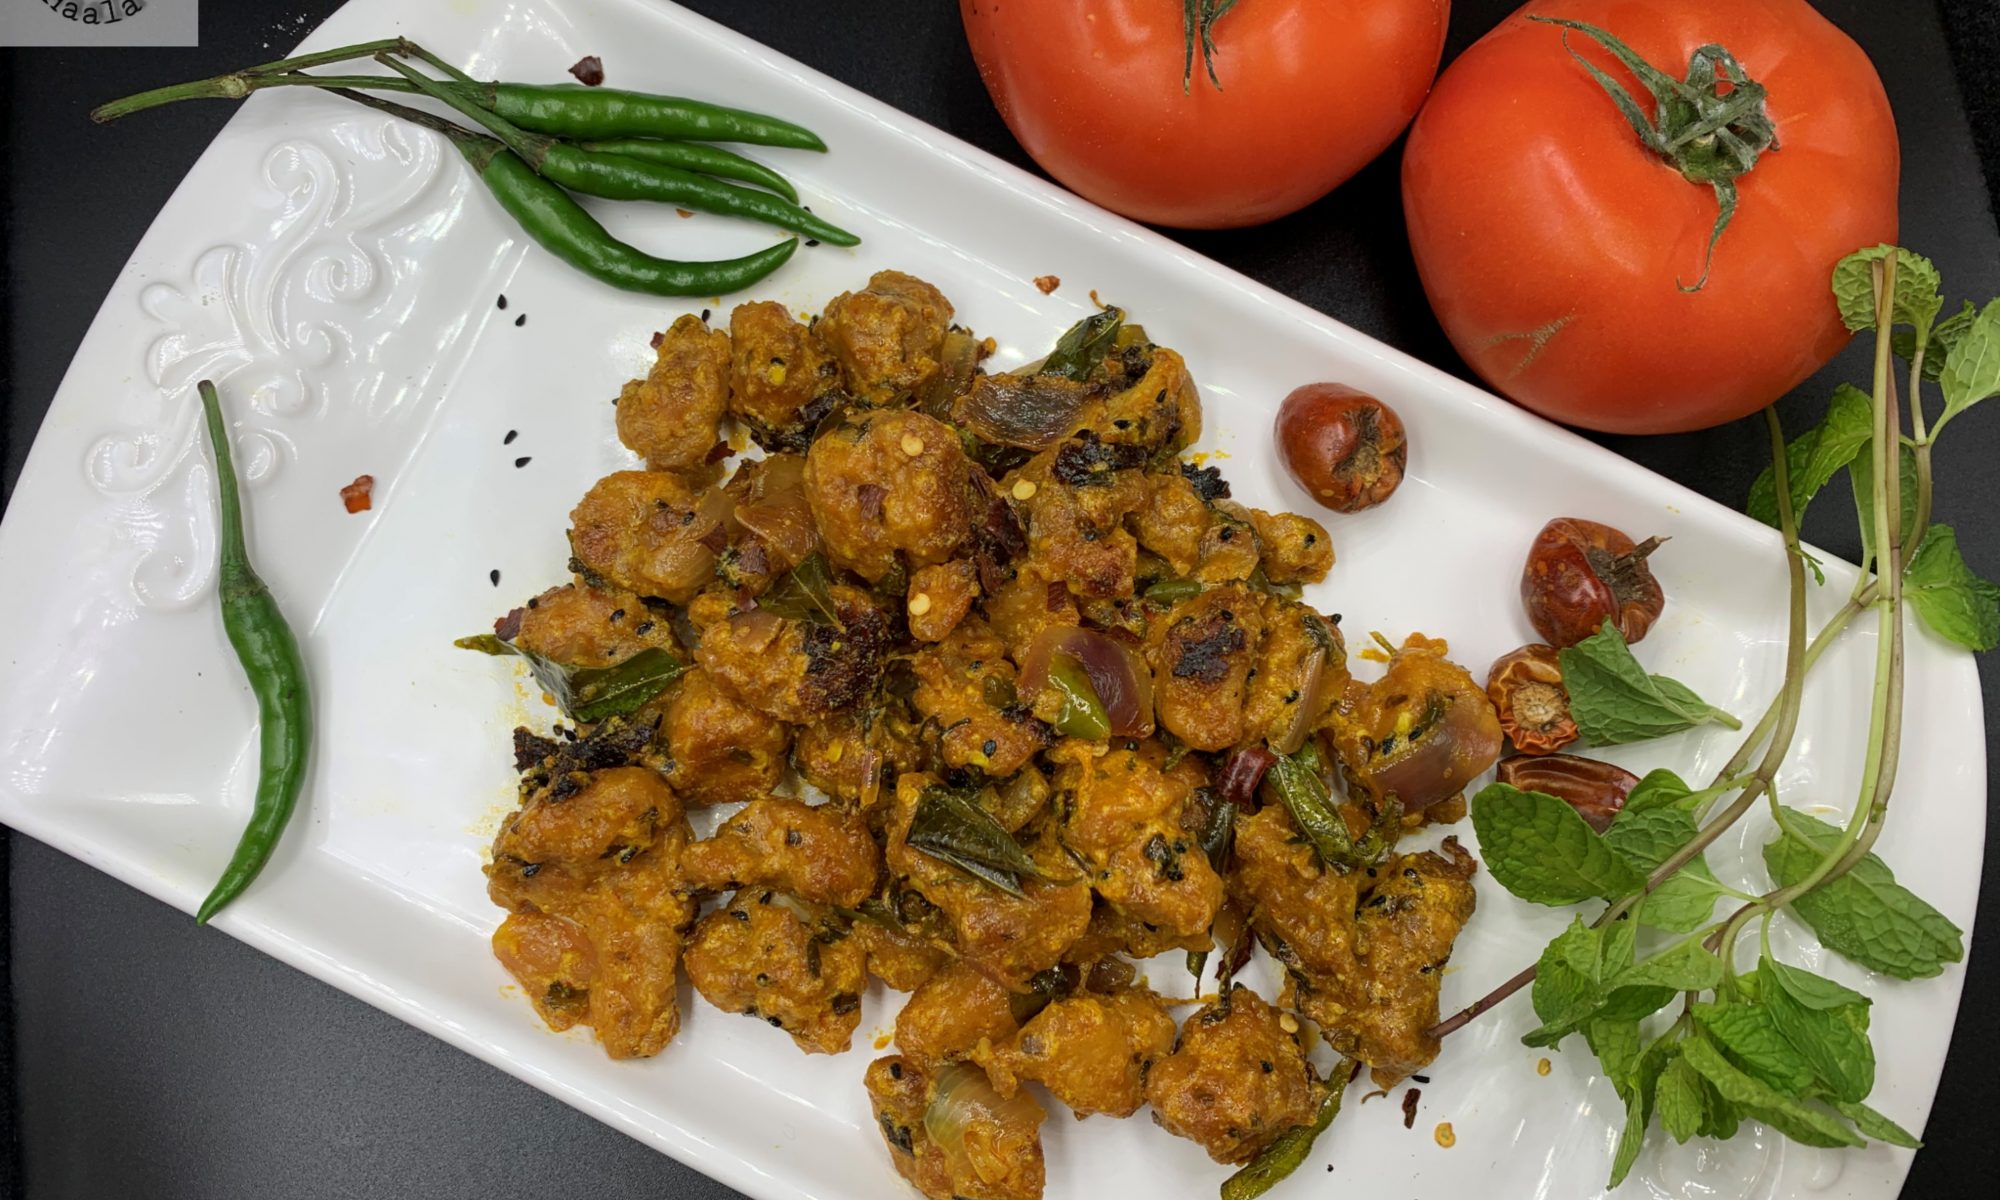
Preparing the Mutton Koftas

Start with minced mutton and grind it further to achieve a finer texture. This helps the meatballs hold together better and gives them a smoother finish.

To this, add a flavorful paste made by blending fried onions, ginger-garlic, fresh coriander leaves, and a slice of bread. A spoonful of roasted chickpea flour goes in as well—both the bread and the flour help absorb excess moisture, making the mixture easier to shape.

Mix in your spices and ensure everything is well combined. Cover the mixture and refrigerate for about 20 minutes. This resting time allows the flavors to meld and makes shaping the koftas much easier.

The koftas shouldn’t be too spicy, or else the spicy koftas served with the spicy gravy become hard to handle. This dish might look difficult, and you might find the steps a little tedious to follow if you are a beginner, but if you follow the steps correctly, you can make this dish easily.

Cook’s Note

When preparing koftas, balance is key. If the meatballs are too spicy and the gravy is equally bold, the dish can become overwhelming. A gentle hand with the spices allows the flavors to complement each other rather than compete.

This recipe may look a bit intricate at first glance, especially if you’re new to cooking. The steps might seem tedious—but trust the process. If you follow each stage with care, you’ll find that it’s absolutely achievable. The result is a dish that’s rich, comforting, and deeply satisfying.

Good food isn’t about shortcuts—it’s about patience, intention, and love. And this dish is worth every bit of it.

Kolhapuri Chicken Dry

🔥 Spice with Grace: Tips for a Balanced Kolhapuri Dish

  • Use Byadgi chilies: They bring vibrant color and mild heat—perfect for layering flavor without overwhelming.
  • Toast your spices: Dry roasting coriander, cumin, and fennel seeds before grinding enhances aroma and complexity.
  • Incorporate coconut: Grated or desiccated coconut adds body and mellows the spice, especially in gravies.
  • Ginger-garlic paste: A must for depth—sauté it well to avoid rawness.
  • Finish with fresh coriander and a squeeze of lime: It brightens the dish and balances the richness.

🌶️ The Heart of Heat: Crafting Kolhapuri Chicken

Kolhapuri cuisine doesn’t whisper—it roars. And this chicken dish is no exception. With the crimson hue of Byadagi chilies and the fiery punch of Lavangi mirchi, it’s a celebration of bold flavors and vibrant color. But the magic lies in the masala—freshly roasted, ground, and layered with care.

Pro Tip: Dry roasting your spices isn’t just a step—it’s a ritual. The moment they hit the pan, your kitchen transforms. That smoky, nutty aroma? It’s the soul of Kolhapur calling.

Masala Prep Essentials:

  • Coriander seeds
  • Cumin seeds
  • Fennel seeds
  • Black peppercorns
  • Cloves, cinnamon, cardamom
  • Byadagi & Lavangi chilies
  • Optional: poppy seeds, sesame seeds, star anise for added complexity

Grind them fresh, and you’ll never look back.

🛠️ Spice Prep Tip: Fresh vs. Fast

Freshly ground masala is the heartbeat of Kolhapuri chicken—but life doesn’t always allow for slow cooking rituals. If you’re short on time, make your spice blend ahead and store it in an airtight container. It’ll stay fragrant for up to 7 days.

Important: Skip the coconut powder during prep. Add it fresh when cooking to preserve flavor and prevent spoilage. It’s the final flourish that keeps your dish vibrant, aromatic, and safe to savor.

🍗 Kolhapuri Chicken: Where Depth Meets Fire

This isn’t just chicken—it’s a journey through spice. Marinated to the bone, then simmered with onions, chilies, curry leaves, and a freshly ground masala that sings of Kolhapur’s bold culinary heritage. Roasting the spices in olive oil lends a gentle touch, but finishing in ghee brings that unmistakable earthy richness.

Serving Suggestion: Pair it with classic Daal Chawal for a comforting meal that’s anything but ordinary. The creamy lentils mellow the heat, while the chicken adds a punch of flavor that lingers beautifully.

Chicken Kulthi Curry [Kutt ka Salan]

Chicken and Lentils: A Surprising Love Story

Some dishes sound absolutely strange at first—but then you taste them, and they completely win you over. This is one of those dishes.

When my husband, Mr. Parveez, first told me about a curry made with chicken and lentils, I was skeptical. I assumed it was one of those nostalgic favorites—something he loved simply because he grew up eating it. To me, the idea of cooking chicken with lentils felt like a waste of perfectly good chicken.

But curiosity (and love) got the better of me. I gave it a try.

And to my surprise, the flavors were beautifully balanced. The lentils added a gentle earthiness, the chicken brought richness, and together they created a dish that was hearty, comforting, and absolutely delicious.

Sometimes, the most unexpected combinations turn out to be the most memorable.

From Stable to Table: The Story Behind a Humble Chicken Curry

Let’s get to the root of this dish’s story.

The lentils used here are horse gram—a hardy, protein-rich legume known for its earthy flavor and nutritional value. I make everything from scratch, and trust me, it’s not difficult to do. But back home in Bangalore, the tradition is even more rustic.

Yes, you read that right: the horse gram is soaked and boiled at the stables. The lentils themselves are fed to the horses, while the nutrient-rich water—the liquid left behind after boiling—is brought home. That humble broth, often with a few lentils still floating in it, becomes the base for a chicken curry that’s surprisingly rich, flavorful, and deeply satisfying.

It’s a dish born from resourcefulness, shaped by tradition, and elevated by taste. And once you try it, you’ll understand why something that sounds so unusual can taste so extraordinary.

Horse Gram & Chicken: A Dish I Never Expected to Love

I had never tried this dish back in Bangalore—and to be honest, I never really looked forward to it either. It just didn’t sound tempting. Cooking chicken with lentils? It felt like a mismatch, a waste of good chicken.

But one fine day, while grocery shopping, we stumbled upon horse gram daal. Mr. Parveez lit up instantly—nostalgia in full bloom. That meant we’d be starting from scratch, with no idea how to get the daal to the right cooking stage.

Thankfully, one of my sister-in-laws came to the rescue. She suggested soaking the daal overnight and then boiling it with turmeric powder, cumin powder, salt, and red chili powder until soft. She advised using just the water with about 25% of the daal, discarding the rest.

But I couldn’t bring myself to throw away the lentils. So I kept them—and ground them into a paste.

That small decision changed everything. The paste added body, depth, and a beautiful earthiness to the curry. What started as a hesitant experiment turned into a dish I now cherish. It’s a reminder that sometimes, the best flavors come from trusting your instincts.

Chicken Nihari

Nihari is hot, spicy, and very earthy. usually made with Mutton and even Beef, but tastes equally amazing with Chicken too. Nihari is one amazing and luxury dish served for breakfast. I still remember traveling to Delhi since I was a kid and I would always look forward to having Nihari. My father always preferred Chicken Nihari since we don’t consume Beef, he found it hard to believe small restaurants selling Beef Nihari as Mutton Nihari. Back in those days, almost 25-30 years ago, it was hard since the restaurants in “Purani Dilli” or the “Jama Masjid” area, restaurants weren’t as hip as what they are now and definitely not too comfortable for people to go with families. My father would always send in a servant who would travel with us to get some Mughlai Breakfast. Paaya, Kheema, Bheja and Nihari.

Nihari is always topped with some Barista, julienne ginger, green chilies, coriander leaves, and Lemon. When I was a teenager, my mom started making Nihari at home. She would make it with Mutton as well as Chicken. Even though I had the dish so many times, I never had the urge to try making it myself. Initially, my mom depended on the masala powder that used to be sold in Delhi. But as she kept cooking, she figured out how to make it by herself. The packet had the list of ingredients and my mother with a few experiments, got the knack of how much of each ingredient should be to make the perfect Nihari masala.

I had this dish so many times and honestly, it’s one of my most favorite ones too but I never felt the urge to attempt it. And then after trying different recipes for Chicken curries, I thought of giving Chicken Nihari a try. I asked my mother for the proportion of the spices and the recipe and gave it a try.

My mother always cooked the Nihari using Ghee, but during a trip to Jama Masjid, New Delhi with Mr. Parveez and I went to a restaurant and while talking to the chefs and people working there we found out that the traditional Delhi Nihari was cooked using Mustard Oil. I know that sounds weird but it’s true. Though I made my Nihari using Mustard Oil, I couldn’t just use all Mustard Oil since it’s pretty strong and I prefer mixing it with little Olive Oil. I also used Ghee for tempering.

Nihari is basically a traditional Muslim dish that was introduced by the Mughal kitchen. Nihari has a slightly different version in every region it’s made because with time every region develops and blends its flavors with the original recipe. Nihari comes from the Persian word “Nahar” which means “ early morning”. Nihari is basically a morning dish and is eaten for breakfast. I believe the way the spices blend in and the way it’s cooked, eating it for any other meal would be too heavy. Nihari always comes out more flavorful if it’s slow-cooked. Back in the day, the chefs would cook it overnight. Of course, that ain’t possible but, I still feel that cooking it on low flame slowly, makes it more flavorful. Using a heavy bottom pan is always better too.

The spice mix makes Nihari earthy and aromatic. It’s spicy but not too hot that would make you cry. The barista and thin slices of Ginger with chopped onions and green chilies are what make it more delicious. Therefore, don’t skip it if you want to get complete satisfaction. fried onion and julienned ginger at the end can be skipped but I would recommend you to definitely use it. The mild sweetness of the Barista balances the spice. Nihari has a lot of history and though the dish is simple, it does require a lot of time and a little effort, but in the end, it’s all worth the effort.

Kolkata Chicken Roll

We love Chicken rolls. Those of you who read my blog and follow my recipes would know that I love different styles of Chicken wraps, be it a Chicken Roll or Burrito or Tacos. I think the love for Chicken rolls came from my Mom. During one of her trips to Mumbai, she had tried some Mutton Tikka boti rolls at a Parsi eatery and tried reinventing them at home which is actually loved by the whole family.

So, when I came across a wonderful pictures of Kolkata Chicken Roll, I had to give it a try. The flavor of Kolkata roll is not just different, it actually bombards your taste buds with a joy ride of different things. From what I have read, its pretty renowned and a popular street food in Kolkata. Though I have never been to Kolkata, there is something about the food and culture that connects me to it and I find it amazingly attractive. Recipes like this are so easy and fuss free that while it connects you to your roots, which is just so important for people like me who live so far off from their home country, but also makes it easy for your kids to eat. Its healthy, nutritious and perfect for on the go too.

I grew up eating and loving my mother Tikka Boti Roll, which she initially only made with meat but then also started making with Chicken and I loved both. I have always been a fan of being able to make something that was good for road trips. See, some trips allow you to stop by at hotels on the way, but not all and for those trips or those after game hunger pangs while you might be stuck in heavy traffic, these are the recipes that just don’t come handy but also are flavorfully satisfying.

I marinated the Boneless Chicken with Salt, Ginger garlic paste, Lemon Juice and Yogurt. Spices I used were Fenugreek leaves, Tandoori powder, Red chili powder, cumin powder and fennel powder. Chicken can be marinated and left in the refrigerator overnight but if you are short on time, it can also be marinated for 30-45 minutes.

This recipe might not be exactly same as what you might have experienced in Kolkata, if you have been lucky enough to try the street food there, but after the numerous trials and efforts made by me and going through uncountable recipes of different kinds, I managed to stick to this one for the Kolkata Chicken rolls. I am not too sure how the Chicken rolls are different from the Kolkata egg rolls, but my mom would always spread some egg was on the Roti and fry it for the Tikka Boti so I did the same thing for my recipe and I feel the taste is deliciously enhanced. This recipe is inspired by numerous flavors that I have tried all my life and I feel with the numerous trials that I have made, I am able to give this dish a flavor different from my regular Chicken rolls. Hope you try it, like it and enjoy it as much as my family and I do.  

Hyderabadi Chicken 65

Chicken Kebabs are an all time wanted and favorite for everyone. Chicken Kebabs go so well with Daal Chawal as a side dish and even by themselves. I love making Chicken Kebabs for my get together with friends as well. People always feel that you cannot experiment much with Chicken Kebabs at home, where as experimenting with different Kebab flavors at home is the best thing to do.

The basic thumb rule is follow the fragrance and the flavor. If there are spices that go well together and there are spices that don’t go too well. Spices like Black pepper is something that you need to add little at a time, since if its too much the dish tends to get bitter. If you need to enhance the flavor of Black pepper in your dish, its always better to add less of Black pepper and more of White Pepper to balance the pepper taste. Adding Tandoori masala gives a lot of kick to Red chili powder and makes kebabs more flavorful. You can always use citric acid in place of Vinegar or Lemon juice. Adding Flour with Rice flour and Corn starch Powder will add a lot of crunch to your kebabs if you are frying them.

With the Hyderabadi Chicken 65, I added Red chili powder and other spices with Ginger garlic paste and mixed it well. Further rolled the spiced Chicken pieces in Flour, Rice flour and cornstarch powder and fried them. Later cooked them in a sauce made with Onions, green chilies, various spices and Yogurt. I also add a little cornstarch powder to the gravy to make it a little thicker.

Chicken 65 is made in different ways in different places of India. Though the original recipe was made in Chennai, but different places modified their ways and made it suitable to their taste buds. Honestly, every pace has their unique flavor and we always tend to have our favorites but making them in different ways is always great to add more variety to your dinner table.

Tellichery Biryani

This recipe also happens to be from Kerala and is the second Biryani from this state that I tried out. Kerala is a state of distinct flavor. I know every state has their own flavors that are distinct and are easily distinguishable from the use of their local grown spices with methods of cooking different cuisines and also availability of local vegetation. Not forgetting their natural climate. Isn’t it amazing how every place has different things popular during different seasons and few things that are good to eat during all seasons. Hats off to generations before us who tried, tested and made so many different varieties of food that we just need to follow. And though, it all seems walk in the park, we still do not follow those age old recipes because we find them too time consuming in our busy lives today.

Thalassery town of Northern Kerala has a unique blend Arabian, Persian, Indian and European styles of cooking as a result as its long history as Maritime Trading Post. Tellichery is an anglicized name for Thalassery. The original name of Thalassery has been restored post Independence. Although both refer to the same place, the Tellichery Biryani is different from the Thalassery Biryani. This one is a little simpler version.

This Biryani does not use the Jeerakshala/Kaima Rice like the Thalassery Biryani and should be cooked with Long grain Basmati Rice. This recipe also displays the influence of Mughals in its flavors but seems to be slightly revised. Going through the ingredients, I do not find any ingredient that would distinguish this dish as a dish from Kerela. The recipe makes me feel that its made by some settlers who still did not adapt to the flavors of Kerela cuisine and were still new to incorporating the spice or certain ingredients to the dish. In all, this dish is great for all Biryani lovers, specially for Beginners. Therefore, if you happen to be someone new at making Biryani, this is for you. An easy, delicious and simple way of making a delicious Biryani.

Pindi Chhole

This hearty, healthy and delicious dish is from Punjab, India. I initially thought that the name comes from the word Pind used for village in Punjabi. But, actually the name of the dish is from the place it was originated from. It is named Pindi Chana after the town Rawalpindi, which used to be a part of Punjab before India-Pakistan partition and later became a part of Pakistan. Pindi chhole is a recipe from Rawalpindi and now is proudly cooked everywhere and popularly known as Pindi Chhole.

This recipe is easy to cook, it makes for a wholesome meal when served with poori or Kulcha or Naan and an onion salad. Pindi Chana can be made with dried chickpeas, which needs to be soaked overnight and boiled until soft. The recipe also requires the use of chana daal along with chickpeas. I usually soak a large amount of chickpeas and boil them as well. I usually then divide them into smaller packs and keep them in the freezer for future use.

I never realized till I was much older that there were so many different ways of making chhole. I felt every family had there own version of making chhole, like with my Punjabi friends, their moms made chhole that didn’t have a lot of gravy and usually were a little dark in color and didn’t have too many tomatoes either. Where as, my mom always had her own version of making chhole with yogurt. The chhole recipe I follow is from a family friend and I make my chhole using tamarind, tomatoes and fennel seeds. And, then one day I came across Pindi chhole made by a close family friend and loved the flavors. This is when I found out that in most Punjabi families, people tend to boil chhole with whole spices and tea leaves which tends to darken the color of the chhole. Punjabi food anyways uses a lot of whole spice in their dishes and there always seems to be a very strong taste of cloves and cinnamon in their cuisine.

All in all this is one awesome chhole recipe. It goes really well with poori or parantha or kulcha. I serve them for breakfast usually with sooji ka halwa on the side, but that can always be when you have friends over or if its a special occasion, but these chhole with poori can definitely make it to your weekend brunch table. Enjoy!!!

Murgh Malai Tikka

These are most juiciest and softest kebabs I have ever made. Yet they are amazingly flavorful. My story for Murgh Malai Tikka is connected to my older son. My older son, who is a handsome teenager now used to have GERD as a kid. For those of us who have kids suffering from refluxes and unable to keep their food down, we know the pain. For those who have kids who are picky eaters, we know the struggle. Unfortunately, for my son, he was both a picky eater and suffered from a reflux and that continued for the first 2 years of his life. But, as they say there is always a ray of good hope and things started to get better once he turned 2.

Now once he started eating real food, his choices went more towards dishes that were spicy but considerable mild at the same time. That was when during one of our outings he tried Malai Tikka and he was so much in love that we placed another order of the dish, which of course he didn’t touch because we forgot that he was two and as much as we loved to feed our super fussy toddler, his tummy could only take so much. But, this was the time when I decided that I should start making my own Malai tikka kebabs at home.

And of course, like everything else dishes also require experiments and some times way too many. So, with this one my initial experiments weren’t that bad but they weren’t successful. The first try, I made them with Chicken breast. Although with some kebabs Chicken breast comes out dry, but honestly with this recipe make one of the most moist kebabs ever. Chicken breast is a great choice for curries and for dishes that require you to mince the chicken, but this is something tried and tested, while making Murgh Malai tikka, you can pick any Boneless Chicken Thigh and leg meat or Chicken Breast. Your kebabs will be juicy, moist and a taste to die for! The second mistake was to only rub in yogurt which didn’t make them too different from the other ones that I was already making.

Secondly the addition of different spices also was a little adventurous but finally a few experiments later I discovered that the key to a perfect Malai Tikka wasn’t just Yogurt and cream but also cheese. A little bit of shredded cheese might sound weird and you might feel that cheese is the last flavor you want to taste in you desire when you bite into your Malai Tikka, but trust me, no one ever knows. I guess its a pretty well guarded secret…LOLzzz. Well, now you know. The cheese needs to be shredded and you can only add Mozarella which isn’t too strong in taste. Adding anything like Cheddar will definitely ruin the taste.

I make these tikkas by marinating them in Yogurt, Cream, Ginger garlic paste, Shredded cheese, Black pepper, White pepper, Cumin powder, Red chili powder, Salt, Turmeric Powder, Tandoori Powder and cashew paste. Besides that I also add some fresh chopped Coriander leaves and Green chilies. I believe there is nothing that can enhance the flavor of spices more than fresh herbs. Though I make these kebabs in the oven, but they have been grilled to perfection on our outdoor grill as well by Mr. Parveez and they come out perfectly juicy and delicious. You can always cook them on the pan too. Kebabs are something that cross out all the restrictions and can be made anytime anywhere. I fail to understand recipes that only require an oven. That should never be the case. So, oven, no oven, grill, no grill…as long as you have these kebabs marinated the right way and have fire, these kebabs can be cooked in no time.

I generally do not serve them with the stick unless I make them for a kid’s party. If you are using the wooden skewers, always soak them in water for 20 minutes before adding your kebabs to it. Soaking in water doesn’t let them burn in the pan or oven while cooking.

These kebabs are very appealing and inviting and an instant hit. They melt in the mouth, while the spices give you a light kick, the cream base cools your taste buds down making these irresistible little chunks soft and juicy and delicious enough for you to lose the count of how many you relished.