Chicken Ramen Noodles

This Japanese-inspired dish came together almost entirely without any advance prep — one of those happy kitchen accidents that turns into a family favorite. My boys had been watching a Japanese show where a character is obsessed with ramen, and ever since, they couldn’t stop talking about how delicious it looked. Naturally, that meant I had to figure out a way to make it happen.

I had never really tried ramen before, mainly because finding Halal Japanese options isn’t easy where we live. Seafood versions never appealed to me either, so it was something I had always quietly skipped. But convincing curious kids to skip a dish they’re fascinated by? Impossible. They’re at that age where they want to explore every cuisine under the sun — as long as it’s religiously permissible — and since their mom enjoys cooking, they assume anything is possible at home.

With very limited time (and very persistent children), I dived into recipe research. Three hours later — which felt like three minutes under pressure — I realized I didn’t even have many of the “essential” ingredients most ramen recipes call for. No bok choy, no lemongrass, no fancy mushrooms. Instead, my fridge offered spinach, carrots, cabbage, zucchini, and a few regular mushrooms. Not exactly traditional, but perfectly workable.

I also chose not to add onions. While they’re wonderful in many dishes, onions can dominate a delicate broth and tend to become overly soft and mushy in soups. I wanted something light, clean, and comforting rather than heavy.

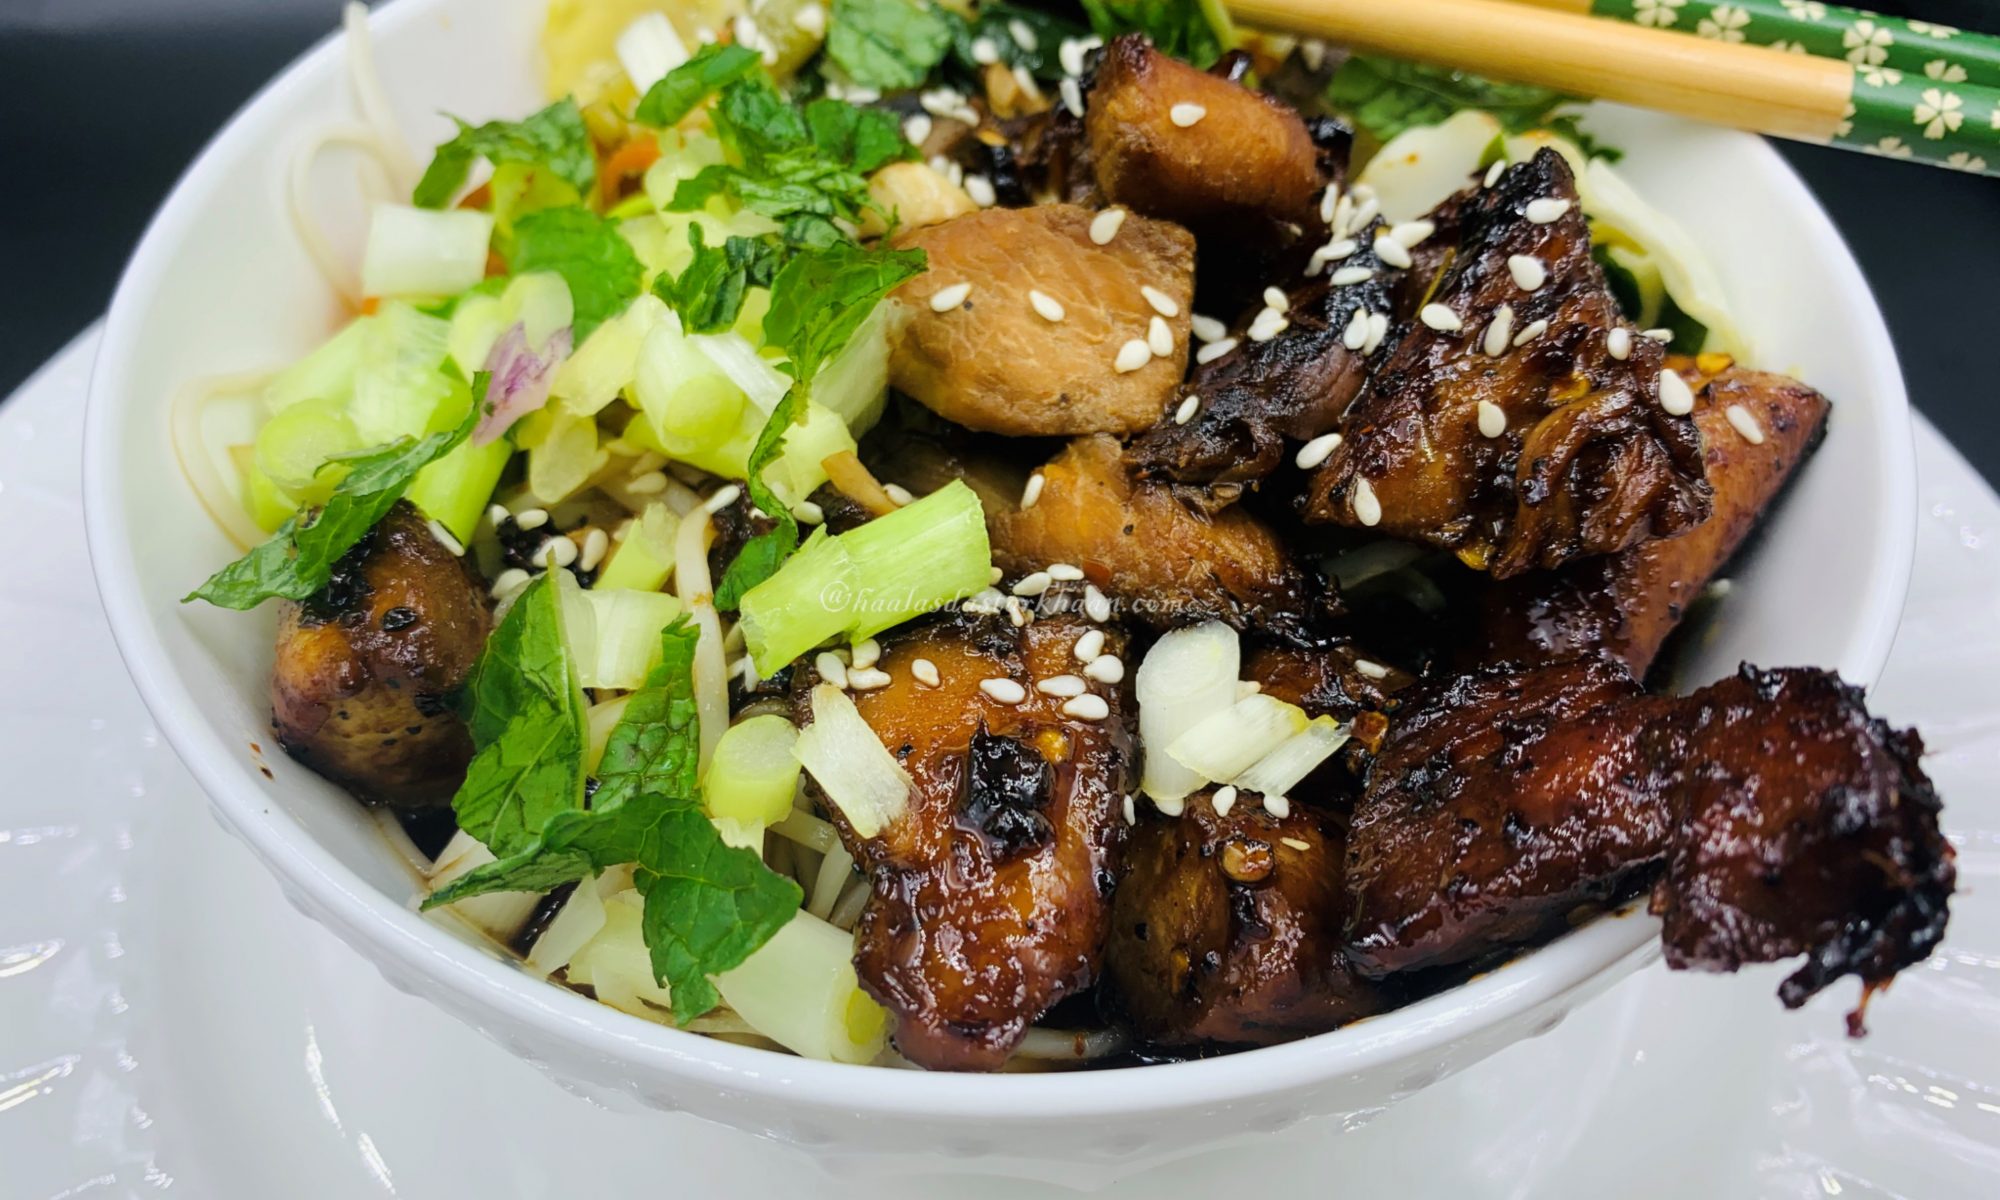
So this version became a practical, home-style ramen — adapted to what I had on hand and to our family’s taste preferences. The broth was simple but flavorful, the vegetables added color and nutrition, and the noodles brought everything together into a warm, satisfying bowl. It may not be an authentic Japanese ramen, but it captures the comforting spirit of the dish beautifully.

What I love most about recipes like this is how easily they help you serve more vegetables without making it feel like a “healthy” compromise. When tucked into a fragrant broth with noodles, even picky eaters happily finish their bowls.

I’m no expert in Japanese cuisine, but the more I experiment, the more I appreciate its balance, simplicity, and depth of flavor. With a few thoughtful adjustments, it’s possible to create dishes that feel authentic while still fitting your pantry and lifestyle.

This quick, comforting ramen-style bowl turned out far better than I expected — warm, nourishing, and completely satisfying. Most importantly, the boys loved it, which is always the ultimate test.

I hope you enjoy this easy, veggie-packed bowl just as much as we did. 🍜✨

Cheesy Garlic Pull Apart Bread

Who doesn’t love garlic bread? I’ve honestly never met anyone who could resist a warm, buttery slice loaded with garlic. Growing up, I was convinced that garlic bread and pizza were inseparable — the ultimate duo — thanks to a certain popular food chain. For me, ordering pizza without garlic bread as an appetizer just didn’t make sense, and I’m sure those famous pizza places have seen plenty of customers like me over the years.

As much as my family enjoys the occasional restaurant treat, there are times when ordering out just isn’t practical — or desirable. Beyond the cost, there’s always that lingering question about freshness, preservatives, and how the food was actually prepared. Not that takeout is inherently bad, but relying on it too often doesn’t feel like the healthiest choice. And when you can cook, making a homemade version becomes both reassuring and rewarding.

Traditionally, garlic bread is made using a crusty loaf like a French baguette or sometimes ciabatta. The bread is partially sliced so the garlic butter can seep into every crevice while keeping the loaf intact, then baked until crisp on the outside and soft inside. Some versions use olive oil and fresh garlic, others rely on butter and garlic powder, and sometimes the loaf is split lengthwise and topped before baking.

I decided to do something a little different — starting from scratch. Instead of using a ready-made loaf, I made a soft, enriched dough using warm milk, yeast, egg, flour, sugar, salt, and butter. Once the dough had risen beautifully, I kneaded in minced garlic, more butter, and fresh scallions, which added both flavor and a lovely aroma. After shaping, I topped it with a generous sprinkle of cheese before baking.

The result is somewhere between classic garlic bread and a soft pull-apart loaf — fluffy, buttery, garlicky, and incredibly comforting. Served hot from the oven, the cheese melts into the bread while the garlic perfumes the entire kitchen. Every bite is soft, rich, and full of flavor, with just the right balance of indulgence and homemade goodness.

Sometimes the simplest foods bring the most joy — especially when made fresh, shared warm, and eaten straight from the tray.

Serve hot, tear into it while it’s still steaming, and enjoy every oozy, garlicky bite. 🧄🧀✨

Pyaaz Ke Samose

I’m from Rajasthan, and I grew up eating samosas as a regular part of life. The classic potato samosa — aaloo ke samose — was everywhere, and every shop seemed to have its own signature flavor. Some were absolutely delicious, others not so much, but one thing I always loved was the crisp, flaky outer crust. In fact, for a long time, that was my favorite part. The only filling I truly adored back then was the kheema samosa my mom used to make at home.

I never enjoyed bland fillings, so whenever the spice level was low, I would lose interest quickly. Over time, as I tasted more varieties, I realized that it was the spicy, punchy samosas that won my heart every single time.

After I got married, I discovered a completely new favorite. During one Ramadan in Bangalore, we tried the famous Ramadan special onion samosas — Pyaaz ke Samose — and instantly fell in love with them. Crisp, aromatic, slightly sweet from the onions, and perfectly spiced, they were unlike any samosa I had eaten before.

There’s a common misconception that Ramadan food for Muslims is mostly non-vegetarian, but that couldn’t be further from the truth. Our iftar tables are filled with a beautiful mix of vegetarian and non-vegetarian dishes, each with its own tradition and story. These onion samosas are a perfect example — simple ingredients transformed into something truly special.

They are most commonly made during Ramadan, though a few Muslim shops prepare them year-round. Still, there’s something about foods made in that month — perhaps the anticipation, the hunger, the togetherness — that makes them taste extra special. It’s a flavor that’s hard to recreate outside that atmosphere.

Since we don’t get these samosas where we live now, I decided to try making them at home. After several rounds of trial and error, I finally arrived at a version that tastes just the way we remember — crispy on the outside, flavorful on the inside, and utterly addictive.

If you enjoy onion samosas and want to recreate that Ramadan magic in your own kitchen, I highly recommend giving these a try. I hope you love them as much as we do. 🥟✨

Badusha

Some sweets are forever tied to celebrations. One bite, and you’re instantly transported to festivals, laughter, lights, and family gatherings. For me, Badusha — or Balushahi — will always be connected to Diwali. I still remember visiting friends during the festival and being served plates of homemade or carefully selected store-bought Badushas, each one flaky, rich, and absolutely irresistible.

This post probably should have gone up during Diwali, but honestly, sweets don’t need an occasion — just a craving, a little enthusiasm, and the time to make them. Diwali may be over, but my love for Indian mithai certainly isn’t. When the craving strikes, there’s no reason to wait.

Living in the USA, I rarely find Badusha easily available, mainly because it isn’t as widely known here. I suspect that if more people tasted it, it would quickly become a favorite. So I decided to make it myself. After several not-so-successful attempts, I finally perfected the recipe — and it was absolutely worth the effort. Some cravings are simply too strong to ignore.

This sweet also carries personal memories. My mom is a huge fan, and I’ve heard stories that Balushahi was one of the sweets served at my parents’ wedding. In my hometown of Jodhpur, there’s an old sweet market area known as “Pongal Pada,” famous for its variety of Badushas in different colors, textures, and finishes. There, they are often called Maakhan Bada, which loosely translates to sweets made with butter. While traditional Badusha is soaked in sugar syrup, Maakhan Bada is typically coated with a thick layer of crystallized sugar — somewhat like a firm fondant shell — giving it a distinct texture and appearance.

Once I finally cracked the recipe at home, there was no looking back. These turn out beautifully flaky on the outside, soft yet layered inside, and perfectly sweet without being overwhelming. And let’s be honest — this is not the kind of dessert anyone eats just one of. One quickly turns into two… and then maybe three.

Known as Balushahi in North India and Badusha in South India, this beloved mithai transcends regional names. No matter what you call it, the experience is pure indulgence — buttery, crisp, syrupy, and deeply satisfying.

If you’ve never tried making it at home, I highly encourage you to give it a go. Once you taste a freshly made batch, you may never feel the need to buy them from a sweet shop again.

I hope you enjoy these as much as I did — flaky, festive, and full of nostalgia in every bite. 🍬✨

Cod Fish with Roasted Veggies

We love seafood in every form — curried, fried, grilled, you name it. There’s something incredibly satisfying about a simple fish dish that’s both nourishing and full of flavor. This particular recipe has become one of our go-to meals when we want something light, quick, and healthy without compromising on taste.

It’s especially perfect if you’re watching your carbs, following a keto lifestyle, or simply trying to eat cleaner. Despite being diet-friendly, it feels hearty and indulgent enough to satisfy everyone at the table.

I used frozen cod for this recipe because it’s easy to keep on hand, but fresh cod works beautifully if you can get it. Cod is mild, flaky, and absorbs flavors wonderfully, making it ideal for quick cooking. My boys are big fish lovers, especially when it’s served with grilled vegetables or a crisp cold salad on the side.

One of the best things about this dish is how simple and budget-friendly it is. When you’re short on time but still want something nutritious and delicious, this recipe truly delivers.

The seasoning is straightforward: red chili flakes, garlic powder, onion powder, white pepper, and tandoori masala, along with a sprinkle of dried parsley for freshness. You can absolutely adjust the spices to your taste. Personally, I avoid cinnamon or regular red chili powder with cod, as they can overpower its delicate flavor. I also prefer white pepper over black pepper, which can sometimes taste slightly bitter with mild fish.

A squeeze of fresh lemon juice ties everything together, adding brightness and balance to the marinade. Once the fish is cooked — either pan-seared or lightly grilled — I use the same pan to sauté bell peppers and asparagus. This step is key, as the vegetables soak up all the flavorful bits left behind by the fish and spices, making them incredibly tasty with minimal extra effort.

It’s a complete meal on one plate: lean protein, vibrant vegetables, and bold yet clean flavors.

This recipe is also perfect for involving older kids or teenagers in the kitchen. It’s simple, quick, and forgiving — a great confidence-builder for budding cooks who want to learn how to prepare healthy meals for themselves.

Easy, nutritious, budget-friendly, and genuinely delicious — this is one of those everyday recipes that you’ll find yourself coming back to again and again. 🐟🥦✨

Gajar Ka Halwa

Gajar ka Halwa is, without a doubt, our ultimate winter comfort dessert. The natural sweetness of carrots slowly cooked with milk, sugar, fragrant cardamom, and rich desi ghee creates something truly magical — a warm, indulgent treat that makes cold days feel cozy and festive. Every family has its own treasured version of this classic, and it remains one of the most beloved winter sweets across North India.

When the markets fill with fresh, juicy red carrots, it almost feels like an invitation to start making halwa. That irresistible urge to end every meal with something sweet suddenly becomes impossible to ignore — and Gajar ka Halwa always tops the list. I make mine using grated red carrots, milk, khoya, and sugar — a traditional, rich version that truly shines when those seasonal carrots are at their peak.

I also prepare another version that comes straight from my mother’s kitchen. Growing up, I was convinced she made the best Gajar ka Halwa in the world. She would slow-cook it patiently for hours on the lowest heat, allowing the flavors to deepen while the entire house filled with the most heavenly aroma. I still remember how she would freeze portions so we could enjoy it long after winter had passed — a small luxury we all looked forward to.

Deeply rooted in North Indian cuisine, this dessert has a rich yet slightly grainy texture and just the right level of sweetness. It’s comforting, nostalgic, and incredibly satisfying. Honestly, I’ve yet to meet an Indian who doesn’t love a good bowl of Gajar ka Halwa.

Garnished with slivers of almonds, pistachios, and other dry fruits, it tastes divine on its own. But if you really want to elevate it, serve it warm with a scoop of vanilla ice cream — the contrast of hot and cold takes it to another level. I even have a richer version on this blog made with condensed milk, which creates an even creamier result.

One of the most beautiful things about this dish is its versatility. It can be enjoyed warm or chilled, simple or decadent, plain or paired with ice cream — and it never fails to bring comfort and joy.

Like most traditional dishes, every North Indian household adds its own personal touch, and even small tweaks can transform the flavor and texture. This recipe is my quick, reliable version — rich, satisfying, and consistently delicious.

I begin by sautéing grated carrots in ghee until they release their moisture. Once most of the water evaporates, I add milk and let everything cook slowly until the carrots become completely tender and the milk reduces to about one-quarter of its original volume. Then comes the khoya, followed by sugar and freshly ground cardamom powder. The mixture is cooked until it thickens beautifully and no excess liquid remains.

For garnish, I usually add sliced almonds and pistachios, sometimes cashews as well. Raisins are optional — some love them, others prefer to skip them — it really comes down to personal preference.

I make Gajar ka Halwa quite often, and it disappears just as quickly. If you’re cooking for a gathering, you can easily double or triple the recipe — just allow extra time for the milk to reduce properly.

Whenever possible, I choose the reddest, juiciest carrots for the best color and flavor. If those aren’t available, a tiny pinch of orange food color can enhance the appearance, though it’s completely optional. The taste remains just as wonderful without it.

Warm, fragrant, rich, and deeply nostalgic — this is winter in a bowl. I hope it brings as much comfort and happiness to your home as it always has to mine. 🥕✨

Lobster Curry

My love for Lobster Curry began in 2012, during our first visit to Kerala. We stayed on a houseboat in Alleppey, surrounded by the serene backwaters and blessed with the most perfect weather. It was around Christmas time — truly the best season to visit Kerala. During our stay, our hosts served an array of traditional Kerala dishes, especially seafood prepared in rich, aromatic coconut gravies. That’s where I tasted Lobster Curry for the very first time which I loved — and it was pure magic.

I had tried Lobsters before at several seafood restaurants, but they were always mildly cooked and flavored with nothing more than garlic and salt. The Lobster Curry in Kerala, however, was beyond my expectations — rich, flavorful, and absolutely unforgettable. The houseboat had three men who managed everything — from cooking to cleaning and maintenance — and they did it all with such warmth and care. Our time there remains one of the best vacations we’ve ever had. The weather, the calm of the backwaters, the walks surrounded by lush greenery, and the incredible hospitality made every moment truly memorable.

After tasting that unforgettable Lobster Curry, I just had to ask for the recipe — and our gracious host gladly shared it with me. Though the recipe was more of a rough guide than exact measurements, it was enough for me to understand the essence and recreate this wonderfully delicious dish back home.

The original recipe was cooked in coconut oil, but I made mine using olive oil since I don’t usually cook with coconut oil. I honestly don’t think it changes the flavor too much — it just makes the dish a little less “coconuty.” Since I still add coconut milk, the curry retains that perfect balance and richness that complements the rest of the ingredients beautifully. I did make a few other changes too, so I can’t really call this an authentic Kerala dish anymore — it’s more of my inspired version of it.

When I order lobsters for home delivery—which is, of course, the preferred option these days—I clean them myself. But if you’re picking fresh ones at a fish market, you can always ask them to crack the claws and cut the lobsters in half for you. I usually parboil the lobsters with a little turmeric powder and salt; it helps get rid of any musky smell.

To make the curry, I start by heating oil and adding black seeds (kalonji) and curry leaves, followed by finely chopped onions. Once the onions turn soft and transparent, I add ginger-garlic paste along with all the spices and some fennel powder. I find fennel powder brings a lovely freshness, especially to seafood dishes. Next, I pour in the coconut milk—or coconut purée—and tomato purée, stirring until everything blends together beautifully. Finally, I add the lobsters and let them simmer gently for about 10–12 minutes, until the curry thickens and the flavors come together perfectly.

The Lobster Curry might look complicated, but honestly, it takes less time to prepare than a regular chicken curry—and it looks absolutely stunning on the dining table. The best part is that this same recipe works wonderfully with crab too; just substitute the lobster for crab, and you’re good to go. I truly hope you enjoy cooking this dish and love it as much as my family and I do!

Chicken Quesadilla

These delicious wraps are filled with spicy pan-fried chicken and gooey cheese, coming together in just 30–40 minutes. It’s the kind of dish that’ll have your kids asking for seconds — and maybe even thirds! They’re easy to make, can be prepped partly ahead of time, and make for the perfect quick meal or snack. These little scrumptious bites are guaranteed to win hearts at the table.

For the chicken, you can use rotisserie chicken, leftover grilled chicken, or even kebabs — anything that’s already cooked works perfectly. I made mine in a Tex-Mex style. I sautéed some onions and green chilies, then added paprika, cumin powder, chili flakes, garlic powder, onion powder, and a touch of dried parsley. To spike it up, I mixed in a little apple cider vinegar and hot sauce. Cook everything together until the chicken dries up slightly and the sauce coats it completely — that’s when you know it’s ready for your wraps.

You can always make these quesadillas using store-bought tortillas, but I prefer making mine at home with a mix of all-purpose flour and corn flour. They’re actually quite easy to prepare — especially if you have a tortilla maker. Once your tortillas are ready, spoon some of the cooked chicken onto one half, sprinkle plenty of cheese, and fold them over. Bake in a preheated oven for about 10 minutes, just until the cheese melts and the tortillas turn lightly crisp.

For serving, you can cut the quesadillas in half — it makes them look neater and easier to eat. These quesadillas are deliciously filling, easy to make, and packed with flavor. Perfect for a quick lunch, dinner, or even a fun family snack.

Khatte Baingan

Biryani is a dish loved by everyone. With countries like India, Pakistan and Bangladesh where Biryanis are so popular and makes it to the menu of all special occasions. Biryani has a huge variety of accompaniments, like Baghare Baingan, Dalcha, Raita, Chutney, Mirch ka Salan and Khatte Baingan.

Deciding on an accompaniment with Biryani also requires a few skills. As much as people think that all Biryanis are more or less the same and a basic raita fulfills the purpose of serving on the side with Biryani, its not really true. If your Biryani is not too spicy, you should make Mirch ka Salan or Baghare Baingan. If its super spicy, making Khatte Baingan or Dalcha mellows it down a little. Raita goes along with any Biryani that’s spicy or simple.

The recipe is simple and made with very little oil. A lot of people fry their eggplants to cook them, but I choose to boil them. Boiling them ensures that they are completely cooked and eggplants have a tendency to absorb too much oil so, this way it doesn’t get too oily. Once eggplants are boiled, add oil to a pan, add Black seeds and curry leaves. Further add a little ginger garlic paste with Turmeric Powder and red chili powder. Add tomato puree, ketchup and green chilies. The ketchup adds color along with a sweet and sour taste making the eggplants taste great.

These Khatte baingan are very easy to make and are loved by everyone, even people who usually aren’t a big fan of eggplants. This goes well with Biryanis that aren’t super spicy. Simple Biryanis like Mughlai Biryani or Thalassery biryani go really well with Khatte Baingan.

Rava Coconut Laddu

Laddus are everyone’s favorite sweet. We all love them, from Besan to Motichoor to Coconut. Different kinds different occasions and just little edible balls of delicious taste that spread joy and happiness. I always loved Motichoor laddus, kind of my all the time go to and get happy sweets.

After I started on my venture of self discovery of being a home based chef, I started making different kinds of laddus. This is when Mr. Parveez asked me to make these Laddus with rava and coconut. These Laddus were something he ate during his childhood and still craved for. Now before I go ahead with the recipe and more details, let me also tell you that this was my third trial and the one that was closest to his childhood flavor.

Rava was roasted in ghee and then I added Besan to help the laddus bind better. I further roasted the grated coconut as well. I also roasted the cashews and Raisins in ghee. Mixed everything together and added sugar to it. Added the remaining ghee and shaped them. These Laddus can be kept in airtight container for up to 10 days.