Chicken Nihari

Nihari is a traditional Muslim delicacy with its roots in the royal Mughal kitchens. Over time, different regions embraced the dish and added their own local twists, creating the rich variations we enjoy today.
The name Nihari comes from the Persian word “Nahar,” meaning early morning—and true to its name, this slow-cooked, aromatic stew was traditionally enjoyed for breakfast.

It’s a rich, hearty dish—and honestly, it makes perfect sense that it was served in the morning. With its deep spices and slow-cooked meat, Nihari can feel a bit too indulgent for any other meal. Its true flavor unfolds only with time. Traditionally, chefs would let it simmer overnight, allowing the spices and meat to meld beautifully. While that may not always be practical today, patience still makes all the difference. Cooking Nihari gently on low heat in a heavy-bottomed pan brings out its signature depth, aroma, and soul—what truly makes this dish so special.

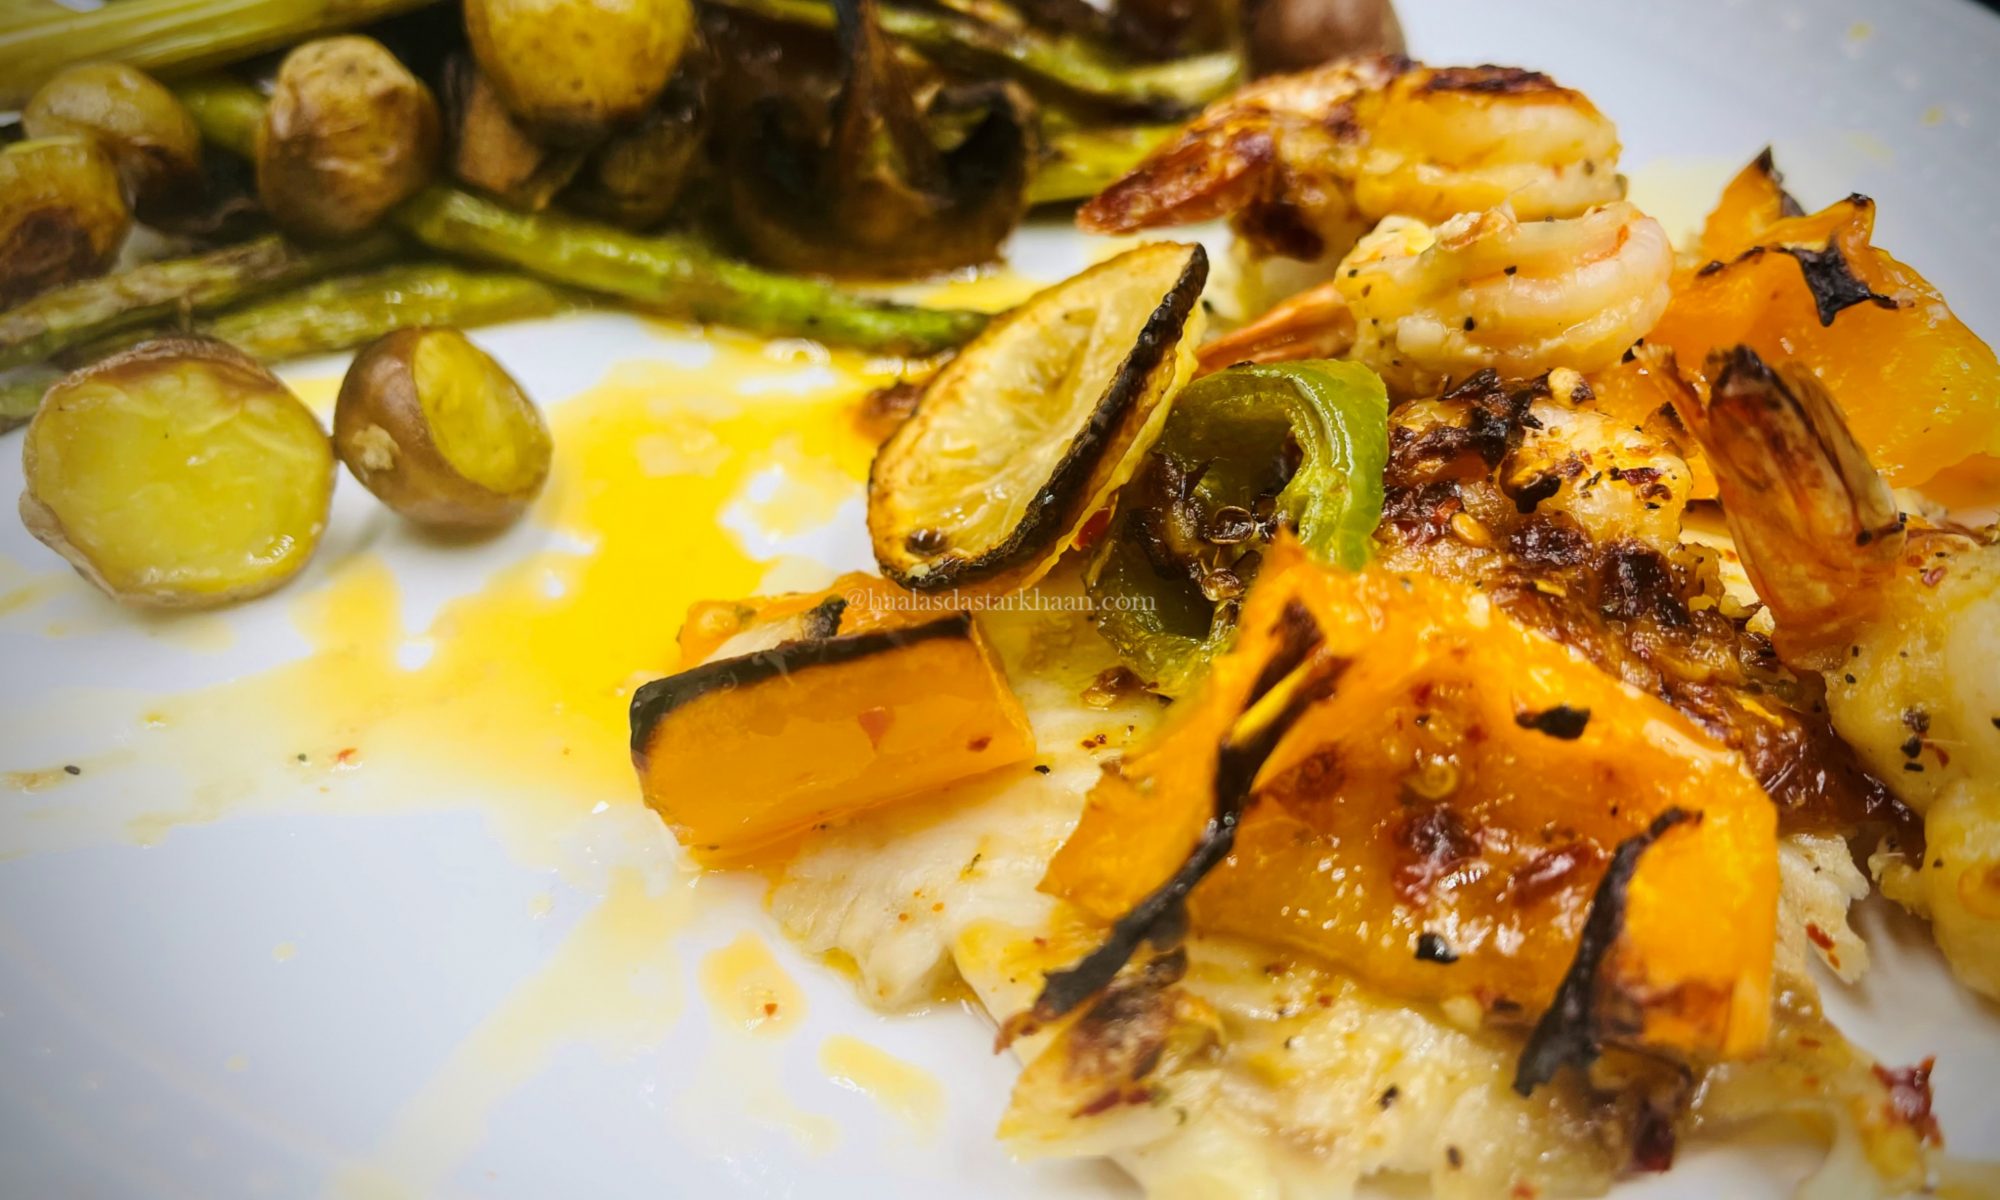
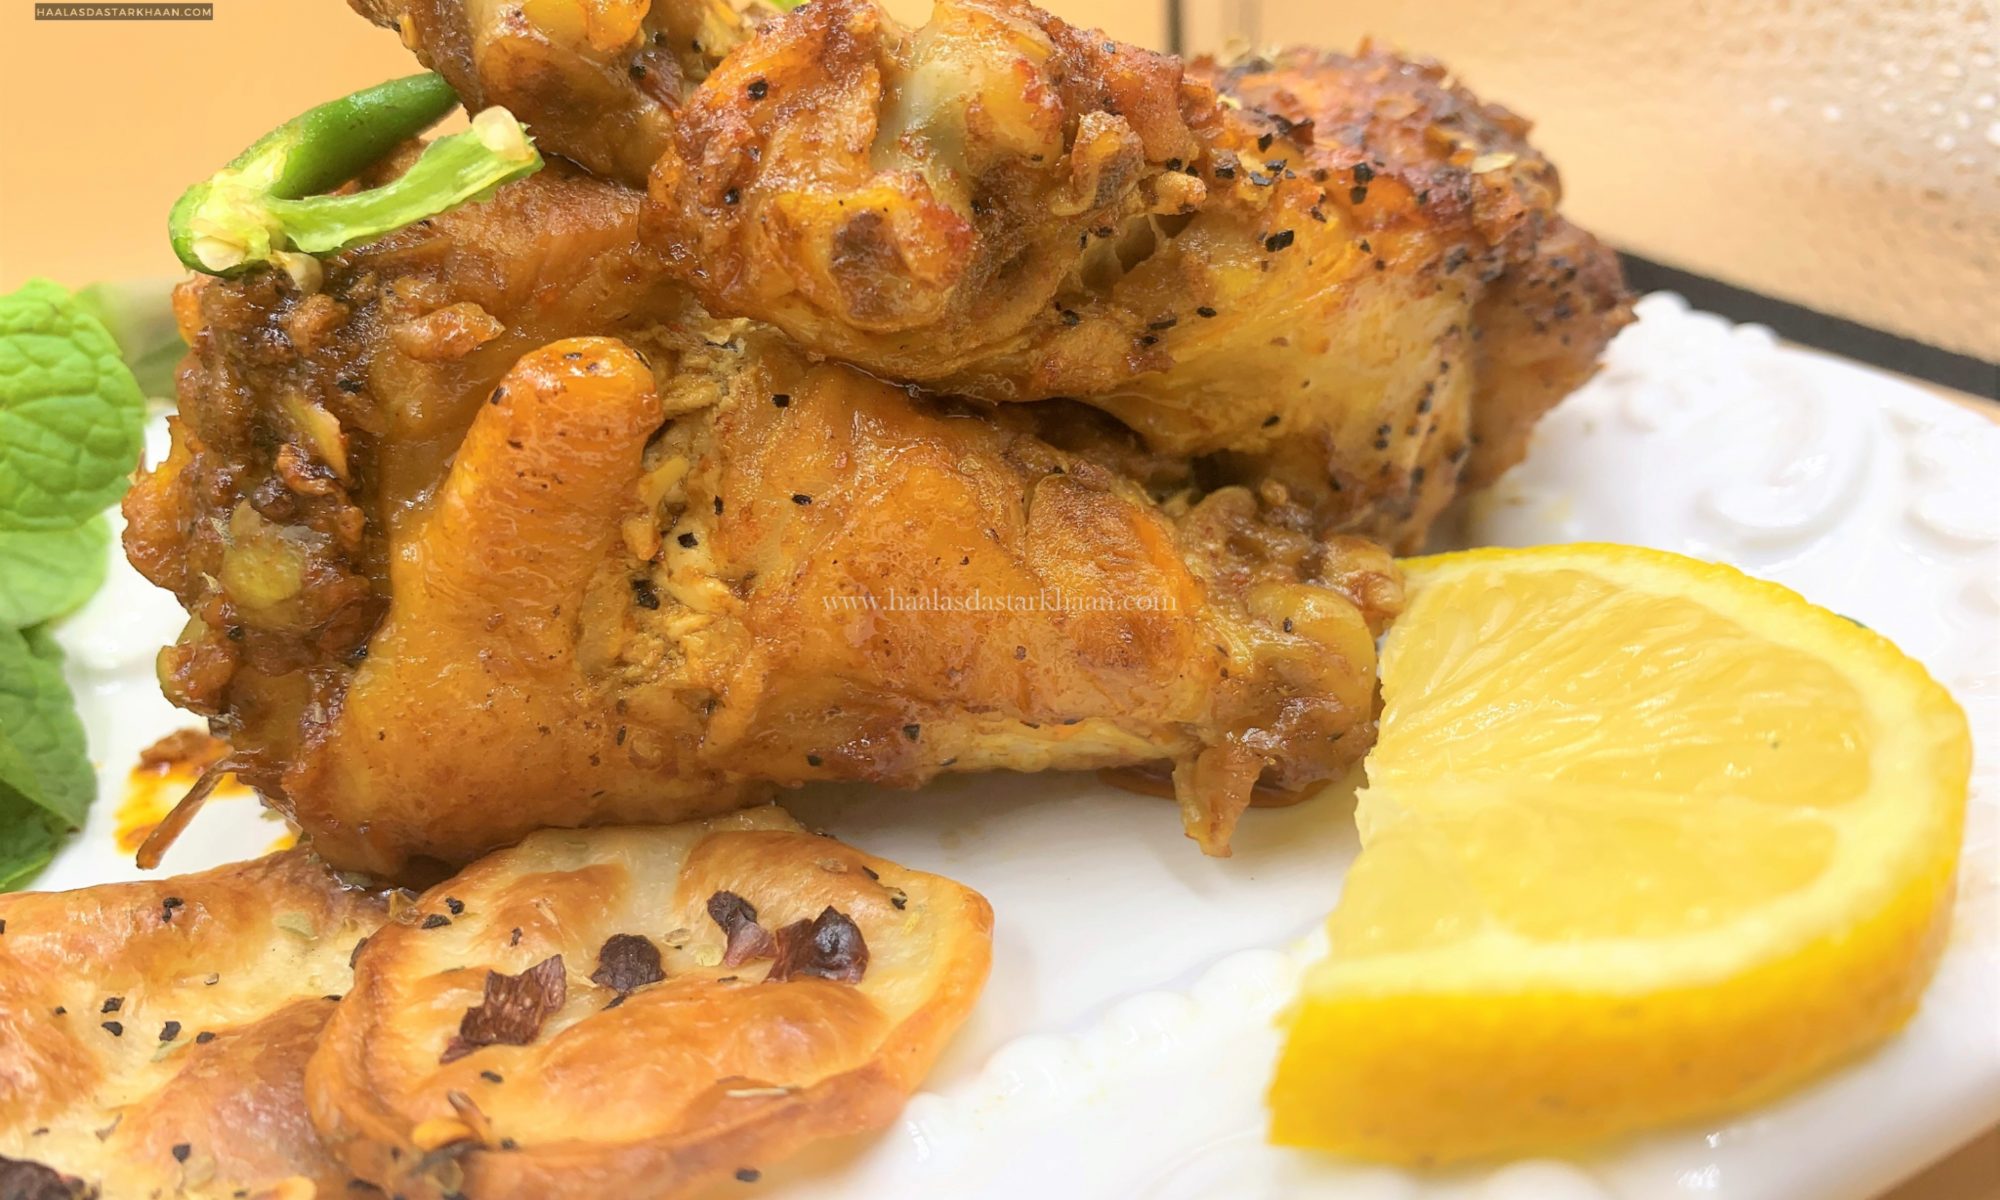
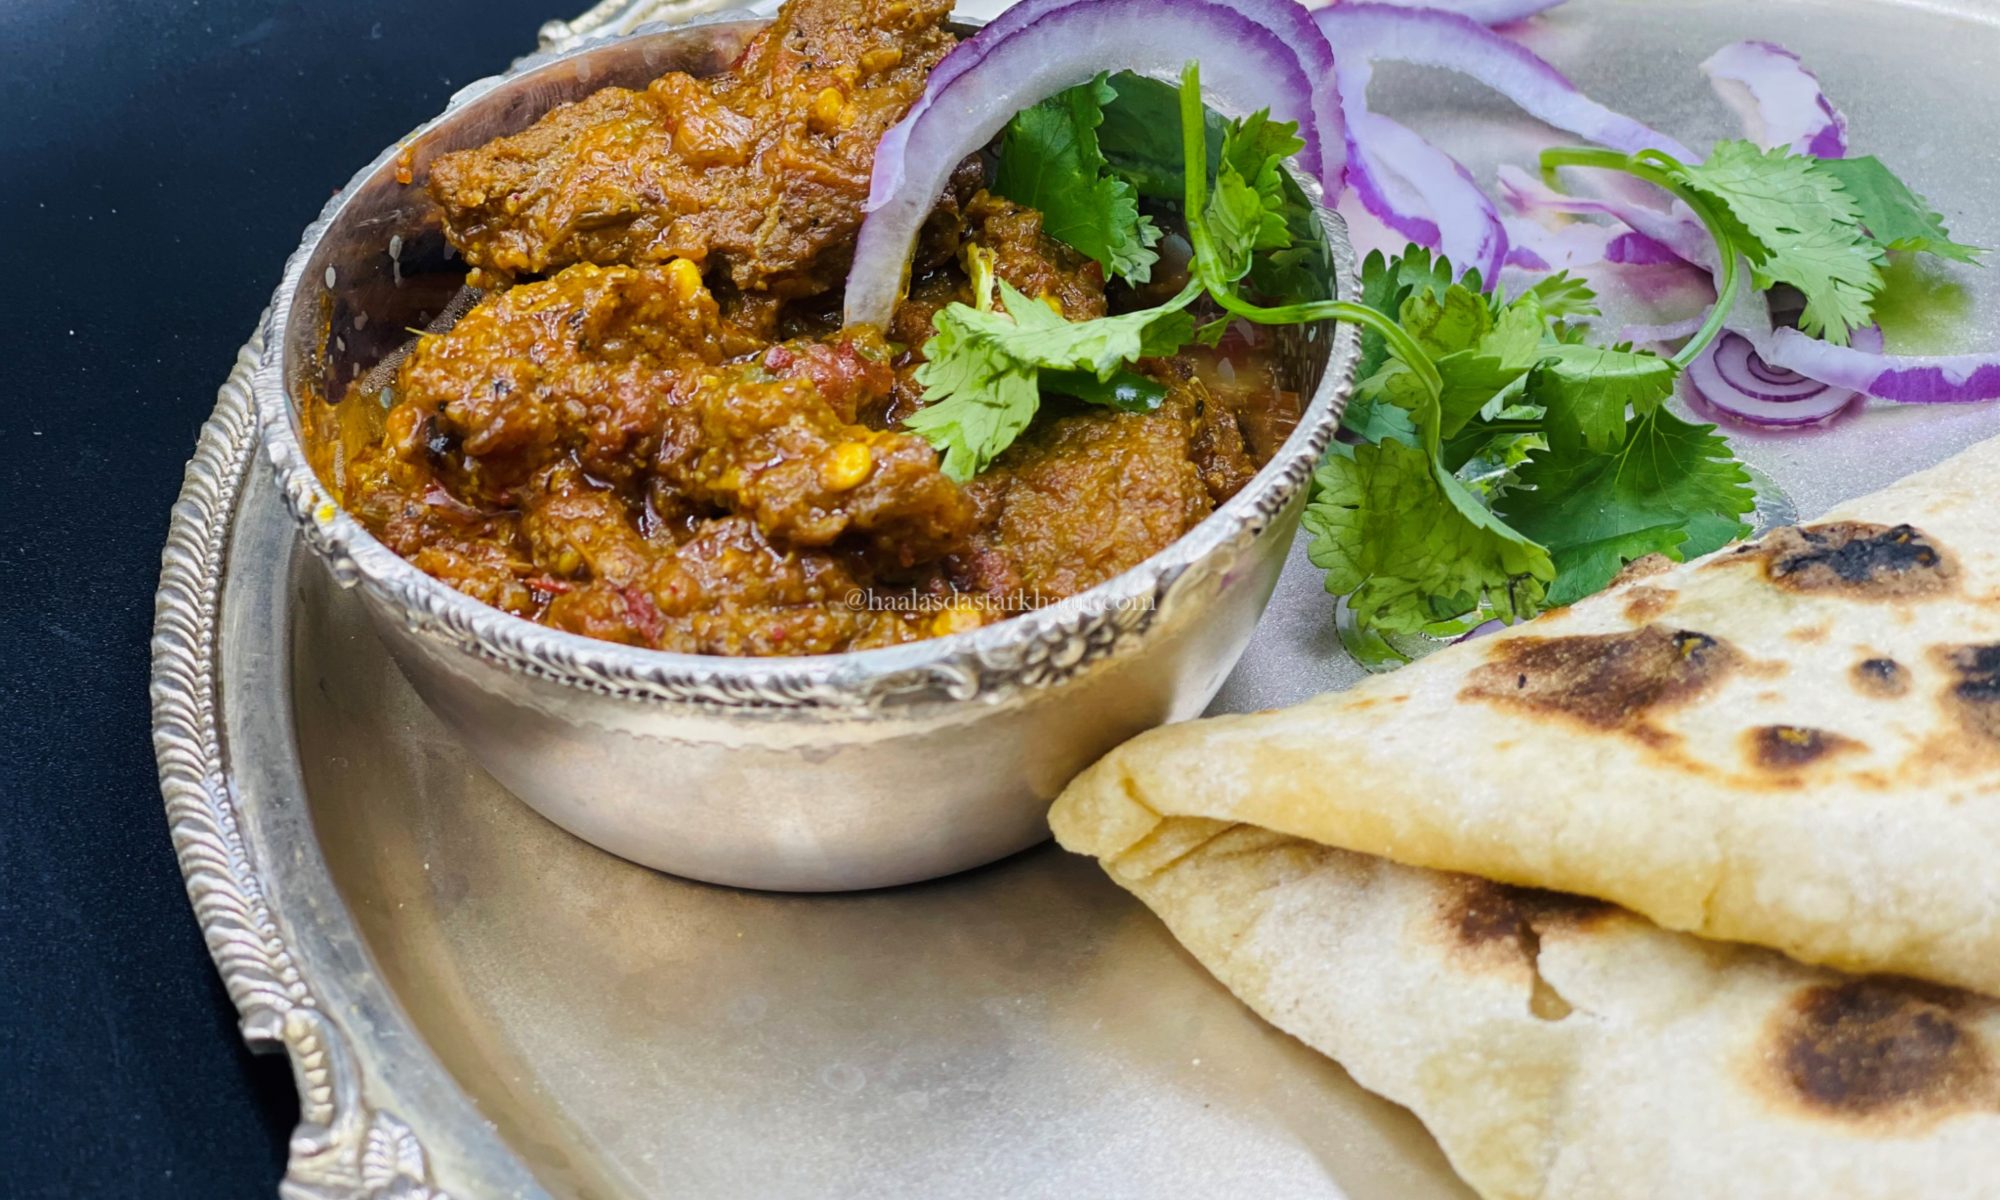
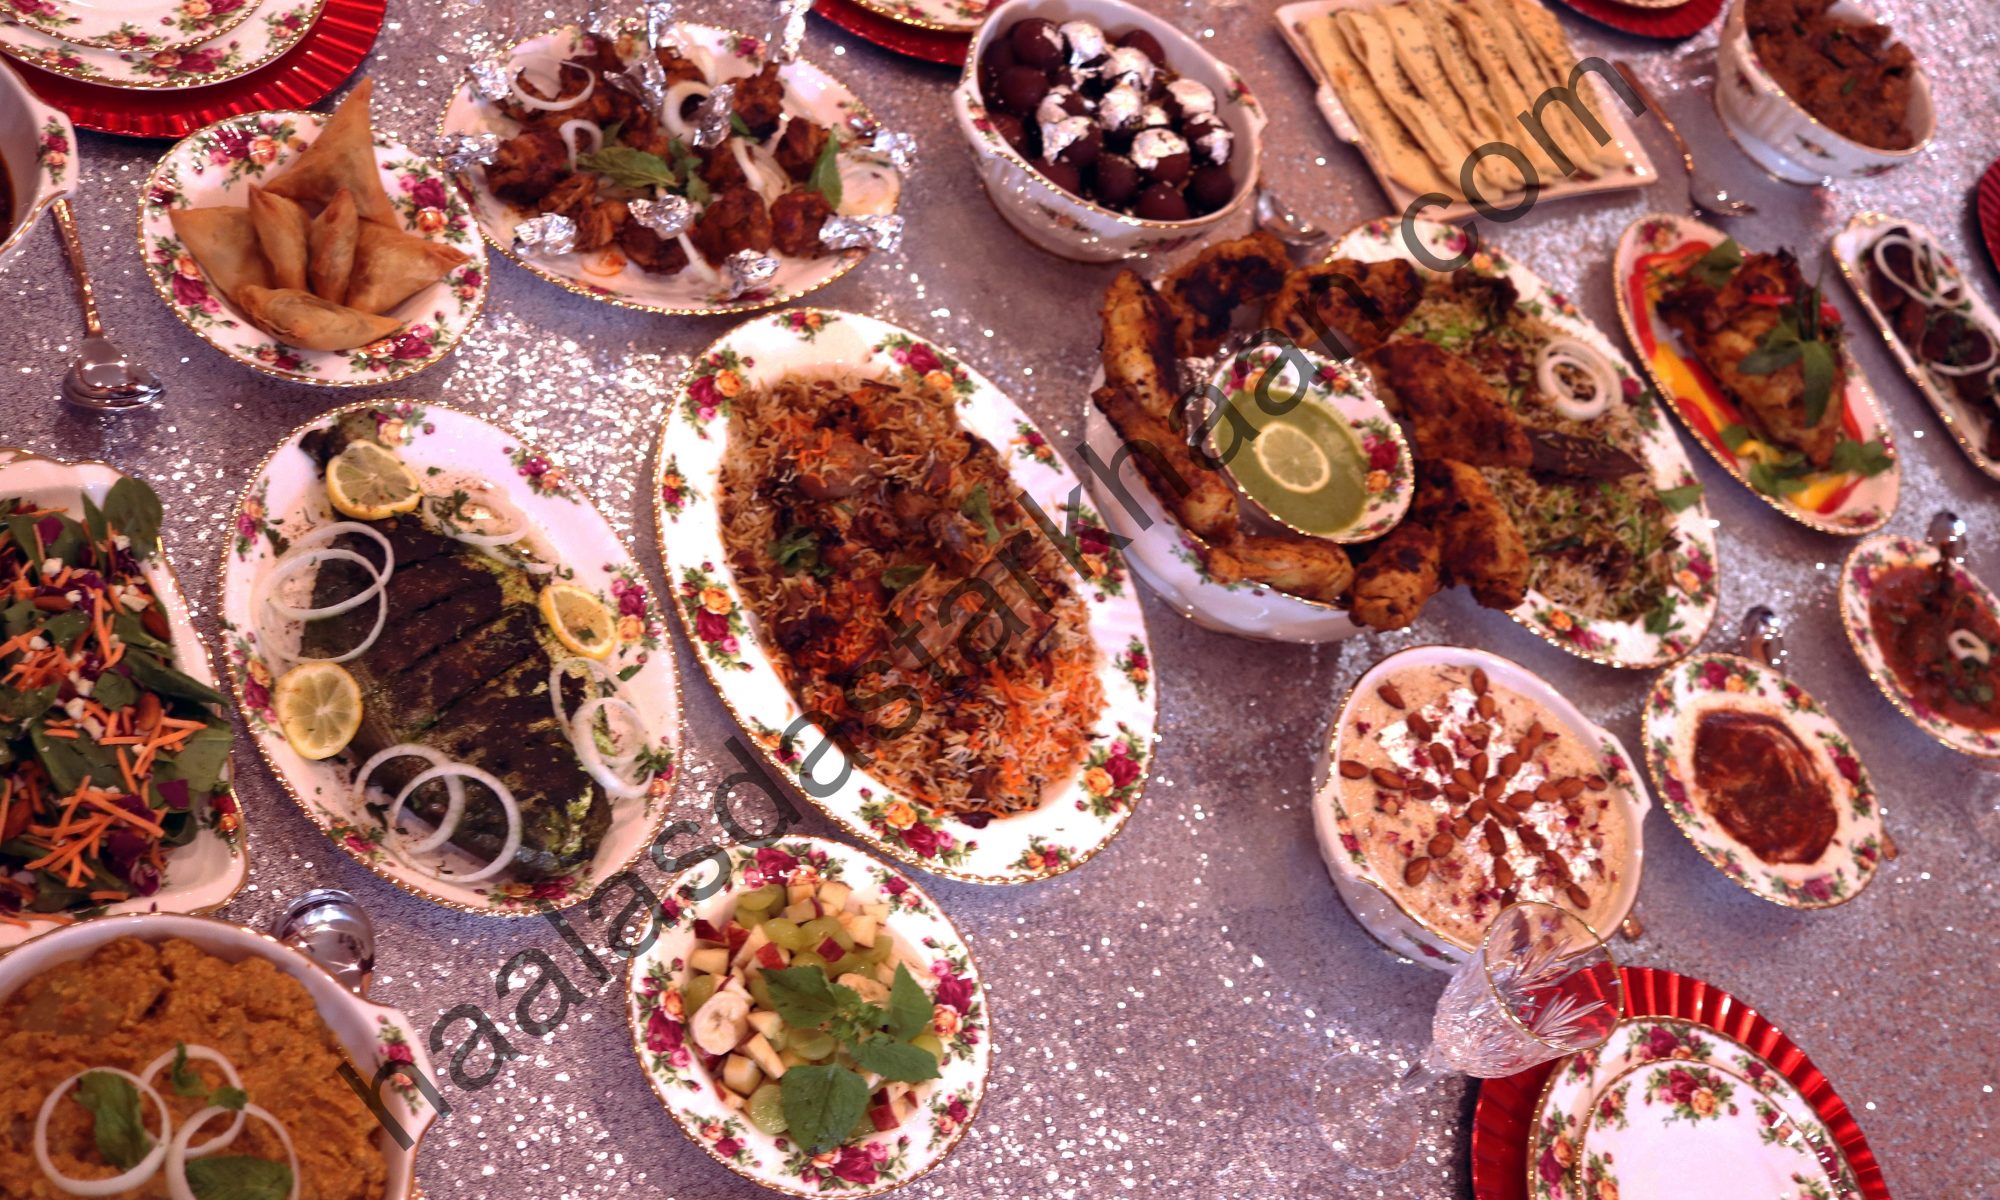
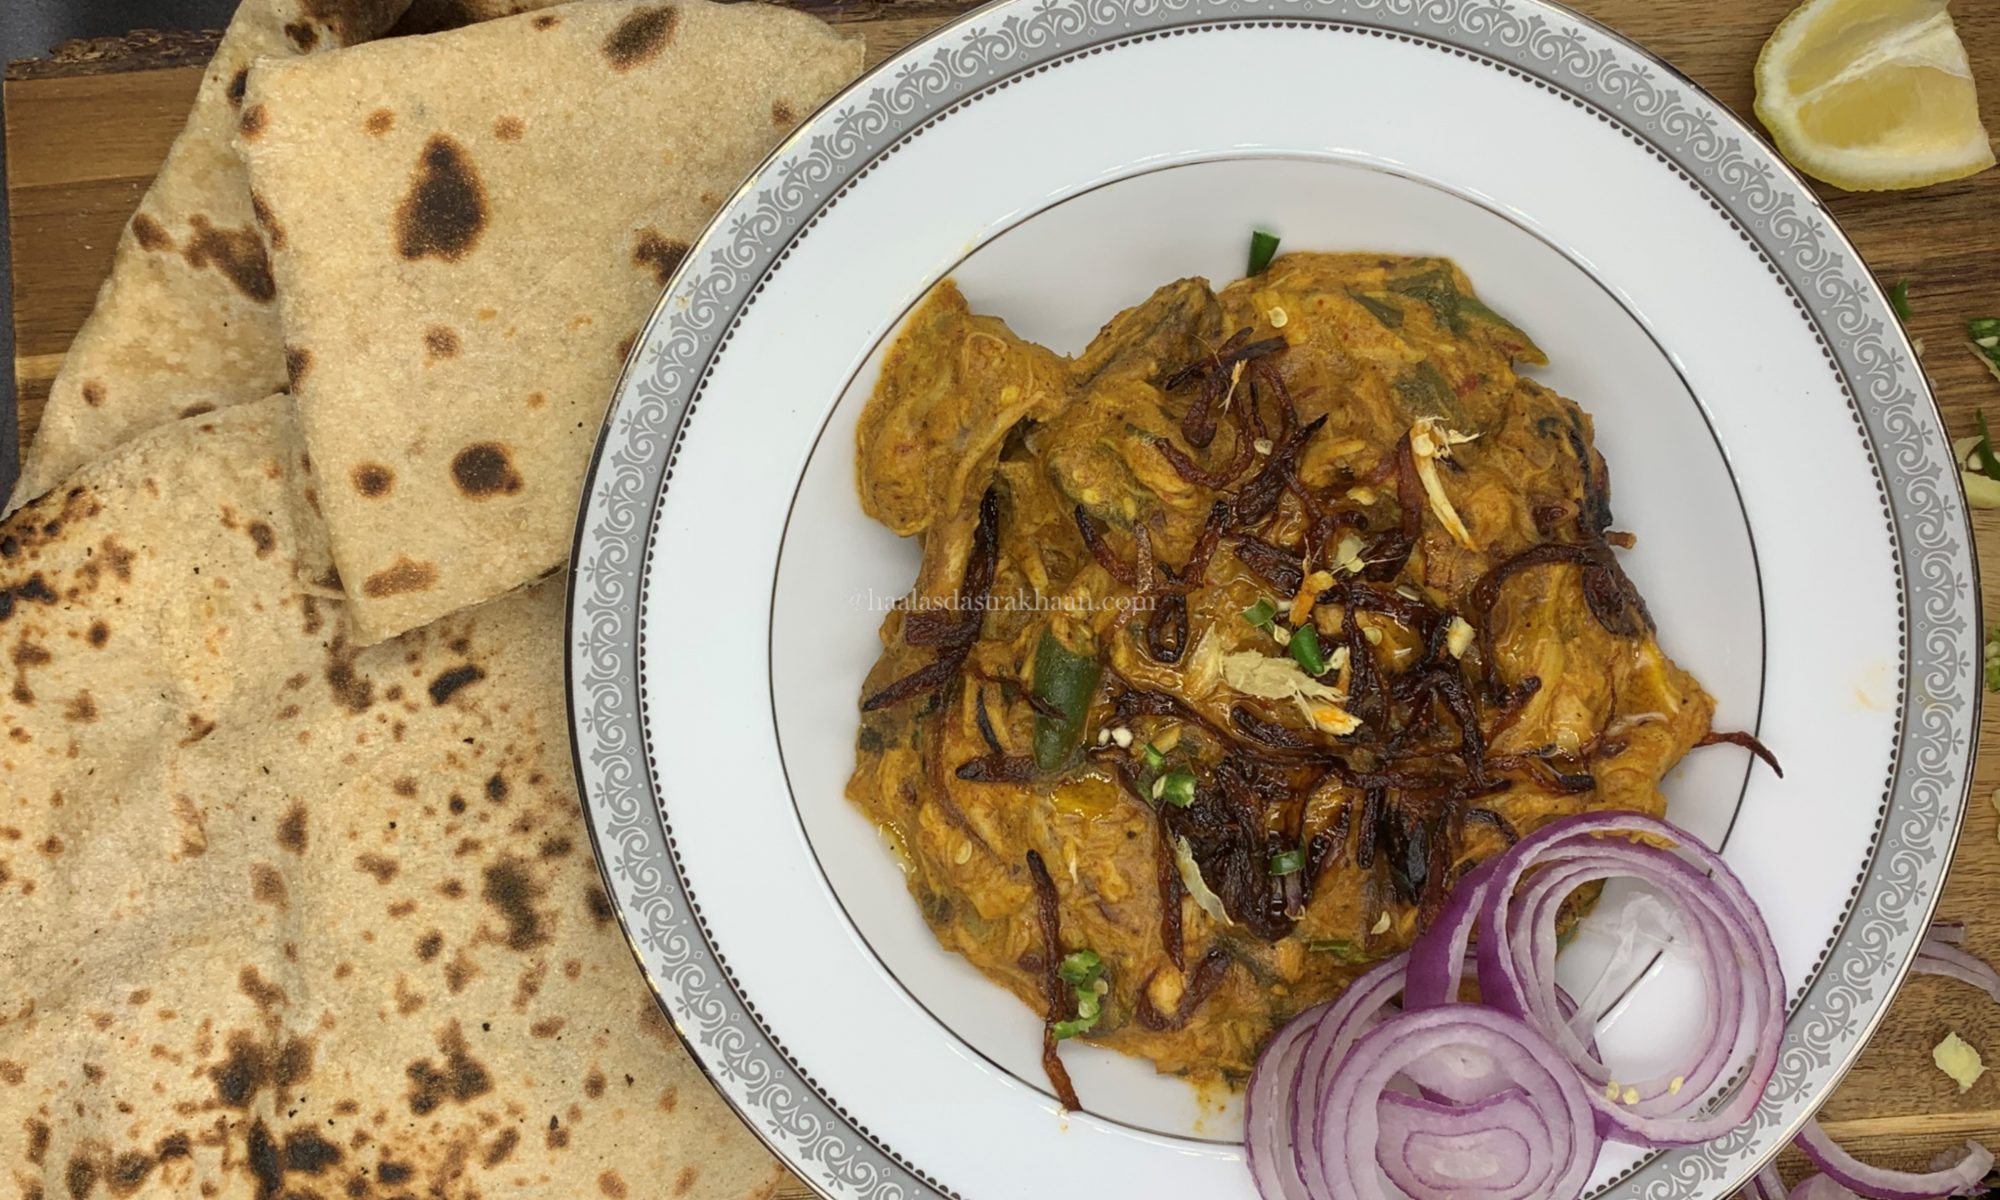
Nihari is always finished with barista—crispy fried onions—along with julienned ginger, green chilies, fresh coriander, and a final squeeze of lemon. As a teenager, I watched my mother make Nihari at home, sometimes with mutton, sometimes with chicken. I had eaten it countless times, yet never once felt the urge to cook it myself.

In the beginning, my mom relied on store-bought Nihari masala packets from Delhi. Over time, though, she began to experiment. The packets listed the ingredients, and through rounds of trial and error, she discovered the perfect balance for each spice. Before long, she was grinding her own Nihari masala—deeper, more fragrant, and far more authentic than anything that ever came out of a packet.

I’ve had Nihari more times than I can count, and it’s easily one of my all-time favorite dishes. Yet somehow, I never felt the urge to make it myself. It was only after experimenting with different chicken curries that I finally decided to try my hand at Chicken Nihari. I called my mother, asked for her spice proportions and method, and finally took the plunge.

My mother always cooked Nihari in ghee. But during a trip to Jama Masjid in New Delhi with Mr. Parveez, we learned something interesting. While chatting with the chefs and staff at a local restaurant, we discovered that traditional Delhi-style Nihari is actually cooked in mustard oil. It may sound unusual, but that is the truly authentic method.

When I finally made it myself, I couldn’t bring myself to use only mustard oil—it’s quite strong. So I balanced it with a little olive oil and still used ghee for the tempering. The result was a version that stayed true to tradition, yet felt perfectly suited to my own taste.

The spice mix is what gives Nihari its earthy aroma and deep, soulful flavor. It’s spicy, but not the kind of heat that brings tears to your eyes—rather, it’s balanced, layered, and deeply comforting. What truly elevates the dish, though, are the toppings: barista, thin slices of ginger, chopped onions, and green chilies. Don’t skip them if you want the full Nihari experience.

You can skip the fried onions and julienned ginger at the end—but I’d strongly recommend adding them. The gentle sweetness of the barista beautifully balances the spices, bringing the whole dish together. Nihari carries a long and storied history, and while the preparation may seem simple, it demands patience and care. It takes time and a little effort—but with that very first spoonful, you know it’s completely worth it.

Garlic Lemon Butter Tilapia with Shrimp

Seafood has amazing recipes. I usually don’t enjoy baked fish, as I feel baking tends to make the fish dry but this recipe for baked fish is just outstanding. This recipe doesn’t require any mayonnaise, or cheese, or any kind of flour or bread crumbs. All you need is butter, lemon, garlic, a few spices, and salt. This Fish by itself is also Keto friendly. I paired the fish with baby potatoes, asparagus, and mushrooms. I also cooked the Fish and shrimp with bell pepper and jalapenos. But the choice of vegetables is always a personal choice. You can always substitute the vegetables you like. This dish is super simple, low carb, gluten-free, and amazingly delicious.

What kind of Tilapia is good?

If you have a store that sells fresh and clan fish, there can be nothing better. That kind of seafood is the best in quality. But mostly, the fish that I buy, especially Tilapia is frozen which is good too. There is always a possibility that any fish you buy has been frozen at some point in order to keep it fresh for transport.

Frozen fish sometimes are better than the Fish that appear fresh but you don’t see them live. Frozen fish is said to be freezer right after the catch, therefore feel absolutely sure to use the fish that is frozen since it is just as good to use as a live fish, and in most cases better than fish from the counter.

Tilapia is generally best and healthy if it’s wild-caught which is the case with most seafood. Farm-raised fish is also considered very healthy. Tilapia is a great source of protein. Though if you are buying farm-raised fish, make sure you check the reputation of the farm and the kind of feed they use for their fish.

I used Shrimp for some extra flavor which I feel goes fabulously with Tilapia. Baked or grilled veggies are a great source of fiber and fill you up too. This dish is great for kids too. The dish is filling, healthy, and low in carbs. Enjoy!!!

Honey Lemon Chicken Wings

Chicken wings are an undeniable favorite for many people, yet interestingly, I had never tried them until after moving to the United States. Back home in India, chicken wings rarely featured in our everyday cuisine, particularly in the form of kebabs or appetizers.

In the beginning, chicken wings were something we only enjoyed when dining out. It was not that I had never considered making them at home—rather, while both Mr. Parveez and I liked them, we were not particularly obsessed with them. There was, however, a small halal restaurant nearby that served the most delicious green masala chicken wings. Every once in a while, we would stop by just to enjoy that flavorful treat.

A few years later, the restaurant closed its doors—and with it disappeared those memorable wings we had grown so fond of.

Yet, even then, I still wasn’t quite inspired to start making chicken wings at home. A few months later, however, we discovered another excellent halal gyro spot that served hot, saucy chicken wings. For a while, they were absolutely fantastic and quickly became a favorite. Over time, though, something seemed to change. The flavors gradually faded, and the wings no longer tasted the way they once had. I often wondered if the management had changed and a new chef had stepped in—someone who simply couldn’t recreate the original magic.

That was the moment it truly occurred to me: if I wanted to continue enjoying good chicken wings, I would probably have to start making them myself. The very first wings I prepared at home were the classic Buffalo style. The kids loved them, and before long they became a regular appetizer for brunches and playdates.

After making them for several years—and watching my little fan club grow—I began experimenting with different flavors and marinades. That experimentation led to my Green Chicken Wings, followed by Haala’s Special Hot Saucy Wings, and eventually, this version.

The inspiration behind this recipe was simple: to create a balance between sweetness and heat. It is ideal for those who enjoy a gentle kick of spice without overwhelming heat—a comforting middle ground that is flavorful, satisfying, and always a crowd-pleaser.

Why Wings?

Chicken wings are best cooked with the skin on. When pan-fried or deep-fried, the skin turns beautifully crisp, giving that perfect crunch. And honestly, any saucy flavor tastes even better when paired with that crispy texture—it’s what makes wings so irresistible.

Why use honey and not sugar?

Honey blends much better with spices than sugar. Sugar often tends to crystallize or make the sauce watery, while honey gives it body and balance. It adds just the right amount of sweetness without overpowering the flavors—making it the perfect choice for sauces and glazes.

These wings strike the perfect balance—lightly sweet, lightly spicy, and absolutely irresistible. The flavors play a little game of hide and seek on your taste buds, keeping every bite exciting. Sweet and spicy together are already a winning combo, but when paired with crispy chicken wings, the result goes beyond just delicious. If you love chicken wings, this is one recipe you’ll definitely want to try.

Korean Chicken Bites

Asian cuisine is wonderfully diverse—Chinese, Japanese, Indonesian, Thai, Malaysian, and Korean—each offering its own distinctive flavors while still sharing certain ingredients and cooking techniques. Over the years, we have enjoyed sampling dishes from many of these cuisines, though often limited to seafood. Being Muslim, staying within the boundaries of halal food can sometimes be challenging, particularly when so many tempting dishes traditionally include non-halal meats.

While I do have friends who are comfortable eating non-halal chicken or meat, for us that is simply not an option. I firmly believe that when there are ways and choices available to remain true to our beliefs, it is important to honor them. Fortunately, that has never stopped us from exploring the flavors we love. The beauty of having curious taste buds—and a genuine passion for cooking—is that you can always adapt a dish and make it your own.

This recipe was inspired by a dish I once tried with scallops and instantly fell in love with. Naturally, I made a few adjustments along the way. In its original form, the scallops were neither marinated nor batter-fried, which meant they relied almost entirely on the sauce for flavor. While the sauce itself was pleasant—mild with a gentle kick—I felt the dish could benefit from a little more depth and texture.

When I decided to recreate it using chicken, I introduced a few changes to build those extra layers of flavor. The chicken was first marinated and lightly battered to add both seasoning and a satisfying crunch. Unlike seafood, chicken tends to absorb whatever flavors you give it, so even a simple marinade with spices, seasoning, or just a touch of salt can make a remarkable difference. Whether you are adding chicken to noodles or tossing it in a sauce, that first layer of flavor is something you should never overlook.

For the chicken, begin by marinating it in a mixture of buttermilk, chili flakes, onion powder, garlic powder, black pepper, white pepper, oregano, and salt. Allow it to rest for at least an hour—longer if possible—so the flavors have time to fully penetrate the meat.

Once marinated, coat the chicken pieces in a mixture of flour, cornstarch, and a little salt, then fry them until they turn golden and crisp. This step creates a light, crunchy exterior that pairs beautifully with the sauce.

The sauce is what truly brings the dish together. It is prepared with crushed garlic and ginger, soy sauce, sesame oil, gochujang—a sweet and mildly spicy Korean chili paste readily available in most Asian markets—along with honey, brown sugar, vegetable oil, and red chili flakes. Allow the sauce to cook until it thickens slightly, then toss in the fried chicken pieces, coating them thoroughly so every bite is infused with flavor.

For garnish, scallions and sesame seeds work beautifully. While scallions can certainly be added directly to the sauce, I prefer sprinkling them on top just before serving, allowing them to remain crisp and provide a pleasant contrast in texture.

Substitute for Buttermilk?

To make buttermilk at home, take the same quantity of milk as the buttermilk required and add 1 tablespoon of lemon juice to it. Mix well and let it rest for a few minutes before adding the chicken.

The flavor of this chicken is a perfect balance of sweet and spicy, making it an excellent choice for all taste buds—kids and adults alike—unless someone prefers completely mild food. I find this dish a great hit for playdates, family gatherings, or small get-together parties.

Cooking in advance

You can fry the chicken bites and keep them in the oven. The oven needs to be preheated. Keep it on warm or at 200°F. Anything above it would overcook the chicken, making it chewy or burning it.

Thai Chicken Curry

Malaysian and Thai cuisines have always been favorites in our home, though finding halal options can sometimes be a challenge. It was actually Mr. Parveez who first introduced me to both. What I appreciate most about these cuisines is how familiar their flavors feel. There is a comforting connection between Indian food and many Southeast Asian dishes, where similar ingredients create layers of warmth and depth. Thai cuisine, for instance, often relies on ingredients such as peanuts, red chilies, and coconut milk or coconut cream, producing a beautiful balance of spice, sweetness, and richness—flavors that feel both comforting and intriguingly different at the same time.

Since we only consume seafood, we often miss out on experiencing certain dishes from various cuisines. Preparing them at home, therefore, becomes our way of exploring those flavors—and in many ways, it turns out to be a blessing in disguise. Not only does it allow us to experiment and learn new cooking styles, but it also offers a healthier approach to enjoying these dishes. Cooking at home means choosing fresh ingredients, controlling exactly what goes into the food, and serving it immediately. That freshness not only enhances the flavor but also adds genuine nutritional value, making every bite feel lighter, brighter, and more satisfying.

This particular curry is wonderfully simple to prepare. For convenience, I used a store-bought Thai red curry paste. Since it was my first time attempting this dish, I wanted to stay close to the authentic flavor profile rather than risk altering the balance of spices too much. For the vegetables, I included bell peppers, onions, scallions, and garlic, though the choice is quite flexible. Baby corn, snap peas, or other vegetables can easily be added. That is one of the joys of Thai curries—their versatility allows each cook to create a slightly different combination of flavors and textures with every preparation

Serve it with some boiled Rice and enjoy it warm.

Laal Maas

Laal Maas is a traditional dish from my hometown, Jodhpur, with roots that trace back to the royal kitchens of the Rajput families. It was once considered a prized specialty, often prepared using game meat brought back from royal hunts. Bold, fiery, and deeply flavorful, the dish reflected both the adventurous spirit of the Rajput warriors and their love for rich, robust cuisine.

Over time, Laal Maas has remained immensely popular. From the royal kitchens, it gradually found its way into restaurants across Jodhpur, where chefs continue to prepare it in their own distinctive styles—introducing subtle variations while still honoring the essence of the original recipe.

This version is my personal interpretation, inspired by the many places where I have tasted Laal Maas and the flavors that stayed with me long after the meal. Interestingly, many people outside Rajasthan assume that Laal Maas is a common everyday dish in non-vegetarian households, particularly among the Muslim community. In reality, it belongs to the royal culinary heritage of Jodhpur and is more closely associated with the Rajput kitchens than with daily home cooking.

When preparing this dish, I prefer to lightly boil the mutton before starting the curry. This step helps reduce the overall cooking time and allows the meat to absorb the spices more effectively, resulting in tender, juicy pieces of mutton infused with flavor in every bite.

Traditionally, Laal Maas is cooked in generous amounts of ghee—something Rajasthani cuisine takes great pride in. The richness of ghee adds a distinctive depth and aroma that defines the dish. However, I usually combine a little oil with the ghee, as cooking entirely in pure ghee can feel quite heavy by today’s standards. Of course, if you want the most authentic experience and are not worried about the calories, feel free to prepare it entirely with ghee. And if you prefer a lighter approach, you can cook it with oil and simply finish with a teaspoon of ghee for that signature aroma.

Despite its bold reputation, this recipe is relatively straightforward to prepare and approachable even for beginners—while still delivering the rich, unforgettable flavors that make Laal Maas such an iconic dish.

This recipe is relatively easy to make and can be prepared by beginners, with truly delicious flavors.

Chicken ke Sholay

Among the many varieties of chicken kebabs we have tried—both homemade and at restaurants—this particular one holds a special place in our memories. It comes from one of our favorite restaurant chains, with several branches across New Jersey and neighboring states. Before long, it became a family favorite, the kind of dish we would almost automatically order whenever we visited.

Then, quite unexpectedly, the branch closest to our home closed down. Anyone living in the United States knows that distances here can feel relative—but when we say five miles, that truly counts as “close.” Losing that nearby spot was certainly disappointing.

Still, moments like these often come with an upside: they inspire you to recreate the dishes you love in your own kitchen. I like to think of it as a small test of our culinary instincts—a chance to discover what we are capable of creating ourselves. And so, I decided to try making these irresistible bites at home.

It took a few attempts to get them just right, but when you genuinely love food and enjoy experimenting with spices, the process itself becomes part of the pleasure. The real challenge lies in finding that perfect balance of flavors—the exact level of seasoning and spice that captures the memory of the original dish.

In the end, those little kitchen experiments often lead to something even more rewarding: new favorites at the family table—dishes that are not only delicious, but made with care and love, which somehow makes them taste even better.

Tava Tangdi Chicken Kebab

My experiments with kebabs always have to be innovative, unique, and, of course, absolutely delicious. My boys love tasting every new version I create, and their excitement is what keeps me inspired to keep experimenting. After making so many styles of chicken kebabs, it can be challenging to come up with something new using the same familiar spices. But that’s the real beauty of cooking — the discovery that timing, technique, and order can transform the very same ingredients into completely different flavors.

One of the most fascinating things I’ve learned is how much difference it makes when you change when a spice is added or how long it cooks. A quick sauté versus a slow roast, a short rest versus an overnight marinade — each step reshapes the final dish. These Tangdi Kebabs are a perfect example of that idea. They require hardly any marination time, yet they turn out deeply flavorful, juicy, and satisfying.

That’s exactly why this recipe has become one of my favorites for busy days or unexpected company. When guests arrive without much notice — or when the dinner menu is decided at the last minute — these kebabs come to the rescue. They look impressive, taste indulgent, and come together with minimal effort. Best of all, you don’t need an oven or any special equipment, just a pan and a handful of everyday ingredients.

For this version, I used chicken legs and named them Tangdi Kebabs, but the recipe is flexible. Boneless chicken works beautifully too, especially thigh or leg meat. I don’t recommend using chicken breast here; because the marination is short and the spice blend is simple, breast meat can become thick and slightly chewy. Thigh meat, on the other hand, stays tender, juicy, and absorbs the flavors much more effectively.

This recipe is also wonderfully beginner-friendly. Whether you’re new to cooking, living on your own, or simply looking for something quick yet impressive, these kebabs are hard to get wrong. They prove that you don’t need complicated techniques or exotic ingredients to create something memorable — just a little confidence, a few good spices, and a willingness to experiment.

If you try this recipe, I’d love to hear how it turns out for you. Cooking is always more fun when it’s shared. Enjoy! 🍗✨

Paav Bhaaji

For me, Pav Bhaji is not just a dish — it’s a memory, a time capsule that takes me straight back to childhood.

I still remember when the Pav Bhaji trend first arrived in my town. I was in elementary school, and almost overnight it became everyone’s favorite food. The rich aroma, the buttery pav, the vibrant, spicy bhaji — it felt exciting and new, like a taste of a bigger world arriving in our quiet little city. My whole family fell in love with it instantly, especially me.

I never got to experience it the way many people did — standing at a bustling roadside stall, eating straight off a hot griddle. I always wanted to, but in the small town where I grew up, it wasn’t considered proper for women to eat at street-side vendors. It sounds like something from another era, yet it wasn’t that long ago — just a few decades. Writing about it now, I’m amazed at how much my town has changed since then. The transformation is exciting, but also a little unsettling.

Small towns have a magic of their own. Life moves slower, people are warmer, and relationships feel closer. Back then, I could walk down the street and run into dozens of familiar faces — neighbors, shopkeepers, school friends, distant relatives. Today, I might still see just as many people, but that easy sense of connection feels softer, almost faded. Progress brings many good things, but sometimes it quietly takes a few precious ones away too.

Since I couldn’t go to the stalls, my father would bring Pav Bhaji home as takeaway, and those evenings felt like celebrations. We would gather around, tearing into buttery pav, scooping up the spicy bhaji, savoring every bite. Eventually, my mother began recreating it at home using store-bought Pav Bhaji masala, and soon her version became just as beloved. Over time, she developed her own blend — simple, balanced, and deeply comforting. It’s the same masala I still use today, and every time I cook with it, it feels like bringing a piece of her kitchen into mine.

I’ve made Pav Bhaji countless times over the years, and it never loses its charm. My mother liked to add a variety of vegetables — cauliflower, carrots, peas — making it wholesome and hearty. I, however, prefer a simpler version with just potatoes and bell peppers. Somehow, that minimal approach brings me closer to the bold, buttery street-style flavor that first captured my heart.

The pav in this recipe are homemade too, and they’re surprisingly easy to make. If you follow the steps carefully, you’ll be rewarded with soft, pillowy buns that rival any bakery version. Of course, these buns are wonderful with many dishes, but paired with bhaji, they become something truly special.

For the best experience, slice the buns in half, spread a generous layer of butter, sprinkle a little Pav Bhaji masala, and toast them on a hot tava or pan until golden and fragrant. That simple step transforms them completely — crisp on the outside, soft on the inside, and infused with buttery spice.

Some foods nourish the body. Others nourish the heart. For me, Pav Bhaji does both.

Click and make your own Paav at home

Homemade Buns / Paav – Haala’s Dastarkhaan

Chicken Veggies oven special

With all the different kinds of foods that we consume, at times you just feel that your tummy needs a break. You feel you need more veggies, less oil, fewer carbs, in all just a healthy meal. But, the problem that people like me face is that we also need something that tastes scrumptious and good along with all the health benefits.

Specially, if you have children as demanding as mine, you basically fight a battle. When the demand is to make veggies look more appealing and to make their protein go leaner without them noticing. That’s when dishes like this are invented.

This Chicken is marinated with spices making it flavorful. The spices can always be switched or played around with. I added Tandoori powder and Red chili powder to make the flavors a little more spicy, but you can always reduce the quantity or omit the spices altogether. I find this a great recipe for easy lunch and dinner.