Lucknowi Mutton Korma

Lucknowi Mutton Korma: A Dish That Feels Like Royalty

There’s something about Lucknowi food that feels like poetry—graceful, layered, and deeply comforting. The first time I made Lucknowi Mutton Korma, I wasn’t just cooking a dish—I was stepping into a legacy. A legacy of Nawabi kitchens, slow-cooked flavors, and the kind of elegance that doesn’t shout, but lingers.

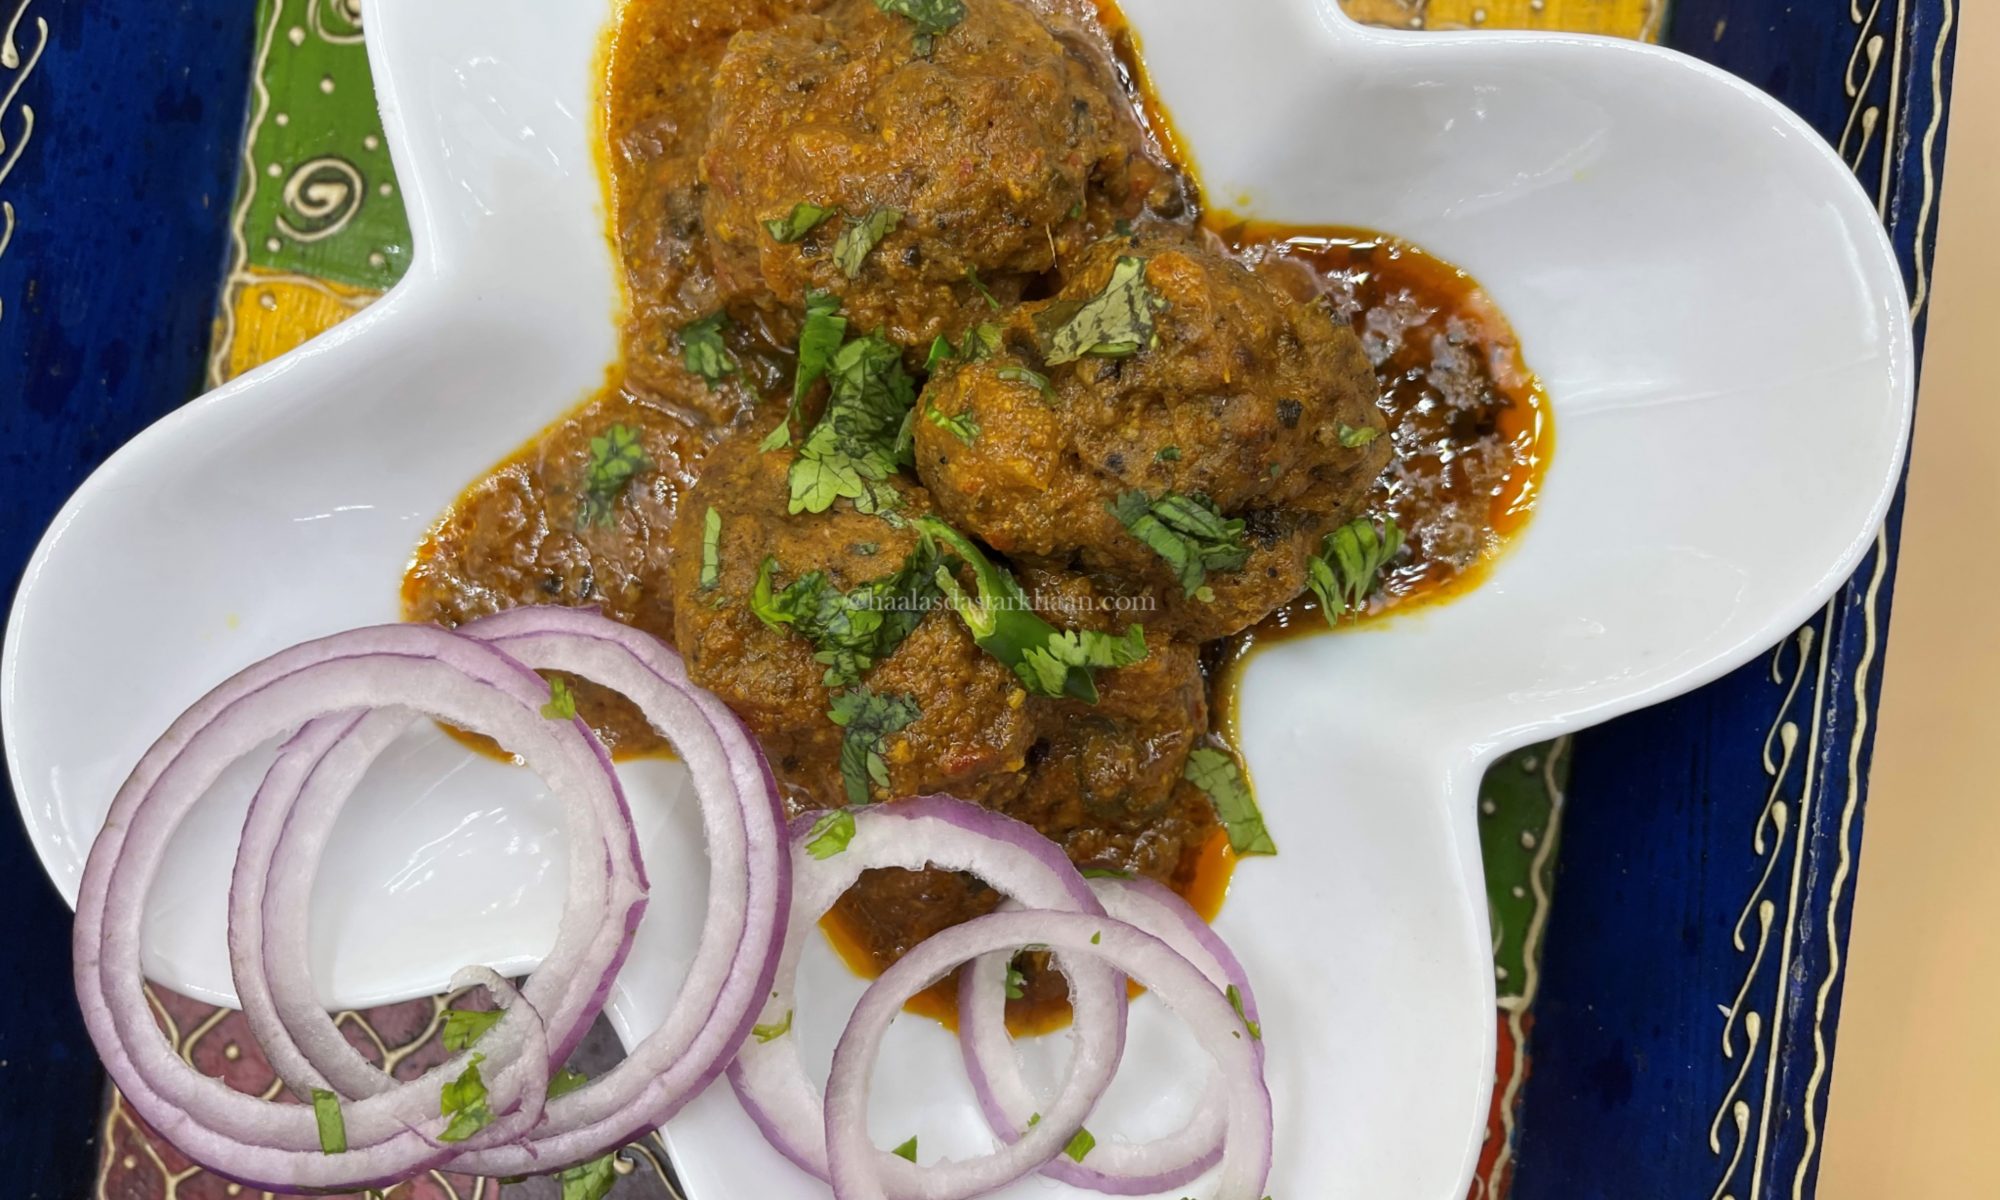
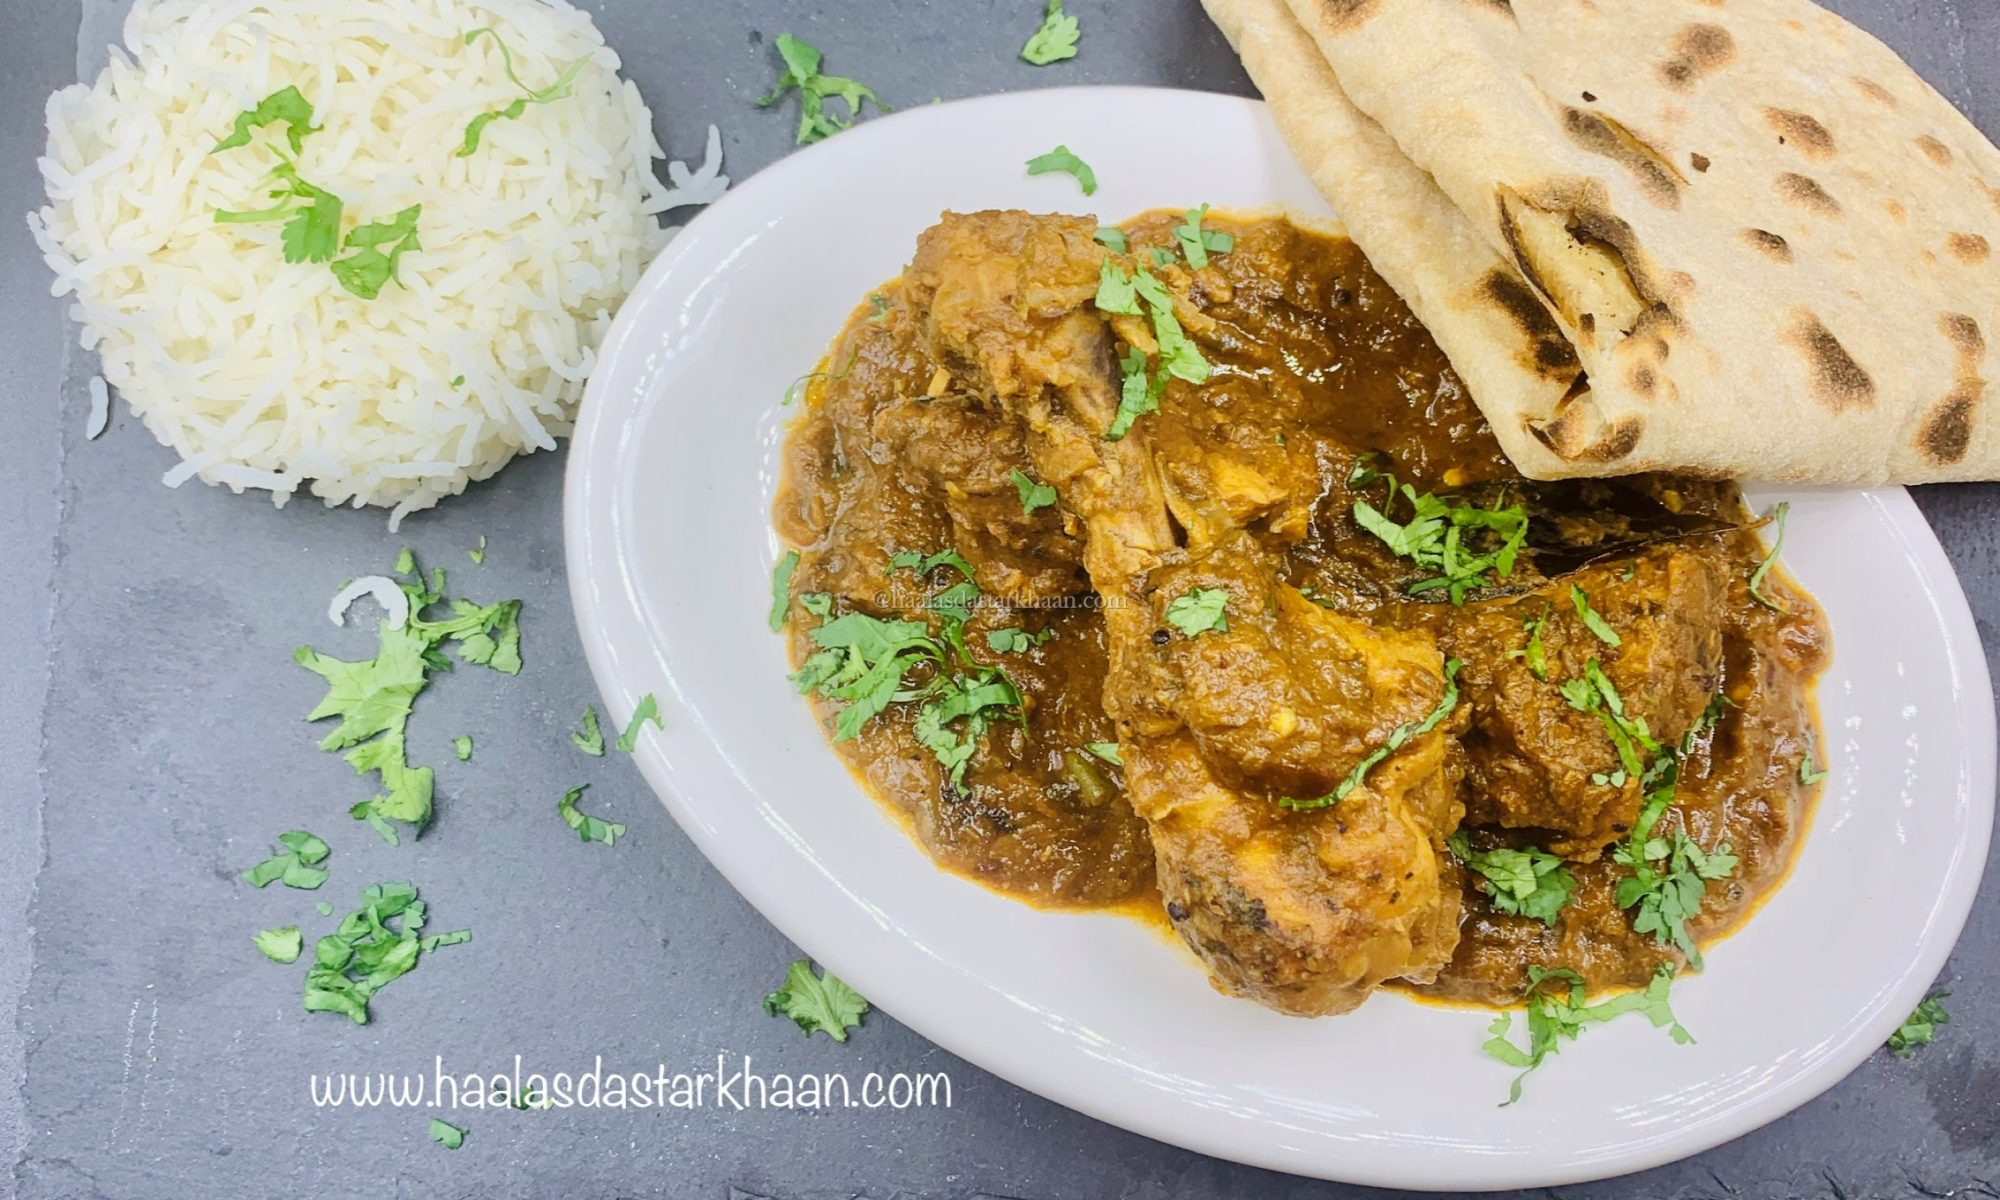
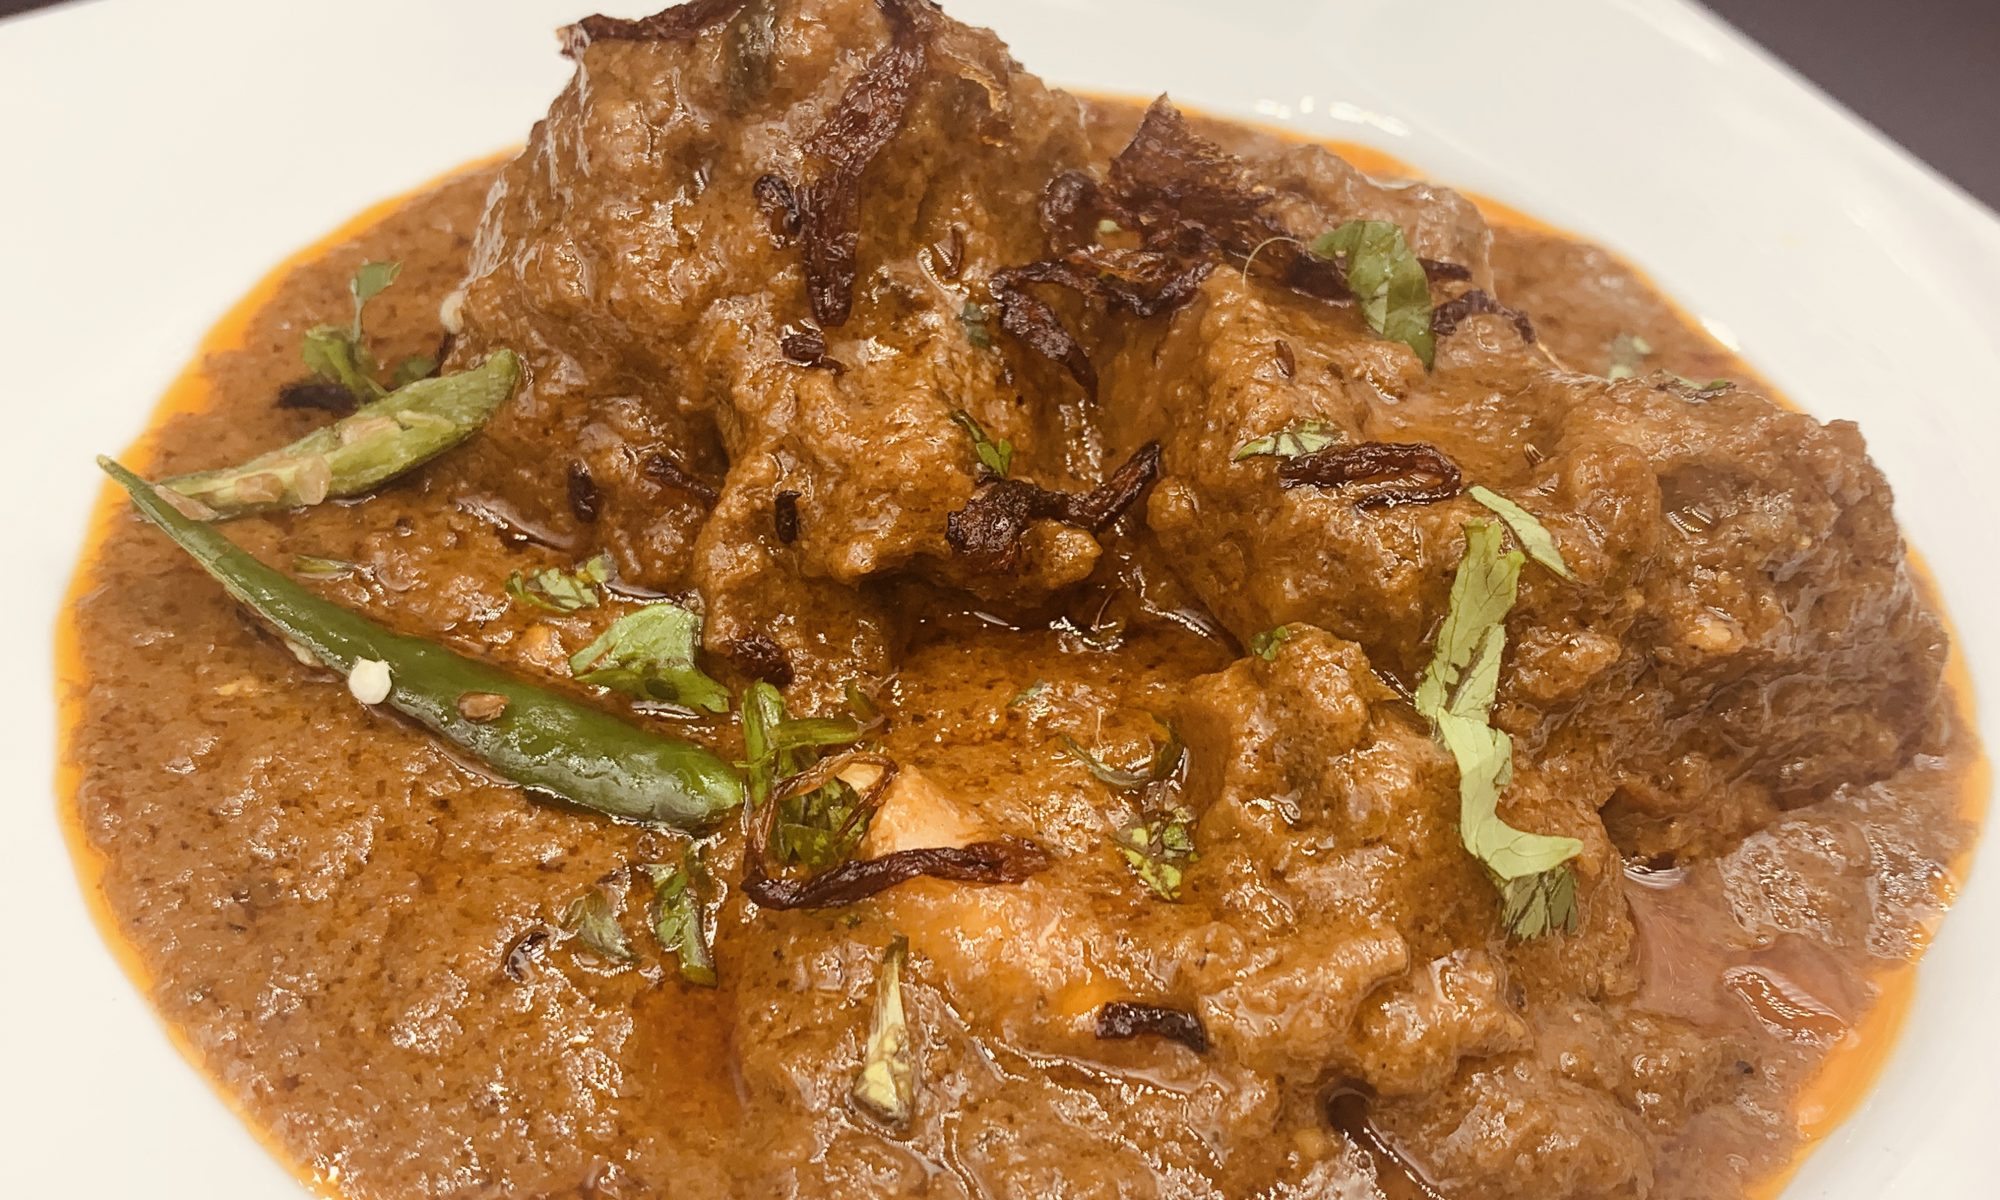
This korma isn’t fiery or bold—it’s gentle, aromatic, and rich in a way that feels regal. The mutton is simmered until tender, wrapped in a velvety gravy made from browned onions, yogurt, and a delicate blend of spices. I add a touch of cashew-almond paste for depth, and finish it with saffron and kewra water—because some dishes deserve that final flourish.

What I love most is how this dish invites patience. It asks you to slow down, to let the flavors build quietly. And when you finally lift the lid, the aroma alone tells you it was worth the wait.

In our home, this isn’t just a recipe—it’s a celebration. Of heritage, of craft, and of the joy that comes from cooking with intention.

The Royal Flavors of Lucknow

Lucknow is renowned for its delicious and lip-smacking food. The biryanis and curries perfected in the kitchens of the Nawabs are what elevate India’s non-vegetarian cuisine to something truly regal. These dishes aren’t just meals—they’re legacies, passed down through generations of khansamas (royal chefs) who mastered the art of slow cooking, delicate spicing, and luxurious presentation.

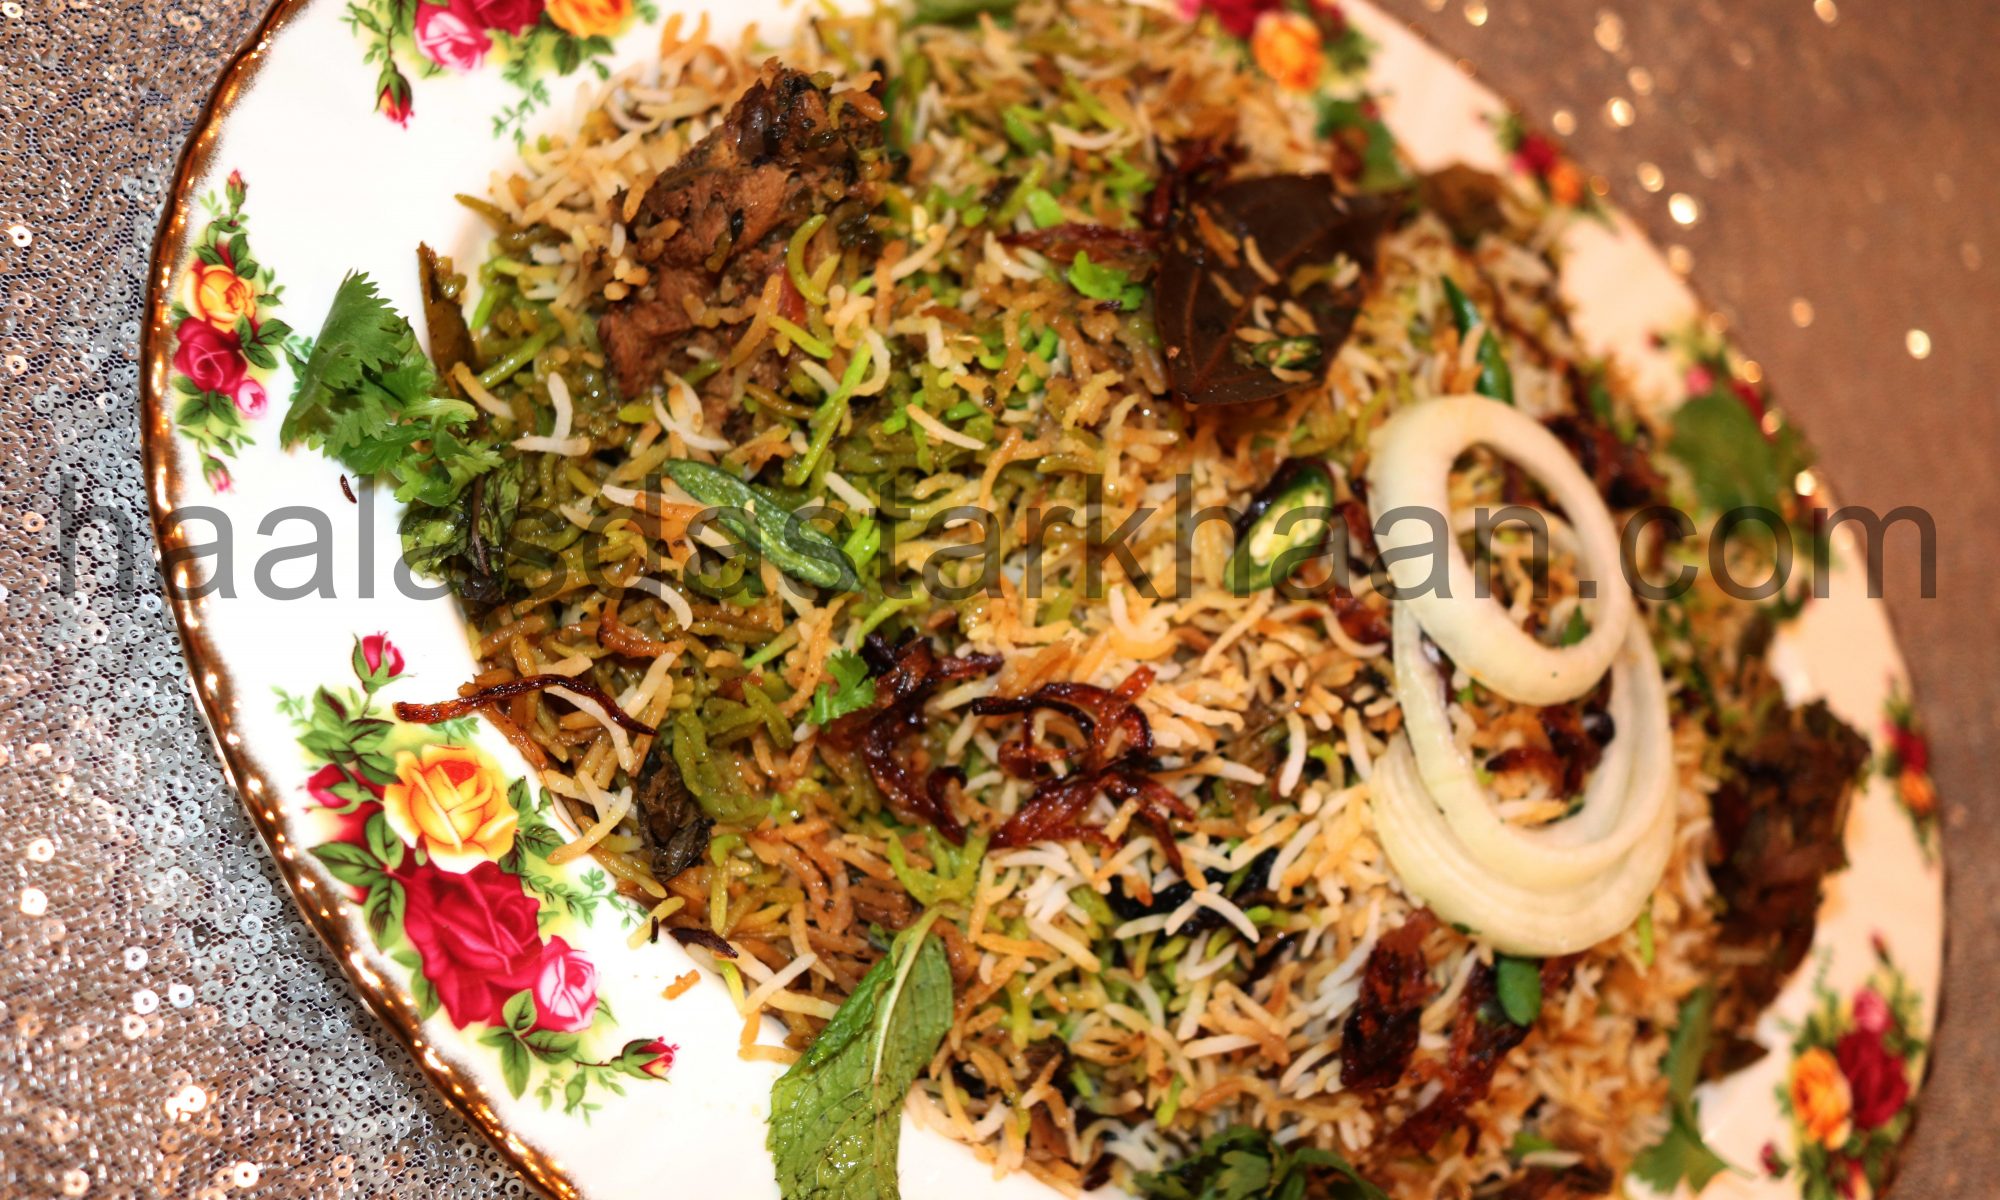
While the Nizams of Hyderabad and the Mughals of Delhi also left behind rich culinary traditions, Lucknow’s Awadhi cuisine stands apart for its subtlety and refinement. The Nawabs of Awadh developed a style that was less fiery than Mughlai food, yet deeply aromatic and layered. Think of melt-in-the-mouth Galouti Kebabs, saffron-laced Lucknowi Biryani, and creamy Mutton Korma—each dish a testament to patience, precision, and poetry on a plate.

The influence of Persian techniques, Mughal grandeur, and local ingenuity combined to create a cuisine that’s both opulent and soulful. From the use of kewra water and rose essence to the slow dum cooking method, every detail was crafted to please not just the palate, but the senses.

Lucknowi Mutton Korma: A Royal Affair

  • Origin: Rooted in the kitchens of Awadh, this korma was traditionally served during royal feasts and special occasions. It’s known for its subtle spice profile and luxurious texture.
  • Key Ingredients:
    • Mutton (bone-in)
    • Yogurt for the velvety base
    • Browned onions for depth
    • Cashew-milk powder-almond paste for richness
    • Fragrant spices: cardamom, cloves, cinnamon, mace
    • Kewra water and saffron for that signature aroma
  • Flavor Profile: Mild yet complex, with a gentle heat from Kashmiri red chilies and a nutty, creamy undertone. The spices are aromatic, not overpowering, allowing the mutton to shine.

Mutton Kofta Curry

A Dish My Father Loved

Mutton Koftas—minced meatballs simmered in a rich, spicy gravy—were one of the special dishes my mother made when I was growing up. I remember the aroma filling our home, the warmth of the kitchen, and my father savoring every bite with quiet joy.

For me, it was a dish I liked, but never craved. It wasn’t something I’d ask for on my birthday or during celebrations. But for my father, it was comfort food. If you asked him to name a favorite, I’m certain Kofta Curry would be near the top of his list.

Even though it wasn’t my personal favorite, it became special because of him. It’s funny how food does that—how a recipe becomes a memory, a connection, a tribute.

Koftas: A Journey Through Empires and Kitchens

Koftas—minced meatballs seasoned with spices—have traveled far and wide, leaving their mark on countless cuisines. Though their exact origin is hard to pin down, the word kofta comes from the Persian kufta, meaning “to pound” or “to grind”—a nod to the preparation of the meat2.

While early Arab cookbooks featured lamb koftas glazed with saffron and egg yolk, it was the Mughal Empire that brought this dish to the Indian subcontinent, transforming it into a rich, spiced curry. In India and Pakistan, koftas evolved into a variety of gravies—bland, spicy, creamy—each tailored to regional tastes and ingredients.

Today, koftas are beloved across the Middle East, Balkans, Central Asia, and North Africa. From Turkish köfte to Greek keftedes, Moroccan lamb koftas to Indian nargisi kofta, each version tells a story of cultural exchange and culinary creativity.

Whether grilled, baked, or simmered in gravy, koftas remain a dish of comfort and celebration. And in your kitchen, Haala, they carry the added weight of memory—your father’s joy, your mother’s touch, and your own evolving relationship with the dish.

🍖 Bangalore Kofte: A Recipe Rooted in Love and Reinvention

After we got married, Mr. Parveez introduced me to Bangalore Kofte—a dish made with minced mutton, seasoned with spices, gently steamed, and then fried to perfection. These koftas are often served on their own, or paired with a warm parantha or roti. In our family, they’re a cherished part of Eid-ul-Adha celebrations, loved by everyone at the table.

Learning to make them was more than just mastering a recipe—it was a moment of connection, a passing down of flavor and tradition. But as my culinary journey unfolded, and I began exploring new dishes and revisiting familiar ones, I found myself drawn to reinterpret the flavors I grew up with.

So I returned to the kofta, this time through the lens of Kofta Curry—infusing it with the spices, textures, and stories I’ve gathered along the way. It’s a dish that reflects not just where I come from, but how far I’ve come.

And now, I’m sharing it with you. Because every recipe carries a memory, and every bite is a step in the journey.

Preparing the Mutton Koftas

Start with minced mutton and grind it further to achieve a finer texture. This helps the meatballs hold together better and gives them a smoother finish.

To this, add a flavorful paste made by blending fried onions, ginger-garlic, fresh coriander leaves, and a slice of bread. A spoonful of roasted chickpea flour goes in as well—both the bread and the flour help absorb excess moisture, making the mixture easier to shape.

Mix in your spices and ensure everything is well combined. Cover the mixture and refrigerate for about 20 minutes. This resting time allows the flavors to meld and makes shaping the koftas much easier.

The koftas shouldn’t be too spicy, or else the spicy koftas served with the spicy gravy become hard to handle. This dish might look difficult, and you might find the steps a little tedious to follow if you are a beginner, but if you follow the steps correctly, you can make this dish easily.

Cook’s Note

When preparing koftas, balance is key. If the meatballs are too spicy and the gravy is equally bold, the dish can become overwhelming. A gentle hand with the spices allows the flavors to complement each other rather than compete.

This recipe may look a bit intricate at first glance, especially if you’re new to cooking. The steps might seem tedious—but trust the process. If you follow each stage with care, you’ll find that it’s absolutely achievable. The result is a dish that’s rich, comforting, and deeply satisfying.

Good food isn’t about shortcuts—it’s about patience, intention, and love. And this dish is worth every bit of it.

Chicken Kulthi Curry [Kutt ka Salan]

Chicken and Lentils: A Surprising Love Story

Some dishes sound absolutely strange at first—but then you taste them, and they completely win you over. This is one of those dishes.

When my husband, Mr. Parveez, first told me about a curry made with chicken and lentils, I was skeptical. I assumed it was one of those nostalgic favorites—something he loved simply because he grew up eating it. To me, the idea of cooking chicken with lentils felt like a waste of perfectly good chicken.

But curiosity (and love) got the better of me. I gave it a try.

And to my surprise, the flavors were beautifully balanced. The lentils added a gentle earthiness, the chicken brought richness, and together they created a dish that was hearty, comforting, and absolutely delicious.

Sometimes, the most unexpected combinations turn out to be the most memorable.

From Stable to Table: The Story Behind a Humble Chicken Curry

Let’s get to the root of this dish’s story.

The lentils used here are horse gram—a hardy, protein-rich legume known for its earthy flavor and nutritional value. I make everything from scratch, and trust me, it’s not difficult to do. But back home in Bangalore, the tradition is even more rustic.

Yes, you read that right: the horse gram is soaked and boiled at the stables. The lentils themselves are fed to the horses, while the nutrient-rich water—the liquid left behind after boiling—is brought home. That humble broth, often with a few lentils still floating in it, becomes the base for a chicken curry that’s surprisingly rich, flavorful, and deeply satisfying.

It’s a dish born from resourcefulness, shaped by tradition, and elevated by taste. And once you try it, you’ll understand why something that sounds so unusual can taste so extraordinary.

Horse Gram & Chicken: A Dish I Never Expected to Love

I had never tried this dish back in Bangalore—and to be honest, I never really looked forward to it either. It just didn’t sound tempting. Cooking chicken with lentils? It felt like a mismatch, a waste of good chicken.

But one fine day, while grocery shopping, we stumbled upon horse gram daal. Mr. Parveez lit up instantly—nostalgia in full bloom. That meant we’d be starting from scratch, with no idea how to get the daal to the right cooking stage.

Thankfully, one of my sister-in-laws came to the rescue. She suggested soaking the daal overnight and then boiling it with turmeric powder, cumin powder, salt, and red chili powder until soft. She advised using just the water with about 25% of the daal, discarding the rest.

But I couldn’t bring myself to throw away the lentils. So I kept them—and ground them into a paste.

That small decision changed everything. The paste added body, depth, and a beautiful earthiness to the curry. What started as a hesitant experiment turned into a dish I now cherish. It’s a reminder that sometimes, the best flavors come from trusting your instincts.

Chicken Ghee Roast

Among the many kebabs and roasts we prepare and enjoy, Mutton Ghee Roast has always held a special place in my kitchen. Recently, I experimented with a chicken variation, and to my delight, it proved to be exceptionally flavorful.

What makes this version particularly appealing is its simplicity. Despite delivering the bold, signature taste that ghee roast is known for, it comes together relatively quickly and without elaborate preparation. For those moments when you crave something deeply satisfying yet manageable on a busy day, this chicken ghee roast is truly a dependable choice.

The ghee roast spice blend is a true pantry essential, keeping well for up to two months when stored in an airtight container. I often prepare a larger batch whenever I make the dish, and it has proven invaluable for those spontaneous cravings.

One of the greatest strengths of ghee roast lies in its versatility. Whether paired with mutton or chicken, the masala adapts beautifully, delivering the same signature depth, warmth, and richness in every preparation.

Traditionally, ghee roast is served as a side dish or appetizer, where its bold flavors can take center stage. Personally, however, I find it especially satisfying alongside simple dal chawal, where the richness of the roast complements the comforting simplicity of the meal.

If you prefer to leave the preparation slightly saucy rather than cooking it down completely dry, it also pairs beautifully with soft phulkas, making it a versatile addition to both everyday meals and special spreads.

Chicken Nihari

Nihari is a traditional Muslim delicacy with its roots in the royal Mughal kitchens. Over time, different regions embraced the dish and added their own local twists, creating the rich variations we enjoy today.
The name Nihari comes from the Persian word “Nahar,” meaning early morning—and true to its name, this slow-cooked, aromatic stew was traditionally enjoyed for breakfast.

It’s a rich, hearty dish—and honestly, it makes perfect sense that it was served in the morning. With its deep spices and slow-cooked meat, Nihari can feel a bit too indulgent for any other meal. Its true flavor unfolds only with time. Traditionally, chefs would let it simmer overnight, allowing the spices and meat to meld beautifully. While that may not always be practical today, patience still makes all the difference. Cooking Nihari gently on low heat in a heavy-bottomed pan brings out its signature depth, aroma, and soul—what truly makes this dish so special.

Nihari is always finished with barista—crispy fried onions—along with julienned ginger, green chilies, fresh coriander, and a final squeeze of lemon. As a teenager, I watched my mother make Nihari at home, sometimes with mutton, sometimes with chicken. I had eaten it countless times, yet never once felt the urge to cook it myself.

In the beginning, my mom relied on store-bought Nihari masala packets from Delhi. Over time, though, she began to experiment. The packets listed the ingredients, and through rounds of trial and error, she discovered the perfect balance for each spice. Before long, she was grinding her own Nihari masala—deeper, more fragrant, and far more authentic than anything that ever came out of a packet.

I’ve had Nihari more times than I can count, and it’s easily one of my all-time favorite dishes. Yet somehow, I never felt the urge to make it myself. It was only after experimenting with different chicken curries that I finally decided to try my hand at Chicken Nihari. I called my mother, asked for her spice proportions and method, and finally took the plunge.

My mother always cooked Nihari in ghee. But during a trip to Jama Masjid in New Delhi with Mr. Parveez, we learned something interesting. While chatting with the chefs and staff at a local restaurant, we discovered that traditional Delhi-style Nihari is actually cooked in mustard oil. It may sound unusual, but that is the truly authentic method.

When I finally made it myself, I couldn’t bring myself to use only mustard oil—it’s quite strong. So I balanced it with a little olive oil and still used ghee for the tempering. The result was a version that stayed true to tradition, yet felt perfectly suited to my own taste.

The spice mix is what gives Nihari its earthy aroma and deep, soulful flavor. It’s spicy, but not the kind of heat that brings tears to your eyes—rather, it’s balanced, layered, and deeply comforting. What truly elevates the dish, though, are the toppings: barista, thin slices of ginger, chopped onions, and green chilies. Don’t skip them if you want the full Nihari experience.

You can skip the fried onions and julienned ginger at the end—but I’d strongly recommend adding them. The gentle sweetness of the barista beautifully balances the spices, bringing the whole dish together. Nihari carries a long and storied history, and while the preparation may seem simple, it demands patience and care. It takes time and a little effort—but with that very first spoonful, you know it’s completely worth it.

Paav Bhaaji

For me, Pav Bhaji is not just a dish — it’s a memory, a time capsule that takes me straight back to childhood.

I still remember when the Pav Bhaji trend first arrived in my town. I was in elementary school, and almost overnight it became everyone’s favorite food. The rich aroma, the buttery pav, the vibrant, spicy bhaji — it felt exciting and new, like a taste of a bigger world arriving in our quiet little city. My whole family fell in love with it instantly, especially me.

I never got to experience it the way many people did — standing at a bustling roadside stall, eating straight off a hot griddle. I always wanted to, but in the small town where I grew up, it wasn’t considered proper for women to eat at street-side vendors. It sounds like something from another era, yet it wasn’t that long ago — just a few decades. Writing about it now, I’m amazed at how much my town has changed since then. The transformation is exciting, but also a little unsettling.

Small towns have a magic of their own. Life moves slower, people are warmer, and relationships feel closer. Back then, I could walk down the street and run into dozens of familiar faces — neighbors, shopkeepers, school friends, distant relatives. Today, I might still see just as many people, but that easy sense of connection feels softer, almost faded. Progress brings many good things, but sometimes it quietly takes a few precious ones away too.

Since I couldn’t go to the stalls, my father would bring Pav Bhaji home as takeaway, and those evenings felt like celebrations. We would gather around, tearing into buttery pav, scooping up the spicy bhaji, savoring every bite. Eventually, my mother began recreating it at home using store-bought Pav Bhaji masala, and soon her version became just as beloved. Over time, she developed her own blend — simple, balanced, and deeply comforting. It’s the same masala I still use today, and every time I cook with it, it feels like bringing a piece of her kitchen into mine.

I’ve made Pav Bhaji countless times over the years, and it never loses its charm. My mother liked to add a variety of vegetables — cauliflower, carrots, peas — making it wholesome and hearty. I, however, prefer a simpler version with just potatoes and bell peppers. Somehow, that minimal approach brings me closer to the bold, buttery street-style flavor that first captured my heart.

The pav in this recipe are homemade too, and they’re surprisingly easy to make. If you follow the steps carefully, you’ll be rewarded with soft, pillowy buns that rival any bakery version. Of course, these buns are wonderful with many dishes, but paired with bhaji, they become something truly special.

For the best experience, slice the buns in half, spread a generous layer of butter, sprinkle a little Pav Bhaji masala, and toast them on a hot tava or pan until golden and fragrant. That simple step transforms them completely — crisp on the outside, soft on the inside, and infused with buttery spice.

Some foods nourish the body. Others nourish the heart. For me, Pav Bhaji does both.

Click and make your own Paav at home

Homemade Buns / Paav – Haala’s Dastarkhaan

Bangalore Muslim Kheema

Kheema curry can be prepared in countless ways, each region and family giving it a personality of its own. Growing up in Rajasthan, the kheema I knew was always my mother’s — simple, comforting, and almost always reserved for picnics and long road trips. She would typically make Kheema with aaloo (potatoes) or Kheema with matar (peas). What I never saw in her kitchen was a version loaded with multiple vegetables together.

I do remember her mentioning that my grandmother liked adding cauliflower to kheema, though I don’t recall ever tasting it myself. And to be honest, I’ve never attempted it either — mostly because Mr. Parveez isn’t a fan of cauliflower. Some culinary traditions quietly skip a generation, especially when family preferences step in.

Then there were the unforgettable versions from our travels. In Old Delhi, near the Jama Masjid area, we would wake up early just to enjoy a hearty breakfast of kheema served with hot tandoori roti. Sometimes it would be accompanied by nahari or paaye — rich, slow-cooked dishes that could turn any ordinary morning into something special. Another favorite that captured my heart was Mumbai’s Kheema Paav, with its slightly tangy tomato base, often made with chicken, and served with buttery toasted buns. Those breakfasts are memories I still cherish, and recipes for both the kheema and the paav will be coming soon.

But the recipe I’m sharing here is completely different from all of those. This one comes from Mr. Parveez’s family — a style of kheema commonly prepared in many Bangalore Muslim homes. Passed down from his mother, we fondly call it “Ammi wala Kheema,” because it carries her unmistakable touch and warmth.

The preparation begins with finely chopped onions slowly sautéed in oil or ghee along with fragrant whole spices. Ginger-garlic paste follows, then the goat kheema, ground spices, and tomatoes. What truly sets this version apart, however, is the generous addition of vegetables — potatoes, beans, fresh fenugreek leaves, and dill leaves — all simmered together until the flavors meld beautifully. The herbs add a depth and freshness that makes this dish both hearty and uniquely aromatic.

Although it’s traditionally enjoyed as a breakfast dish, this kheema is wonderfully versatile. It tastes just as delicious for lunch or dinner, served with roti, bread, or even rice. Comforting, wholesome, and deeply rooted in family tradition, this “Ammi wala Kheema” is more than just a recipe — it’s a piece of home on a plate. 🍲✨

Pyaaz Ke Samose

I’m from Rajasthan, and I grew up eating samosas as a regular part of life. The classic potato samosa — aaloo ke samose — was everywhere, and every shop seemed to have its own signature flavor. Some were absolutely delicious, others not so much, but one thing I always loved was the crisp, flaky outer crust. In fact, for a long time, that was my favorite part. The only filling I truly adored back then was the kheema samosa my mom used to make at home.

I never enjoyed bland fillings, so whenever the spice level was low, I would lose interest quickly. Over time, as I tasted more varieties, I realized that it was the spicy, punchy samosas that won my heart every single time.

After I got married, I discovered a completely new favorite. During one Ramadan in Bangalore, we tried the famous Ramadan special onion samosas — Pyaaz ke Samose — and instantly fell in love with them. Crisp, aromatic, slightly sweet from the onions, and perfectly spiced, they were unlike any samosa I had eaten before.

There’s a common misconception that Ramadan food for Muslims is mostly non-vegetarian, but that couldn’t be further from the truth. Our iftar tables are filled with a beautiful mix of vegetarian and non-vegetarian dishes, each with its own tradition and story. These onion samosas are a perfect example — simple ingredients transformed into something truly special.

They are most commonly made during Ramadan, though a few Muslim shops prepare them year-round. Still, there’s something about foods made in that month — perhaps the anticipation, the hunger, the togetherness — that makes them taste extra special. It’s a flavor that’s hard to recreate outside that atmosphere.

Since we don’t get these samosas where we live now, I decided to try making them at home. After several rounds of trial and error, I finally arrived at a version that tastes just the way we remember — crispy on the outside, flavorful on the inside, and utterly addictive.

If you enjoy onion samosas and want to recreate that Ramadan magic in your own kitchen, I highly recommend giving these a try. I hope you love them as much as we do. 🥟✨

Mutton Ghee Roast

With the wide variety of Kebabs that we make, we love kebabs made from meat the most. I love the way meat Kebabs are always so juicy and tender and absorb all the flavors so naturally. The texture of meat and the spices blend in so well together. I am sure if you look into details of cooking that when it comes to Kebabs, meat Kebabs definitely make to the top of the list. I have heard a lot of people liking Beef too, but since I have never cooked or consumed beef, I don’t really have an idea. But I do think that since Beef has a lot of fat, cooking with its own fat must be adding more flavor to it.

Coming back to Ghee Roast. I came across some cuisine where they mentioned the dish and showed how the meat is boiled till it’s cooked. after roasting the whole masalas, they are ground to a powder, and then the meat is cooked in ghee with spice powder, onions, curry leaves, and green chilies. This dish is pretty easy to make and makes it to my top ten list of easy and flavorful kebabs.

The best thing about these kebabs is that they can be partly premade a few days in advance as well. You can boil the mutton a few days in advance and refrigerate or freeze it, depending on how many days you want to use it. Similarly, you can always dry roast the whole masala and grind them and store them in a dry and airtight container. These kebabs are juicy, moist, flavorful, and go really well as a side dish or by itself. If you are a fan of meat kebabs, you will love the scrumptious chunks of flavorful meat. Enjoy!!!

Bharwaan Bhindi

Some recipes are simple, yet I never get amazed when people still ask me ways to cook them. Its just that simplest things sometimes look complicated. Starting with the story for this dish, its funny, hilarious and true. I don’t like Bhindi.

Out of all the vegetables that could ever be grown, Bhindi has been my least favorite. Actually, its on my “Hit list”. I always felt the seeds looked like raw teeth. Yeah please do not ask me the concept of Raw teeth. I am sure its an outcome of my over intelligent brain. So, seeds looked like teeth, then it was too green and I never liked that shade of green. I mean come one, I need to come up with a better excuse, but that is the expression of a 5 year old. And the last one was, that I felt it was too gluey and chewy. Altogether, I convinced my mother enough for her to understand that consuming this vegetable would either kill me after the first bite, or definitely give me food poisoning.

The funnier part is that when I started venturing out in the kitchen, and cooked varieties, Bhindi was one of the best veggies I cooked and it was loved immensely and I was asked to cook it more often. I would always happily oblige despite the fact that I would never dare to taste what I made and was loved so much. Think of it as a coincidence or perfect soulmates, Mr. Parveez doesn’t like Bhindi either, so I never felt the need to cook it. Until recently, we just decided on eating more greens and we both thought that Bhindi/Okra was worth another try. And, we did end up trying a few different recipes and I am sharing the ones that we enjoyed the most.

So this recipe, of course requires Okra, along with that we need Onions, green chilies, cumin seeds, Dry red chilies and a few dry spices. I usually wash and pat dry my Okra. After mixing in the dry spices, I slit the Okra and add the spice mix to them. After adding oil to the pan, add cumin seeds, onions and green chilies and further add the Okra with the spice mix. You can also use baby onions and slit and add masala to them too. This curry is dry and goes really well with Phulka/Roti or as a side curry with Daal – Chawal.