Andhra Shrimp Dry

Shrimp seem to be everyone’s favorite. But my first bite was a disaster. I was eight, visiting family friends in Mumbai—Bombay, back then. They served shrimp curry for dinner. The flavor was mild, almost timid, but I hated it instantly. One bite in, and I was running to spit it out. Right there, I swore I’d never touch shrimp again.

That promise held for years. Growing up in Jodhpur, seafood was never really on the table. Fresh catch was a rarity, and shrimp didn’t exist in my world at all.

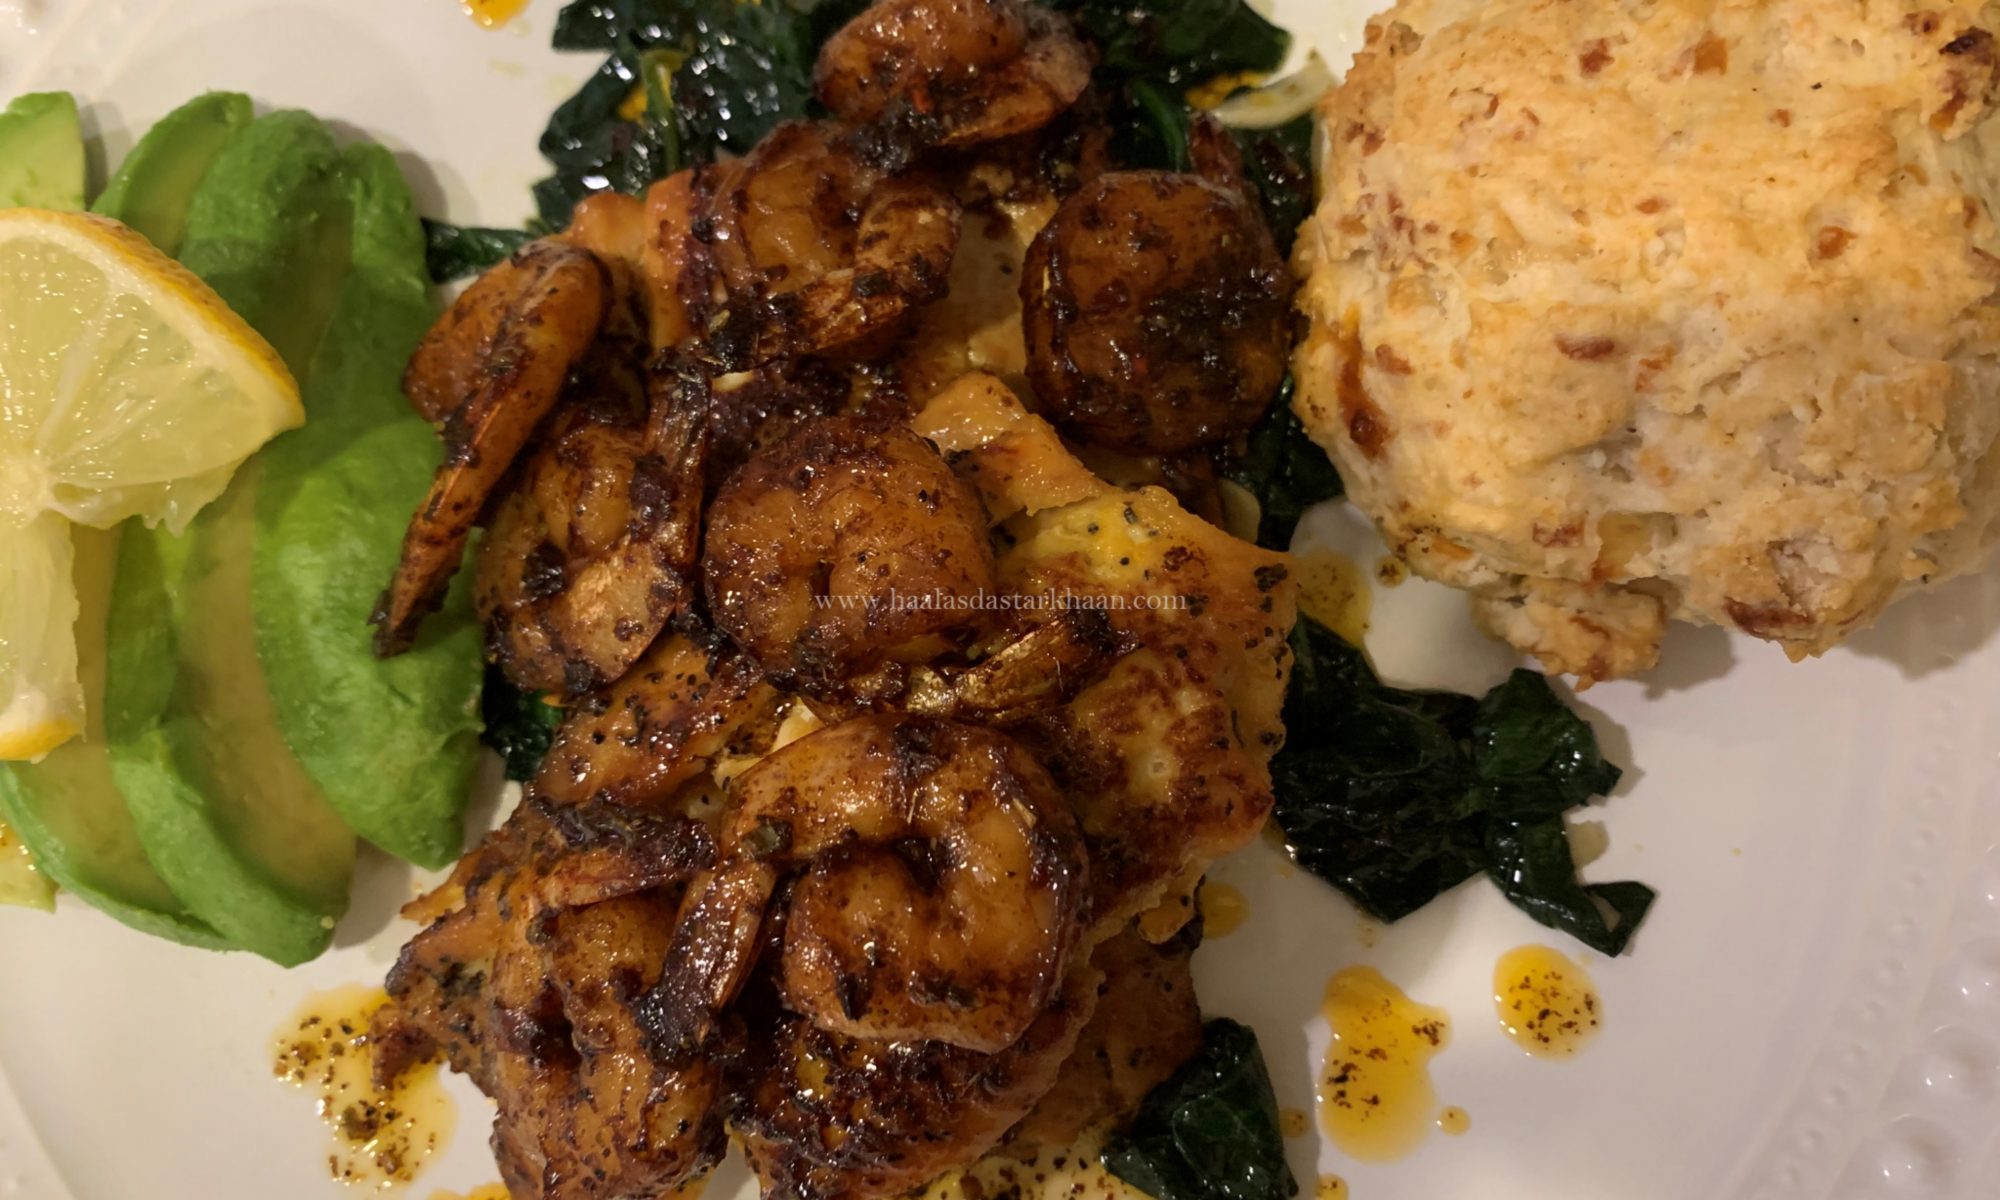
It wasn’t until my early twenties, back in Mumbai with my parents, that everything changed. My father took me to a small restaurant in Juhu and ordered tandoori shrimp. Reluctantly, I tried it. Oh my God—what a revelation. Smoky, spicy, charred just right. In a single bite, all those bitter childhood memories were erased. I was in love. To this day, I thank my late father for insisting I give shrimp a second chance.

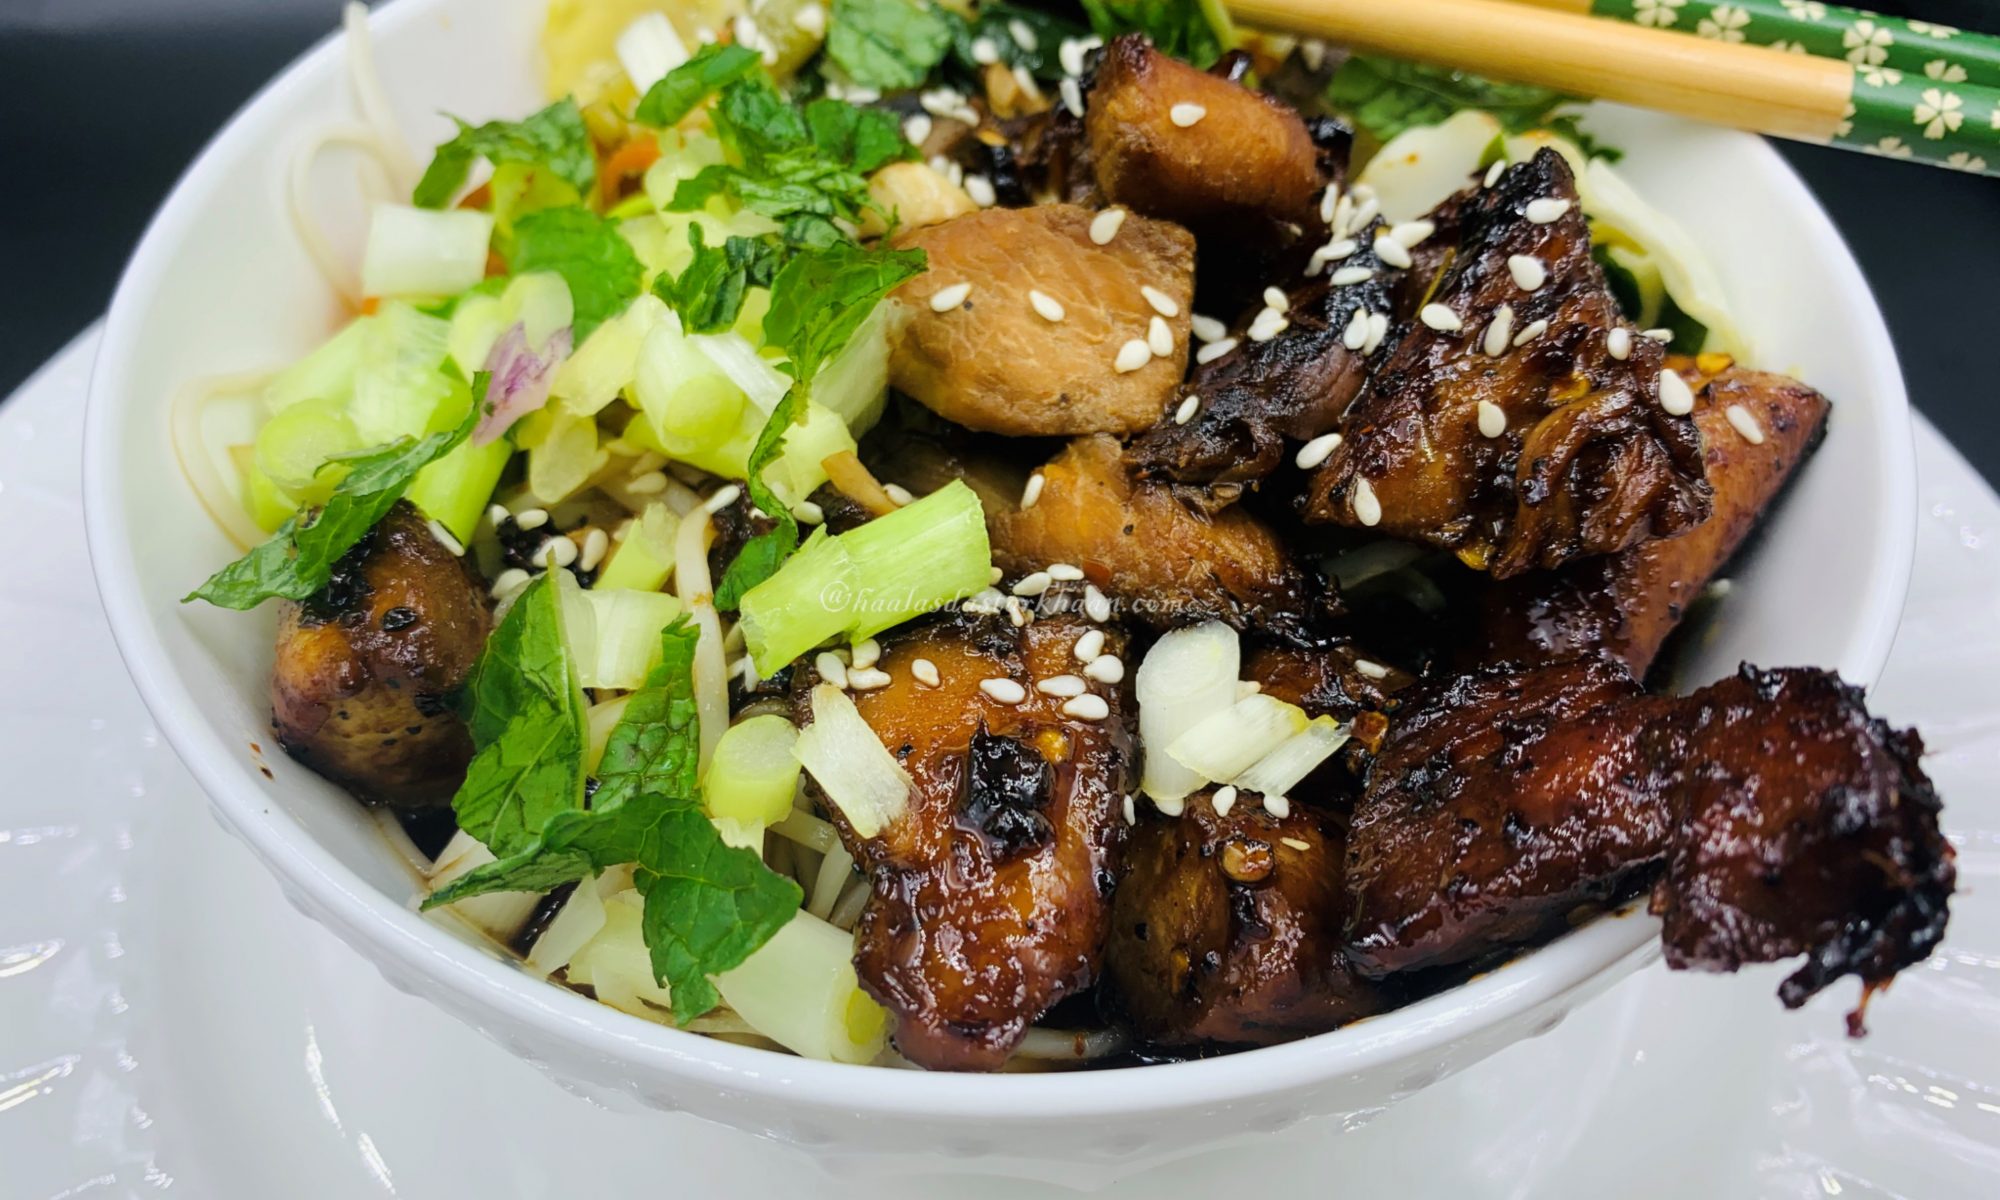
Years later, after I married and moved to the U.S., shrimp became more than a dish—it became a staple. As Muslims, our meals were halal or seafood, and shrimp quickly took center stage. I started experimenting in my own kitchen: pasta tossed with shrimp, sandwiches, wraps, rolls. Before long, I was simmering shrimp curries and skewering shrimp kebabs. Each new recipe felt like another chapter in a love story that had once begun with such a rocky start.

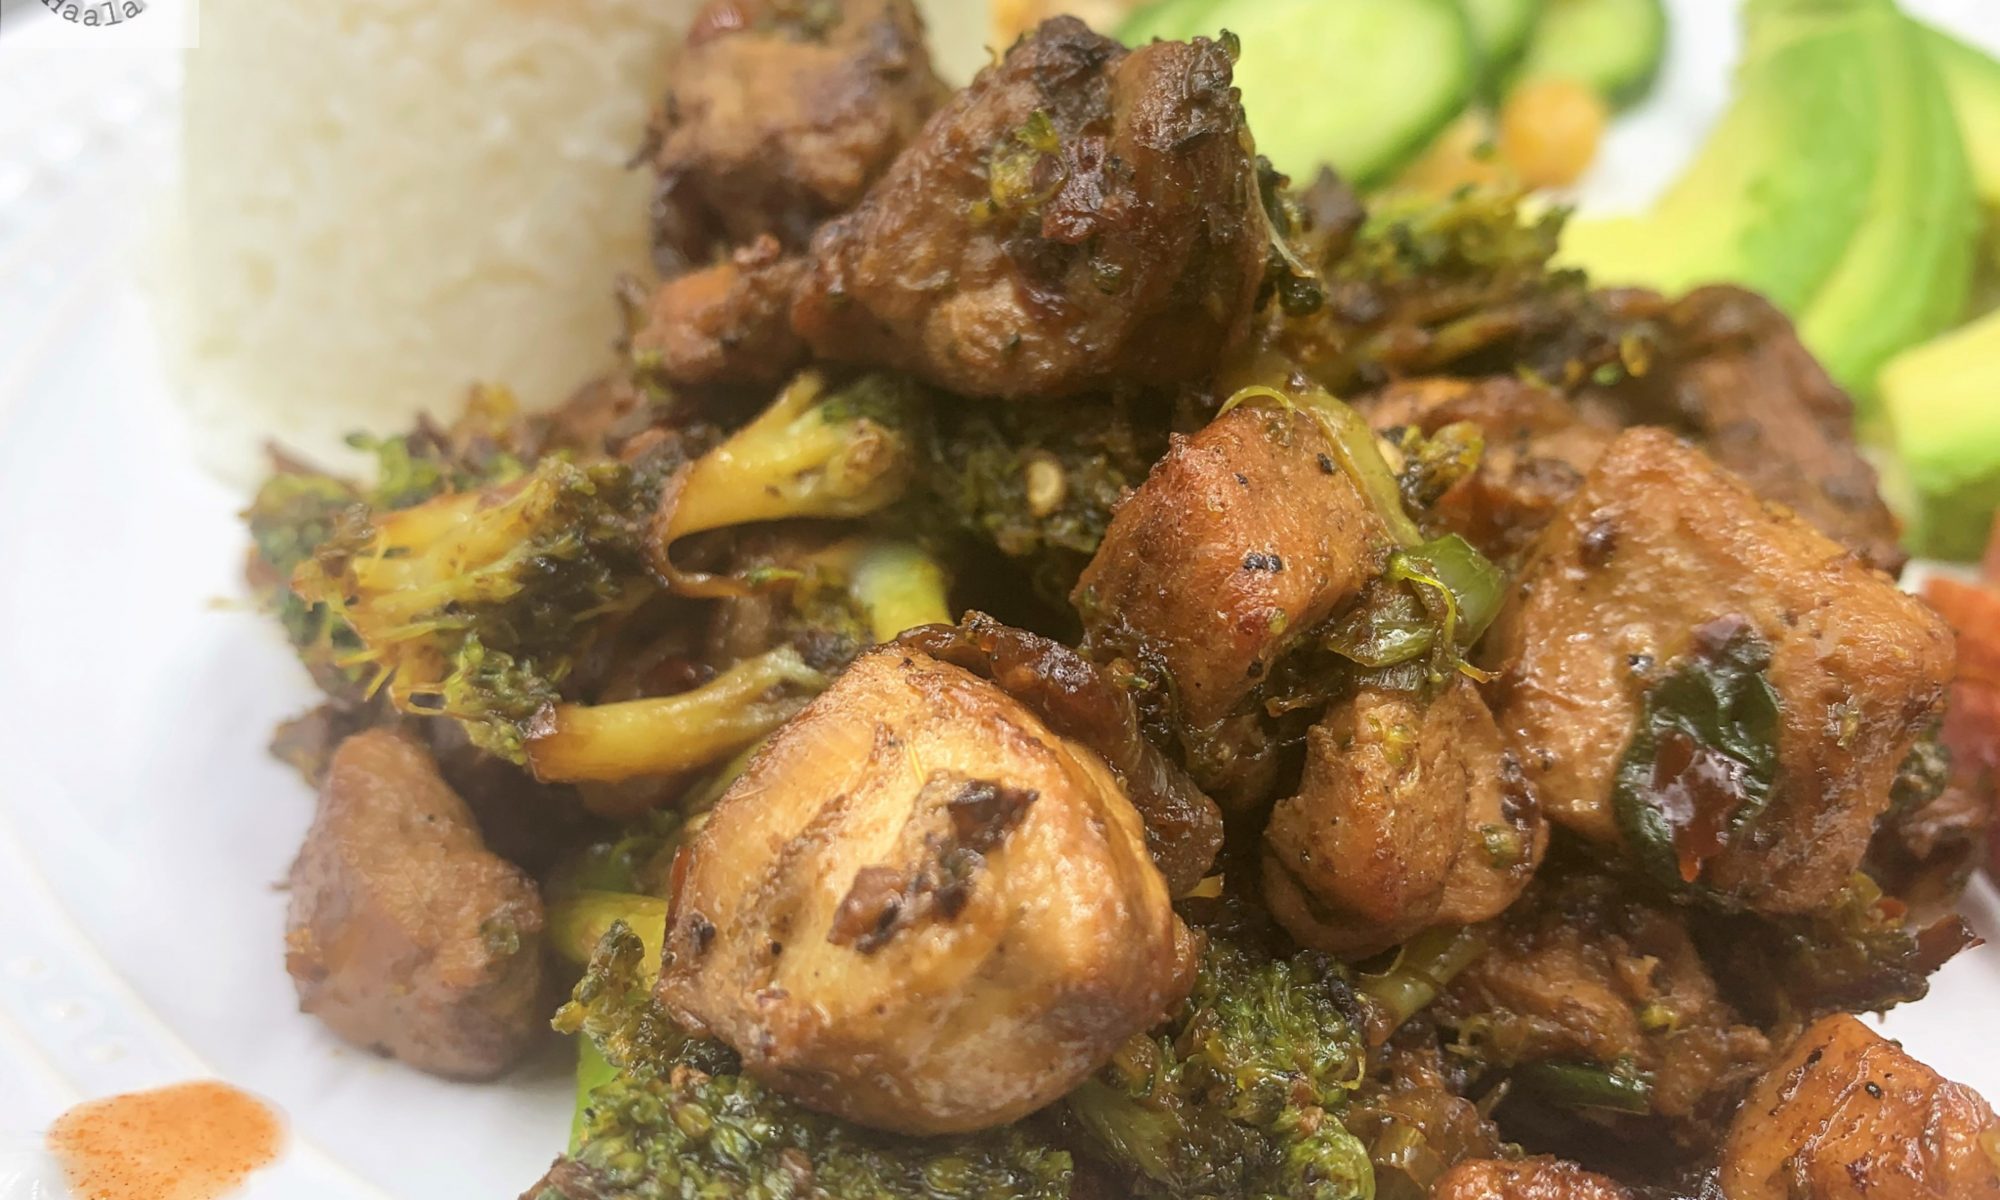
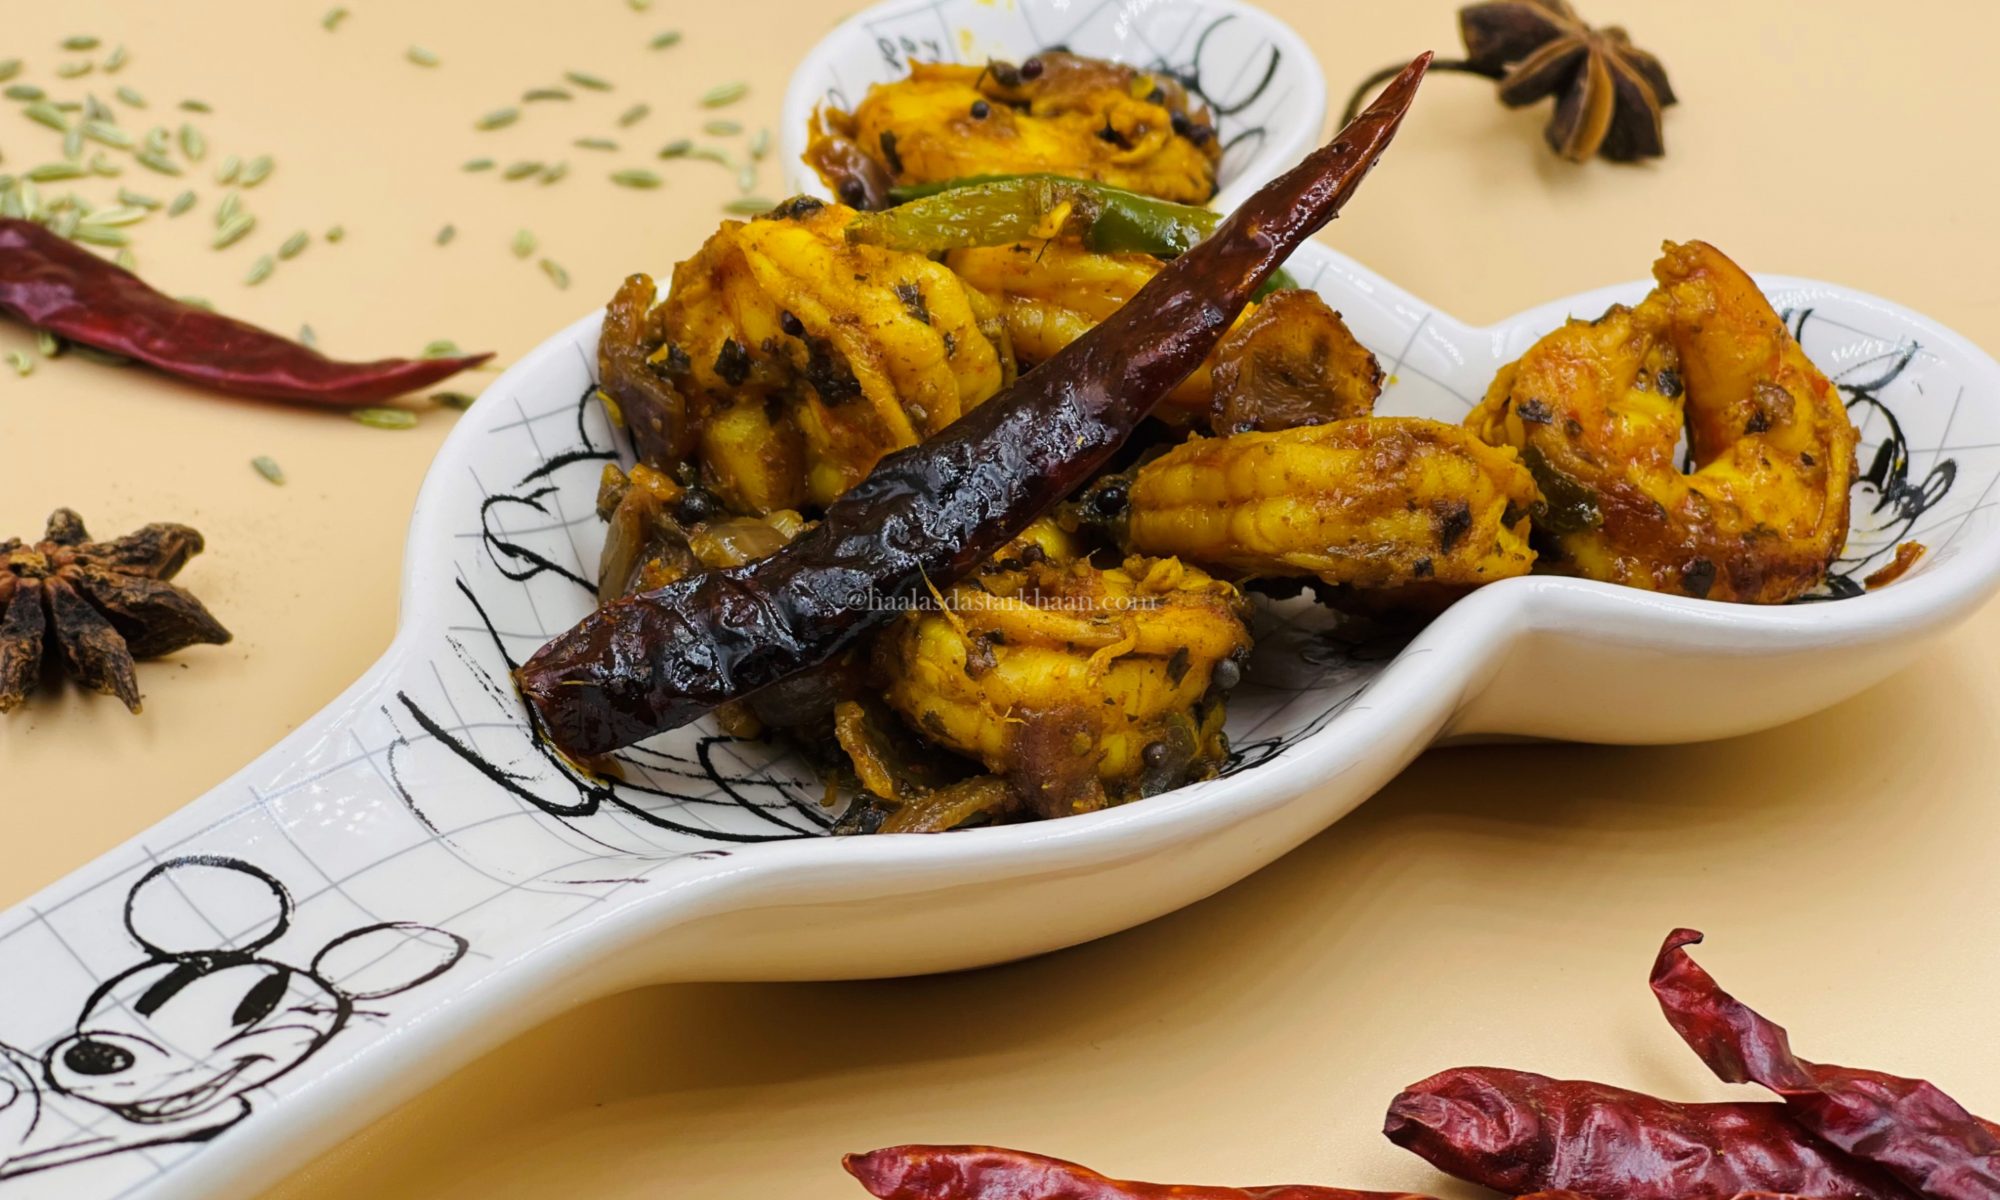
One of my favorite ways to cook shrimp now is Andhra style. It’s spicy, crispy, and absolutely delicious. I go heavy on curry leaves, mustard seeds, and dried red chilies, layering in all those bold flavors. The result is a dish that’s simple to make but bursting with character. It pairs beautifully with daal chawal—comfort food elevated by a punch of heat and crunch.

Garlic Lemon Butter Tilapia with Shrimp

Seafood has amazing recipes. I usually don’t enjoy baked fish, as I feel baking tends to make the fish dry but this recipe for baked fish is just outstanding. This recipe doesn’t require any mayonnaise, or cheese, or any kind of flour or bread crumbs. All you need is butter, lemon, garlic, a few spices, and salt. This Fish by itself is also Keto friendly. I paired the fish with baby potatoes, asparagus, and mushrooms. I also cooked the Fish and shrimp with bell pepper and jalapenos. But the choice of vegetables is always a personal choice. You can always substitute the vegetables you like. This dish is super simple, low carb, gluten-free, and amazingly delicious.

What kind of Tilapia is good?

If you have a store that sells fresh and clan fish, there can be nothing better. That kind of seafood is the best in quality. But mostly, the fish that I buy, especially Tilapia is frozen which is good too. There is always a possibility that any fish you buy has been frozen at some point in order to keep it fresh for transport.

Frozen fish sometimes are better than the Fish that appear fresh but you don’t see them live. Frozen fish is said to be freezer right after the catch, therefore feel absolutely sure to use the fish that is frozen since it is just as good to use as a live fish, and in most cases better than fish from the counter.

Tilapia is generally best and healthy if it’s wild-caught which is the case with most seafood. Farm-raised fish is also considered very healthy. Tilapia is a great source of protein. Though if you are buying farm-raised fish, make sure you check the reputation of the farm and the kind of feed they use for their fish.

I used Shrimp for some extra flavor which I feel goes fabulously with Tilapia. Baked or grilled veggies are a great source of fiber and fill you up too. This dish is great for kids too. The dish is filling, healthy, and low in carbs. Enjoy!!!

Honey Lemon Chicken Wings

Chicken wings are an undeniable favorite for many people, yet interestingly, I had never tried them until after moving to the United States. Back home in India, chicken wings rarely featured in our everyday cuisine, particularly in the form of kebabs or appetizers.

In the beginning, chicken wings were something we only enjoyed when dining out. It was not that I had never considered making them at home—rather, while both Mr. Parveez and I liked them, we were not particularly obsessed with them. There was, however, a small halal restaurant nearby that served the most delicious green masala chicken wings. Every once in a while, we would stop by just to enjoy that flavorful treat.

A few years later, the restaurant closed its doors—and with it disappeared those memorable wings we had grown so fond of.

Yet, even then, I still wasn’t quite inspired to start making chicken wings at home. A few months later, however, we discovered another excellent halal gyro spot that served hot, saucy chicken wings. For a while, they were absolutely fantastic and quickly became a favorite. Over time, though, something seemed to change. The flavors gradually faded, and the wings no longer tasted the way they once had. I often wondered if the management had changed and a new chef had stepped in—someone who simply couldn’t recreate the original magic.

That was the moment it truly occurred to me: if I wanted to continue enjoying good chicken wings, I would probably have to start making them myself. The very first wings I prepared at home were the classic Buffalo style. The kids loved them, and before long they became a regular appetizer for brunches and playdates.

After making them for several years—and watching my little fan club grow—I began experimenting with different flavors and marinades. That experimentation led to my Green Chicken Wings, followed by Haala’s Special Hot Saucy Wings, and eventually, this version.

The inspiration behind this recipe was simple: to create a balance between sweetness and heat. It is ideal for those who enjoy a gentle kick of spice without overwhelming heat—a comforting middle ground that is flavorful, satisfying, and always a crowd-pleaser.

Why Wings?

Chicken wings are best cooked with the skin on. When pan-fried or deep-fried, the skin turns beautifully crisp, giving that perfect crunch. And honestly, any saucy flavor tastes even better when paired with that crispy texture—it’s what makes wings so irresistible.

Why use honey and not sugar?

Honey blends much better with spices than sugar. Sugar often tends to crystallize or make the sauce watery, while honey gives it body and balance. It adds just the right amount of sweetness without overpowering the flavors—making it the perfect choice for sauces and glazes.

These wings strike the perfect balance—lightly sweet, lightly spicy, and absolutely irresistible. The flavors play a little game of hide and seek on your taste buds, keeping every bite exciting. Sweet and spicy together are already a winning combo, but when paired with crispy chicken wings, the result goes beyond just delicious. If you love chicken wings, this is one recipe you’ll definitely want to try.

Korean Chicken Bites

Asian cuisine is wonderfully diverse—Chinese, Japanese, Indonesian, Thai, Malaysian, and Korean—each offering its own distinctive flavors while sharing certain ingredients and cooking techniques. Over the years, we have enjoyed exploring many of these cuisines, although our choices were often limited to seafood. As Muslims, staying within the boundaries of halal food can sometimes be challenging, especially when so many tempting dishes traditionally feature non-halal meats.

While I do have friends who are comfortable eating non-halal chicken or meat, for us that has never been an option. I firmly believe that when there are choices available that allow us to remain true to our beliefs, it is important to honor them. Fortunately, that has never prevented us from enjoying the flavors we love. The beauty of having curious taste buds—and a genuine passion for cooking—is that almost any dish can be adapted and made your own.

Begin by marinating the chicken in a mixture of buttermilk, chili flakes, onion powder, garlic powder, black pepper, white pepper, oregano, and salt. Allow it to rest for at least an hour—longer if possible—so the flavors have time to fully penetrate the meat.

Once marinated, coat the chicken pieces in a mixture of flour, cornstarch, and a little salt, then fry until golden and crisp. This creates a light, crunchy exterior that pairs beautifully with the sauce.

The sauce is what truly brings the dish together. It is prepared with crushed garlic and ginger, soy sauce, sesame oil, gochujang—a sweet and mildly spicy Korean chili paste readily available in most Asian grocery stores—along with honey, brown sugar, vegetable oil, and red chili flakes. Allow the sauce to simmer until it thickens slightly, then toss in the fried chicken pieces, coating them thoroughly so every bite is infused with flavor.

For garnish, scallions and sesame seeds work beautifully. While scallions can certainly be added directly to the sauce, I prefer sprinkling them over the finished dish just before serving. This keeps them crisp and fresh, providing a pleasant contrast in texture.

Substitute for Buttermilk?

If you don’t have buttermilk on hand, it’s easy to make your own. Simply add 1 tablespoon of lemon juice to the same quantity of milk required in the recipe. Stir well and let it rest for a few minutes before using it in the marinade.

The flavor of this chicken strikes a wonderful balance between sweet and spicy, making it appealing to both children and adults alike—unless, of course, someone prefers completely mild food. It has become one of my favorite dishes for playdates, family gatherings, and casual get-togethers because it is always a crowd-pleaser.

Cooking in advance

If you’re entertaining, the chicken bites can be fried ahead of time and kept warm in a preheated oven set to its lowest warming setting, ideally around 200°F (95°C). Anything significantly higher may overcook the chicken, causing it to become chewy or dry. When you’re ready to serve, simply toss the chicken in the freshly prepared sauce and garnish before bringing it to the table.

Thai Chicken Curry

Malaysian and Thai cuisines have always been favorites in our home, though finding halal options can sometimes be a challenge. It was actually Mr. Parveez who first introduced me to both, and over the years they have become cuisines we return to again and again.

What I appreciate most about these cuisines is how familiar their flavors often feel. There is a comforting connection between Indian food and many Southeast Asian dishes, where similar ingredients come together to create layers of warmth, depth, and complexity. Thai cuisine, for instance, frequently relies on ingredients such as peanuts, red chilies, coconut milk, and coconut cream, resulting in a beautiful balance of spice, sweetness, and richness. These are flavors that feel both comforting and intriguingly different at the same time.

Because we primarily consume seafood, we occasionally miss out on experiencing certain dishes as they are traditionally prepared. Recreating them at home, therefore, becomes our way of exploring those flavors—and in many ways, it has been a blessing in disguise. Not only does it allow us to experiment and learn new cooking techniques, but it also offers a healthier way to enjoy these dishes. Cooking at home means selecting fresh ingredients, controlling exactly what goes into the food, and serving it at its very best. That freshness not only enhances the flavor but also adds genuine nutritional value, making every bite feel lighter, brighter, and more satisfying.

This particular curry is wonderfully simple to prepare. For convenience, I used a store-bought Thai red curry paste. Since it was my first time making this dish, I wanted to stay close to the traditional flavor profile rather than risk upsetting the delicate balance of spices and aromatics that makes Thai red curry so distinctive.

For the vegetables, I used bell peppers, onions, scallions, and garlic, though the choice is entirely flexible. Baby corn, snap peas, bamboo shoots, mushrooms, or any number of vegetables can be added depending on what you have available. That is one of the joys of Thai curries—their versatility allows every cook to create a slightly different combination of flavors, colors, and textures with each preparation while still preserving the essence of the dish.

Simple, flavorful, and endlessly adaptable, this curry is the kind of recipe that proves delicious food doesn’t have to be complicated. Sometimes, all it takes is a few good ingredients and a willingness to explore new flavors from your own kitchen.

Serve it with some boiled Rice and enjoy it warm.

Tava Tangdi Chicken Kebab

My boys are my toughest critics and biggest fans, and their excitement to taste every new creation keeps me inspired to keep experimenting. After making countless versions of chicken kebabs, finding something new with the same familiar spices can be a challenge. But that’s the magic of cooking—the realization that the very same ingredients can create completely different flavors when timing, technique, and the order of cooking change.

Today’s kebabs are proof that creativity in the kitchen never runs out. ✨🍢

One of the most fascinating lessons cooking has taught me is how much difference timing can make. The exact same spices can create completely different flavors depending on when they’re added and how long they’re cooked. A quick sauté versus a slow roast, a short rest versus an overnight marinade—every step transforms the final dish.

These Tangdi Kebabs are the perfect example of that idea. Despite requiring very little marination time, they turn out incredibly flavorful, juicy, and satisfying. That’s exactly why they’ve become one of my favorite recipes for busy days and unexpected guests.

When company arrives with little notice—or dinner plans come together at the last minute—these kebabs are my go-to solution. They look impressive, taste indulgent, and come together with minimal effort. Best of all, there’s no need for an oven or special equipment—just a pan and a handful of everyday ingredients.

For this version, I used chicken legs, which is why I call them Tangdi Kebabs, but the recipe is wonderfully versatile. Boneless chicken/ Chicken with bones cut into small pieces works beautifully too, especially thigh meat if using boneless. I wouldn’t recommend chicken breast here; with the short marination and simple spice blend, breast meat can become slightly firm and chewy. Thigh meat, on the other hand, stays tender, juicy, and absorbs the flavors far more effectively.

What I love most about this recipe is how beginner-friendly it is. Whether you’re just learning to cook, living on your own, or simply looking for something quick yet impressive, these kebabs are remarkably forgiving. They prove that memorable food doesn’t require complicated techniques or exotic ingredients—just a few good spices, a little confidence, and a willingness to experiment.

✨ Simple ingredients. Minimal marination. Maximum flavor.

If you try this recipe, I’d love to hear how it turns out for you. Cooking is always more fun when it’s shared. Enjoy! 🍗✨

Chicken Broccoli and Rice

With all the rich and indulgent foods we enjoy, there comes a time when your body quietly asks for a reset. You start craving something lighter — more vegetables, less oil, fewer carbs — a meal that feels nourishing rather than heavy. But for people like me, “healthy” can’t mean bland. It still has to be delicious, comforting, and satisfying. And when you have children as particular as mine, getting them to eat more greens can feel like a full-blown negotiation.

That’s exactly how recipes like this are born — out of the need to make wholesome food that no one feels forced to eat. Eating more greens is always a good idea, but the real win is when your family enjoys them without even realizing they’re eating something so nutritious.

This Chicken with Broccoli is one of those simple, dependable meals. It’s light, protein-rich, and packed with flavor while still feeling clean and balanced. I usually serve it with plain boiled white rice, but it pairs just as beautifully with brown rice, quinoa, or even barley if you want to boost the fiber content further.

I also love mixing and matching vegetables depending on what I have on hand, but broccoli and onions work especially well with chicken. The combination is hearty yet fresh, and it cooks quickly — perfect for busy days.

To prepare, heat a little olive oil in a pan and add chopped garlic. Once the garlic turns lightly golden and fragrant, add boneless chicken pieces, followed by chopped onions. Season generously with red chili flakes, black pepper, garlic powder, onion powder, salt, cumin powder, and paprika. Let the chicken cook through, absorbing all those warm, savory flavors. Finally, add chopped broccoli and stir-fry for about 5–7 minutes, just until tender but still vibrant.

Serve hot with slices of fresh cucumber and avocado on the side, along with your grain of choice. The freshness of the vegetables balances the warmth of the dish beautifully.

My goal in sharing meals like this is simple: to show that healthy food does not have to be boring or tasteless. With the right ingredients and seasoning, you can create dishes that are both nourishing and deeply satisfying — meals your family will happily come back to.

I hope you enjoy this quick, wholesome recipe as much as we do. It’s nutritious, filling, flavorful, and proof that eating well can still feel like a treat. 🥦🍗✨

Chicken Ramen Noodles

This Japanese-inspired dish came together almost entirely without any advance prep — one of those happy kitchen accidents that turns into a family favorite. My boys had been watching a Japanese show where a character is obsessed with ramen, and ever since, they couldn’t stop talking about how delicious it looked. Naturally, that meant I had to figure out a way to make it happen.

I had never really tried ramen before, mainly because finding Halal Japanese options isn’t easy where we live. Seafood versions never appealed to me either, so it was something I had always quietly skipped. But convincing curious kids to skip a dish they’re fascinated by? Impossible. They’re at that age where they want to explore every cuisine under the sun — as long as it’s religiously permissible — and since their mom enjoys cooking, they assume anything is possible at home.

With very limited time (and very persistent children), I dived into recipe research. Three hours later — which felt like three minutes under pressure — I realized I didn’t even have many of the “essential” ingredients most ramen recipes call for. No bok choy, no lemongrass, no fancy mushrooms. Instead, my fridge offered spinach, carrots, cabbage, zucchini, and a few regular mushrooms. Not exactly traditional, but perfectly workable.

I also chose not to add onions. While they’re wonderful in many dishes, onions can dominate a delicate broth and tend to become overly soft and mushy in soups. I wanted something light, clean, and comforting rather than heavy.

So this version became a practical, home-style ramen — adapted to what I had on hand and to our family’s taste preferences. The broth was simple but flavorful, the vegetables added color and nutrition, and the noodles brought everything together into a warm, satisfying bowl. It may not be an authentic Japanese ramen, but it captures the comforting spirit of the dish beautifully.

What I love most about recipes like this is how easily they help you serve more vegetables without making it feel like a “healthy” compromise. When tucked into a fragrant broth with noodles, even picky eaters happily finish their bowls.

I’m no expert in Japanese cuisine, but the more I experiment, the more I appreciate its balance, simplicity, and depth of flavor. With a few thoughtful adjustments, it’s possible to create dishes that feel authentic while still fitting your pantry and lifestyle.

This quick, comforting ramen-style bowl turned out far better than I expected — warm, nourishing, and completely satisfying. Most importantly, the boys loved it, which is always the ultimate test.

I hope you enjoy this easy, veggie-packed bowl just as much as we did. 🍜✨

Cheesy Garlic Pull Apart Bread

Who doesn’t love garlic bread? I’ve honestly never met anyone who could resist a warm, buttery slice loaded with garlic. Growing up, I was convinced that garlic bread and pizza were inseparable — the ultimate duo — thanks to a certain popular food chain. For me, ordering pizza without garlic bread as an appetizer just didn’t make sense, and I’m sure those famous pizza places have seen plenty of customers like me over the years.

As much as my family enjoys the occasional restaurant treat, there are times when ordering out just isn’t practical — or desirable. Beyond the cost, there’s always that lingering question about freshness, preservatives, and how the food was actually prepared. Not that takeout is inherently bad, but relying on it too often doesn’t feel like the healthiest choice. And when you can cook, making a homemade version becomes both reassuring and rewarding.

Traditionally, garlic bread is made using a crusty loaf like a French baguette or sometimes ciabatta. The bread is partially sliced so the garlic butter can seep into every crevice while keeping the loaf intact, then baked until crisp on the outside and soft inside. Some versions use olive oil and fresh garlic, others rely on butter and garlic powder, and sometimes the loaf is split lengthwise and topped before baking.

I decided to do something a little different — starting from scratch. Instead of using a ready-made loaf, I made a soft, enriched dough using warm milk, yeast, egg, flour, sugar, salt, and butter. Once the dough had risen beautifully, I kneaded in minced garlic, more butter, and fresh scallions, which added both flavor and a lovely aroma. After shaping, I topped it with a generous sprinkle of cheese before baking.

The result is somewhere between classic garlic bread and a soft pull-apart loaf — fluffy, buttery, garlicky, and incredibly comforting. Served hot from the oven, the cheese melts into the bread while the garlic perfumes the entire kitchen. Every bite is soft, rich, and full of flavor, with just the right balance of indulgence and homemade goodness.

Sometimes the simplest foods bring the most joy — especially when made fresh, shared warm, and eaten straight from the tray.

Serve hot, tear into it while it’s still steaming, and enjoy every oozy, garlicky bite. 🧄🧀✨

Salmon New Orleans

Being Muslims we adhere to eating only seafood when other meat options are not halal. Salmon New Orleans was one of those dishes that we tried at one of our favorite restaurant and were immediately in love with. The only problem is only that the restaurant is pretty far away and as much as we would love to be there every weekend, we cannot.

So one beautiful Sunday, when Mr. Parveez happened to be working on a weekend project, my boys craved Salmon New Orleans and there was no other option than me trying to make it at home. Following the flavors I could remember, this is the closest I can get to the dish, but considering that variations are acceptable in every dish, this dish came out fabulous. The boys couldn’t make out any difference except for what we made tasted more fresh. I guess fresh seafood and mixing of spices at the time does always help. And, this doesn’t mean I am advocating you to stop exploring restaurants, but while sharing this recipe at the time of pandemic Covid-19, I feel this is the best option to try out your restaurant favorite foods at home, as there ain’t any other option anyways.

If I was told before I started making this meal, that it will be done, finish to start in around 30 minutes and that too using just one pan, I would not really believe it, but honestly its true. I seasoned the Salmon with salt and pepper. Make sure you don’t add too much salt, because Salmon usually absorbs salt very quickly, so you might wanna hold your hand a little.

There are always different ways you serve your fish. I like mine with some veggies, preferably carrots, spinach, avocados, broccoli or asparagus. Here I used Spinach and avocados. I first cooked the spinach with garlic, saute’ed it lightly so the flavors blend in nicely without overcooking the spinach and making it lose its color. The light garlic tasting spinach adds that perfect flavor with the sweet salmon and shrimp medley. Another side of avocado slices with a little drizzle of lemon goes in so perfectly. If you like, you can always serve with a buttermilk biscuit like me or with anything you like. A little rice or mashed potato. The side should be a little mellow in taste to compliment the flavor of the fish.

Later we need to melt the butter and whisk a little honey. That’s where the slight sweetness of honey cooked with butter creates caramelization that our salmon will be cooked and come out with awesomely delicious results. I like my Salmon fillets to be thin. I feel that makes them juicer and crunchier. If you prefer them thick, then you can always take a fillet that weighs between 6-8 oz or else you can get thinner fillets that are around 3-4 oz each.

I made my cajun seasoning at home. You can always use store bought, but in case you want to make it at home, its pretty simple with ingredients easily available in your pantry. A little garlic powder, Onion powder, black pepper powder, white pepper powder, salt, red chili powder, red chili flakes and dry parsley. I believe the actual cajun spice might have a little more spice added to it, but with my caliber this is all I could guess and trust me doing this at home, the results would amaze you.

After this saute your shrimp in the same pan you used for the salmon, along with some more butter and that cajun seasoning. Top your salmon with a few shrimp and drizzle the cajun butter sauce from the pan right over the top. Garnish with a little chopped cilantro or parsley if you like and you’re done.

That’s it. So simple to make but believe me, you will be amazed with the results. This is Restaurant-quality at home with no-fuss. Isn’t that what we all desire?

Hope you try this recipe and enjoy it as much as we did.