Garlic Lemon Butter Tilapia with Shrimp

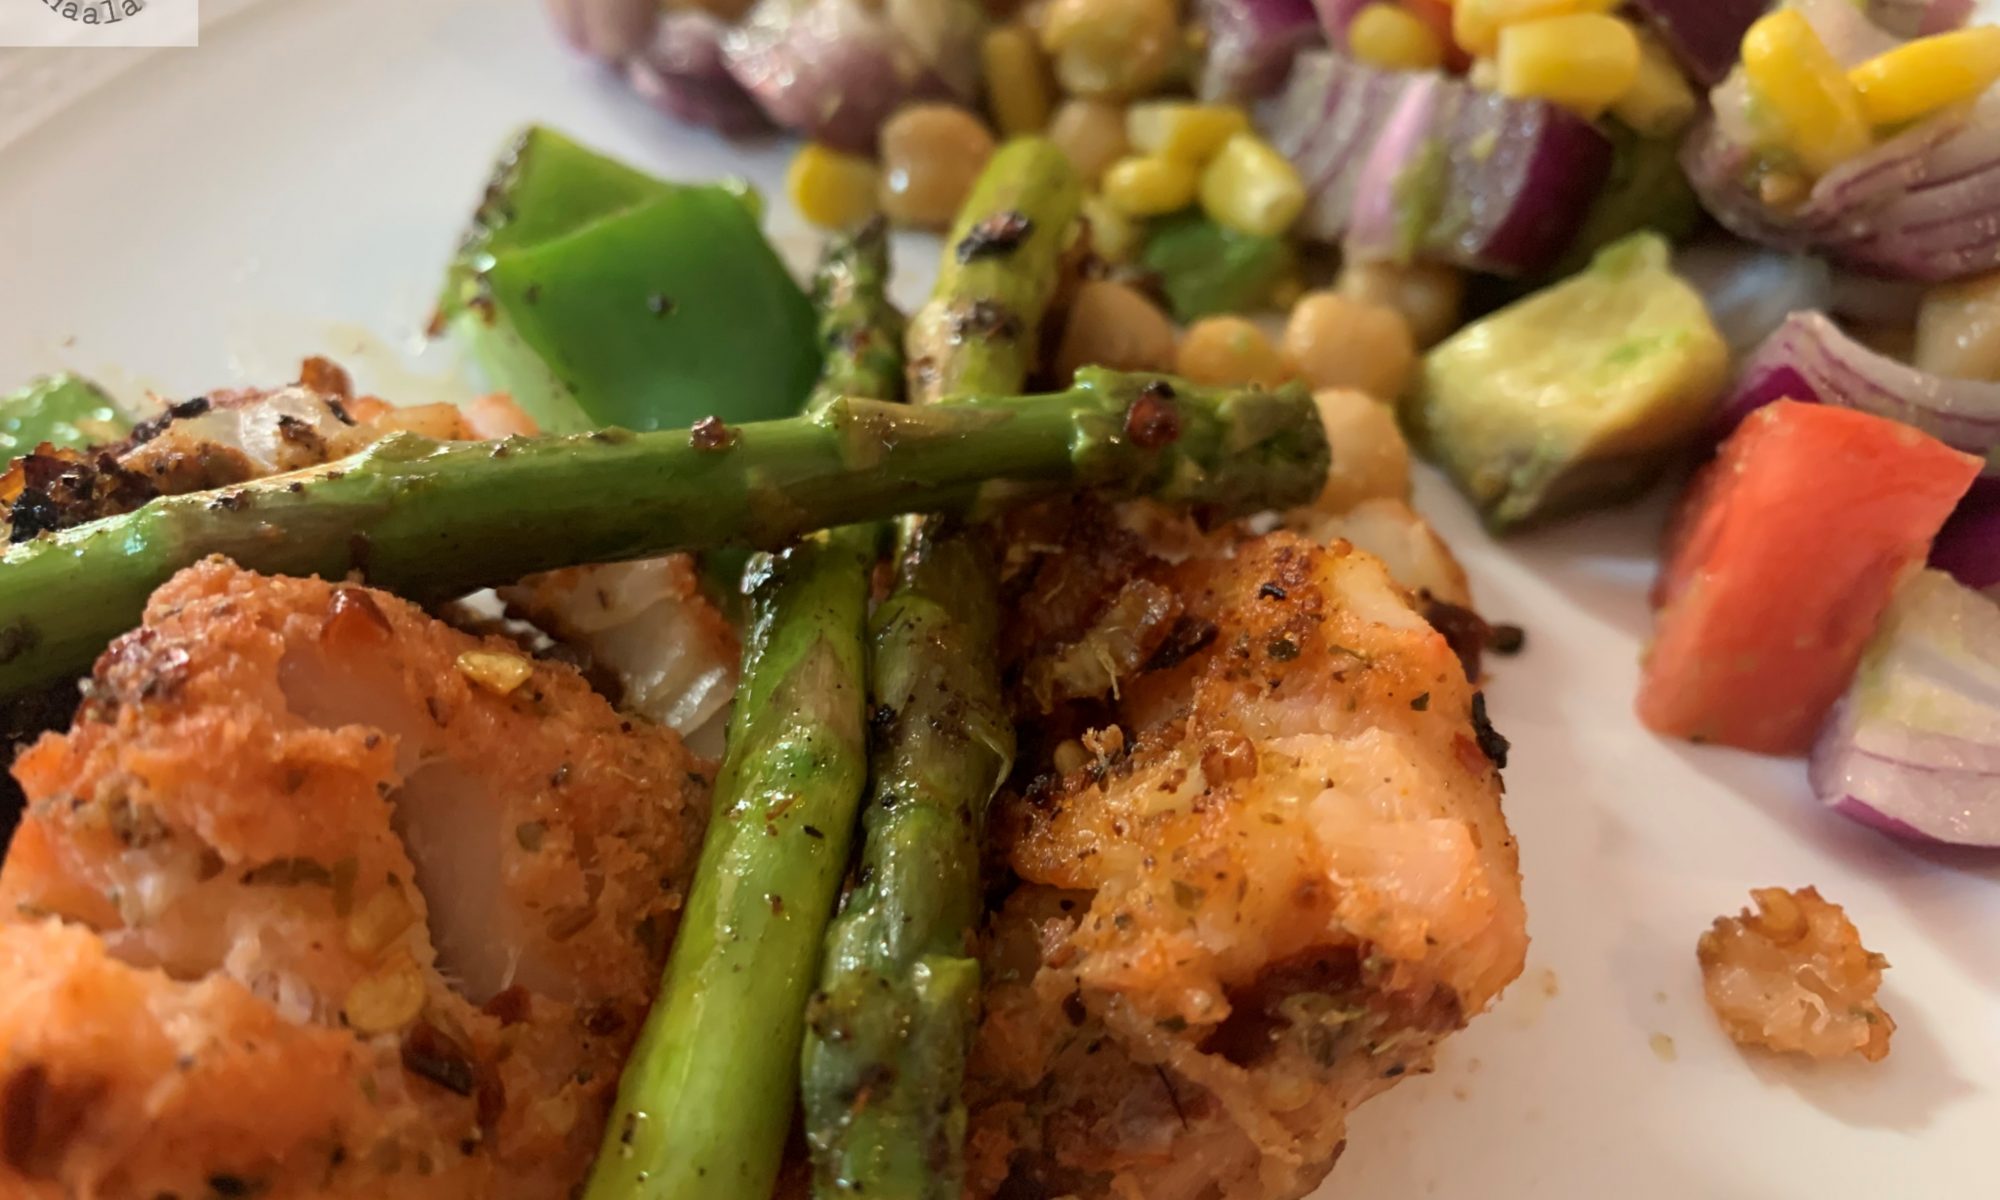
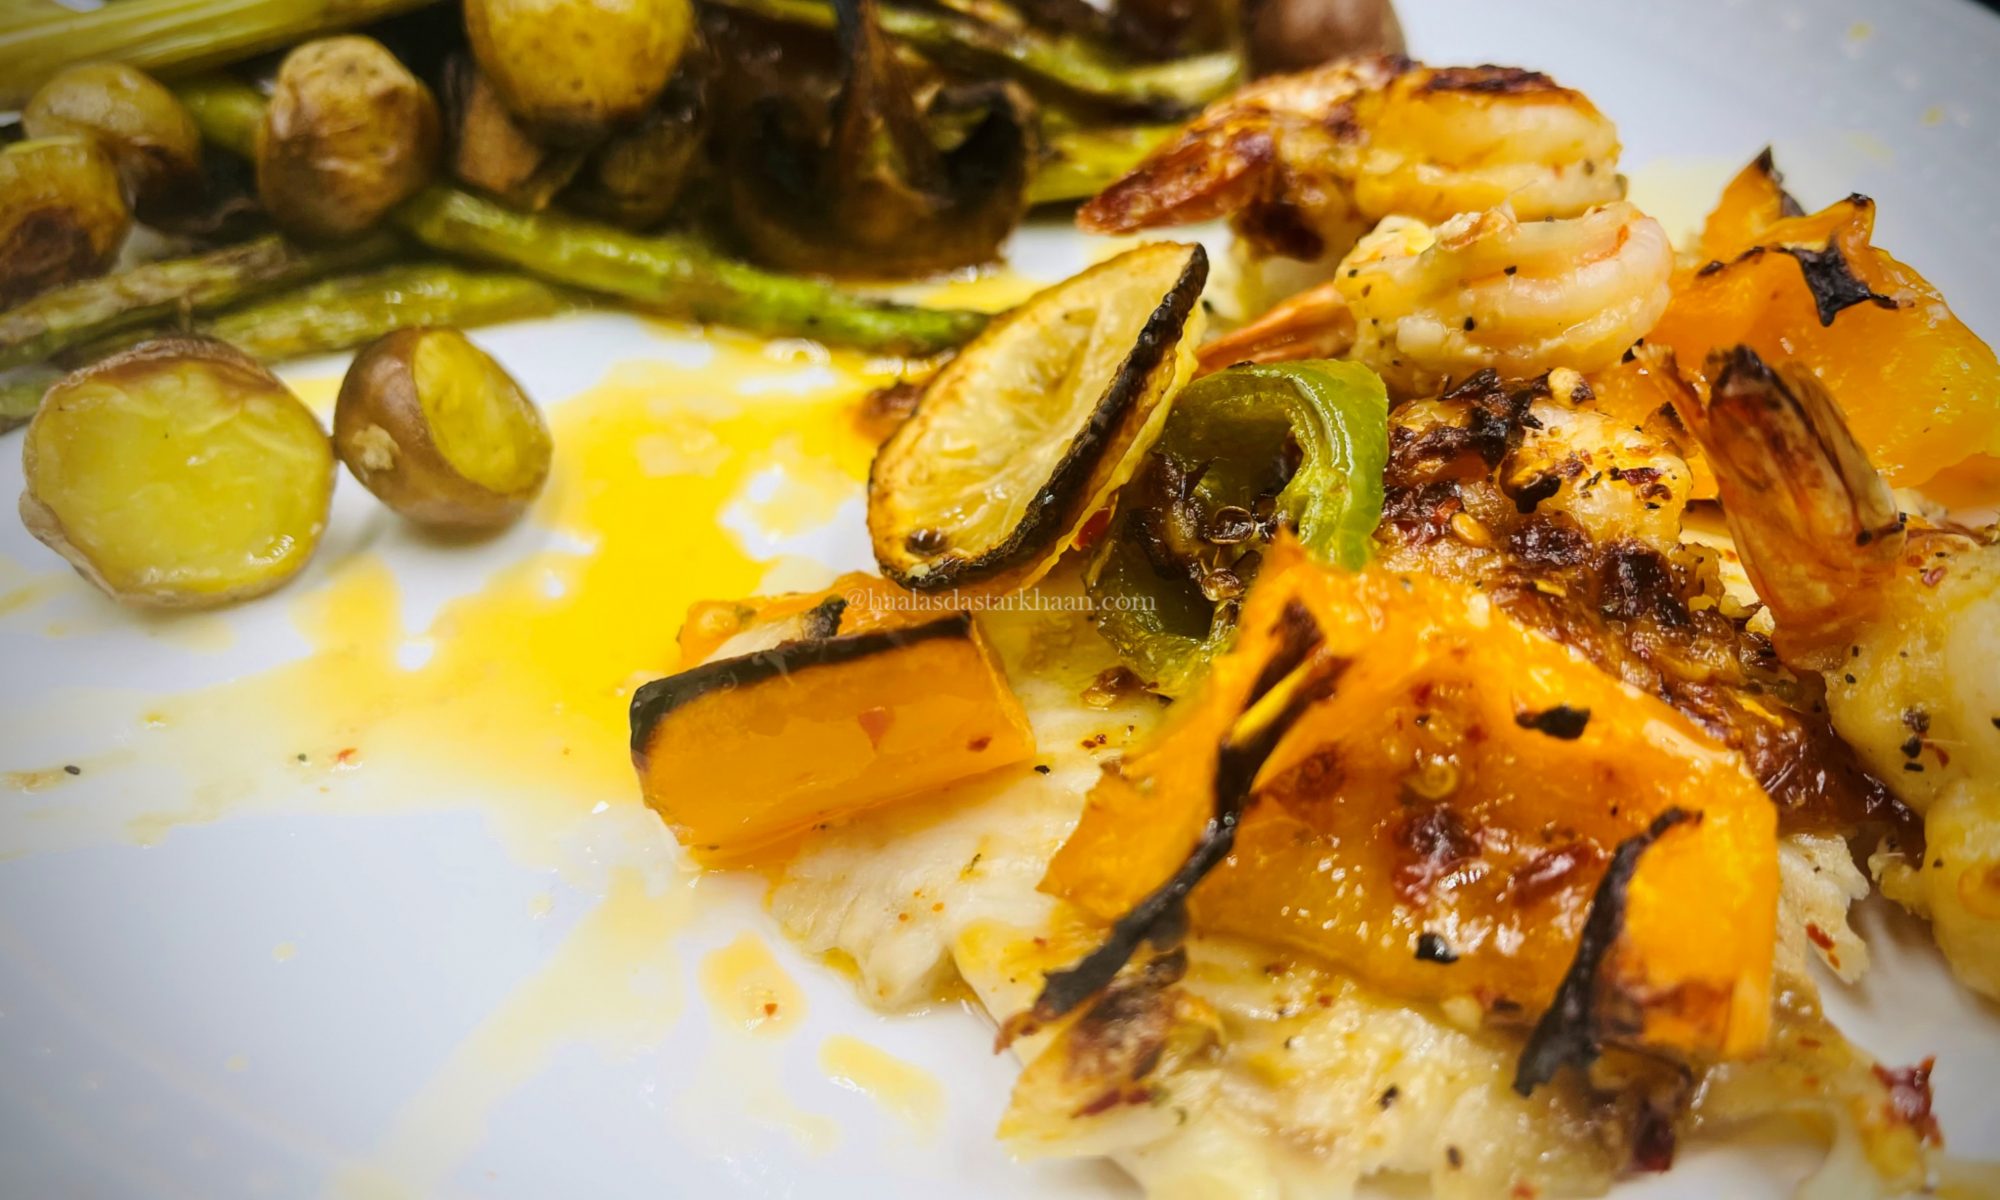
Seafood has amazing recipes. I usually don’t enjoy baked fish, as I feel baking tends to make the fish dry but this recipe for baked fish is just outstanding. This recipe doesn’t require any mayonnaise, or cheese, or any kind of flour or bread crumbs. All you need is butter, lemon, garlic, a few spices, and salt. This Fish by itself is also Keto friendly. I paired the fish with baby potatoes, asparagus, and mushrooms. I also cooked the Fish and shrimp with bell pepper and jalapenos. But the choice of vegetables is always a personal choice. You can always substitute the vegetables you like. This dish is super simple, low carb, gluten-free, and amazingly delicious.

What kind of Tilapia is good?

If you have a store that sells fresh and clan fish, there can be nothing better. That kind of seafood is the best in quality. But mostly, the fish that I buy, especially Tilapia is frozen which is good too. There is always a possibility that any fish you buy has been frozen at some point in order to keep it fresh for transport.

Frozen fish sometimes are better than the Fish that appear fresh but you don’t see them live. Frozen fish is said to be freezer right after the catch, therefore feel absolutely sure to use the fish that is frozen since it is just as good to use as a live fish, and in most cases better than fish from the counter.

Tilapia is generally best and healthy if it’s wild-caught which is the case with most seafood. Farm-raised fish is also considered very healthy. Tilapia is a great source of protein. Though if you are buying farm-raised fish, make sure you check the reputation of the farm and the kind of feed they use for their fish.

I used Shrimp for some extra flavor which I feel goes fabulously with Tilapia. Baked or grilled veggies are a great source of fiber and fill you up too. This dish is great for kids too. The dish is filling, healthy, and low in carbs. Enjoy!!!

Homemade Buns / Paav

I still remember when the trend of Paav Bhaaji came to my town. I was in Elementary school and I loved the flavors and so did everyone in the family. The funny thing was that all of a sudden Paav Bhaaji became a favorite dish for all. Now I have never been to the roadside stalls to eat Paav Bhaaji, though I somewhere always wanted to, but the small town I belonged wasn’t very apt with women standing on roadside eateries during those days. While writing this, I feel as if it was centuries ago, but honestly it was just a few decades ago and the amazing thing is that my small town has changed so much in the last few years that it’s exciting as well as scary. See, small cities have their own magic. People are friendlier, have more time in hand and almost everyone knows everyone. From that time where I would meet 50 people in a radius of one mile to now meeting almost the same number, but with the warmth missing.

Anyways, coming back to Paav Bhaaji. So, my father would always bring it home as a take away and we would all love it to the core. Slowly, my mom started getting Pav bhaaji masala and we would enjoy home made Paav bhaaji. So, my home made Paav bhaaji masala is my mother’s recipe.

I had tried my hands at Paav Bhaaji multiple times and always loved every bite of it. Though my mother used so many different veggies like cauliflower and carrots for her Paav Bhaaji, I only stick to Potato and Bell pepper, making it closer to the original flavors.

The Paav are also homemade. They are pretty easy as well. If you follow the recipe properly, you will be able to make these pillow soft amazing buns at home. You can serve the buns with anything, but as Paav with Bhaaji, they just seem to taste super amazing. To make them taste more delicious, split the buns, spread some butter and sprinkle some Paav Bhaaji masala on them and toast them on the Tava/ Pan.

Chicken Veggies oven special

With all the different kinds of foods that we consume, at times you just feel that your tummy needs a break. You feel you need more veggies, less oil, fewer carbs, in all just a healthy meal. But, the problem that people like me face is that we also need something that tastes scrumptious and good along with all the health benefits.

Specially, if you have children as demanding as mine, you basically fight a battle. When the demand is to make veggies look more appealing and to make their protein go leaner without them noticing. That’s when dishes like this are invented.

This Chicken is marinated with spices making it flavorful. The spices can always be switched or played around with. I added Tandoori powder and Red chili powder to make the flavors a little more spicy, but you can always reduce the quantity or omit the spices altogether. I find this a great recipe for easy lunch and dinner.

Pasta with Garlic Chicken and Mushroom

This is a great recipe and cooks pretty quickly as well. I am not a fan of Alfredo sauce with my Pasta and honestly the boys were never big fans of cheese sauce either but when I came across dish that has Mushrooms and Chicken cooked with Garlic, it kind of sounded interesting.

So I got down to trying and cooking my own. I love Mushrooms, but the kids aren’t a big fan so the dish had to be interesting enough. Roasting garlic in the oven enhances the flavor in a dish. So, I roasted garlic with skin with olive oil, salt and pepper till its soft and mushy. Cook the chicken pieces in a pan with little oil, salt and pepper. Further adding butter and oil to the same pan and added the mushed garlic and a little chicken broth followed by mushrooms. After it comes to a boil added a little heavy cream and further the cooked chicken. I also added Red chili flakes and White pepper for extra flavor.

This dish can be served by itself or with Rice too, since its a little saucy, but I personally felt that it goes on best with pasta. I served it with Spaghetti Pasta and a side of Garlic bread. Trust me, my boys who do not like Mushroom at all loved this dish. This dish easily qualifies as an awesomely flavorful and delicious dish. The taste is that of a dish you’d get at a high end Italian restaurant. It might seem a little complicated but trust me if you follow the recipe and make it once, you will become pro and will manage making this dish in no time. This dish is actually perfect for those surprise dinner dates. This impresses anyone and everyone.

Cheesy Garlic Pull Apart Bread

Who doesn’t like Garlic bread? No one I ever met said they didn’t love a good Garlic bread. Growing up I always thought that Garlic bread and Pizza go hand in hand thanks to a food joint. I could just not take the fact of people not ordering garlic bread as an appetizer before eating Pizza. And, I am sure that famous “Pizza” joint and it equally good famous competitors must have seen so many like me.

As much as my family and I love getting the Garlic bread and Pizza, at times its just not possible to order restaurant food. I mean, there are Big names and Big companies, but at times the thought of you not knowing how fresh is the food that you are consuming or is it a mix of preservatives. With all that confusion and realizing that you are blessed that you can cook, we decided we make our own. Now, it isn’t that I feel people who order take outs are doing something wrong, but I do feel that eating that kind of food every day or every other day isn’t very healthy. And then when making it at home is pretty easy.

Typically, Garlic bread is made using a French baguette, or sometimes a sourdough like ciabatta which is partially sliced downwards, allowing the condiments to soak into the loaf while keeping it in one piece. The bread is then stuffed through the cuts with oil and minced garlic before baking. Alternatively, butter and garlic powder are used, or the bread is cut lengthwise into separate slices which are individually garnished.

I made mine a little differently. I made the dough using warm milk, yeast and egg with flour, sugar and salt and added butter. Once the dough had risen, I added minced garlic, butter and scallions. Sprinkle some cheesy and bake….Serve hot and enjoy the oozing flavors.

Cod Fish with Roasted Veggies

We love all kinds of Sea Food. Curries, Fried, Grilled, any which way we love them. This dish makes a great option if you are on a diet, or looking for low carb options or following keto recipes. This is a quick recipe for lunch and a super nutritious one too.

I used Frozen cod but if you have fresh Cod available, that would be great. My boys love fish and grilled veggies or just cold salads on the side of a pan fried fish. These kind of dishes are easy, scrumptious, fits the budget, healthy and delicious. This is a perfect recipe when you are running short on time.

I use basic spices like Red chili flakes, Garlic powder, Onion powder, White pepper powder and Tandoori masala. I also added some dry parsley for flavor. You can always mix and match and use the spices you like. I personally don’t like much of cinnamon or Red chili powder on cod fish. I also feel that Black pepper makes it a little bitter so I prefer white pepper powder. Add a little Lemon juice and the marination is just perfect.

I grill or saute the bell peppers and Asparagus in the same pan as the fish once i am done cooking the fish. I feel it adds a lot of flavor from the fish and the spices to the vegetables. This is a great dish if you want to involve your budding teenagers and teach them easy and quick dishes.

Chocolate chip scones

After trying my hands on the delicious, airy and scrumptious British scones, my kids had always been after making them. I have already made them numerous times, I felt it was time to experiment with something new. One of the main reason behind trying out the Chocolate chip scones was Mr. Parveez. When I made the plain scones, he mentioned that he loved the chocolate chip scones at a Book store cafe which he visited on some weekends before we got married and he loved them.

Therefore, I felt my second trials have to Chocolate chip scones. these scones are pretty rich, chocolaty , slightly sweet and just melt in the mouth. They are pretty easy, simple and fast to make, crunchy exterior and soft interior make them extremely satisfying. I make scones in a traditional scone way where I patted the dough around an inch thick and then cut them with the help of a biscuit cutter. But you can also roll the dough into a circle, around 8 inches and cut them in triangle shape, like a pizza. You can cut them into as many as you like, as long as the width is around an inch.

The butter you use should be cold because if it melts too soon, your dough wouldn’t be crumbly. If the dough gets super soft for any reason, because the butter you used was on room temperature or melted, then place the dough in the refrigerator for 30 minutes to an hour, till the dough is good enough for you to handle. The heavy cream used in the recipe is an approximate measure. It honestly depends on the flour that you are using. If the dough doesn’t come together easily and if you feel its still dry, add a little more cream, little at a time. Similarly, if the dough is too sticky and gets hard to handle, you can always add a little more flour, one tablespoon at a time. Avoid overworking the dough, because scones do not need too much mixing. Less mixing makes softer scones. The dough should be soft, not sticky.

Scones are best when you serve them fresh out of the oven. If you have extra, its always better to freeze the dough and bale it when you are ready to eat. You can freeze them up to 2 months in an airtight container. When you want to use it, just thaw the dough and use it.

Shrimp Hero Baguette Sandwich

This recipe is a true inspiration from one of our favorite restaurants near our old home. This restaurant is pretty old, owned by a lovely Italian family and has been serving New York style pizza for almost 80 years if not more. A very small restaurant that can barely seat 12 people, but most people order their take outs. We were their regular customers and along with the Pizza, they also served variety of other Italian fast food cuisines. What I loved the most was the Garlic knots and the Shrimp Hero Sandwich. The sandwich was super huge and loaded with wonderful sauce and lots of cheese. The ingredients always tasted so fresh and awesome.

I kind of always love going to these small eateries because one can vouch that they cook fresh because they do run out of things and say “no” too which never happens with big chains. Although, big chains always maintain quality but use large amount of preservatives that keep the food looking good and taste great. Anyways, getting back to my favorite Shrimp sandwich. We moved and its just not possible to go back and forth to that restaurant. So, once I started making my own bread, I also started making baguettes and that led to making these wonderful sandwiches.

My boys love eating bread. Specially if the bread is served straight out of the oven. Baguette, the long delicious French Bread seems to be a family favorite. Every restaurant that served a good bread had us visiting them more often. Every time we bought French Baguette from our favorite baker, I would reheat it in the oven to make it taste fresh, which was great but not the same. And, that’s when I thought I should try making my own baguette at home. Honestly, looking at so many different recipes, I felt that Baguette wasn’t all that fancily difficult and I decided it was time I just make it. I mean, how could anything be better than a freshly baked loaf of bread? That crackly crust, the tender, airy crumb inside, steamy and yeasty and just begging to be torn into.

You can look into my baguette recipe and follow it. It’s a detailed recipe and the instructions are pretty easy to follow and execute. Once your baguette are cool enough to handle, cut them to sandwich size and slit from the middle. To prepare the shrimp, just devein and take the tail off, wash them well too. Fry some garlic in the oil and add marinara sauce. Once it comes to a boil, add shrimps to it. Cook for 2-3 minutes, add Red chili flakes, dry parsley and garlic powder. Cook for a minute and add Onion powder. Cover and cook for 2 minutes. Your marinara sauce should be thick by now and shrimp should also be cooked. Slit the baguette and add the shrimp with sauce. I like mine spicy, so I added Jalapenos as well, but you don’t have to. Place them in the oven at 350F for 5-7 minutes. Sprinkle some dry parmesan cheese and serve.

French Baguette

My boys love eating bread. Specially if the bread is served straight out of the oven. Baguette, the long delicious French Bread seems to be a family favorite. Every restaurant that served a good bread had us visiting them more often. Every time we bought French Baguette from our favorite baker, I would reheat it in the oven to make it taste fresh, which was great but not the same. And, that’s when I thought I should try making my own baguette at home. Honestly, looking at so many different recipes, I felt that Baguette wasn’t all that fancily difficult and I decided it was time I just make it.

Now, when I think of France, I think of high end fashionable people, Eifel Tower and also a girl riding a bicycle with a basket full of long loaves of French bagutte Those long loaves are called “baguettes.” (The term comes from the Latin word for “stick.”) They are iconic, and France’s reputation for incredibly crusty and delicious baguettes is known far and wide.

They say that nothing can come close the bread you can get in France. I’ve never been, so I can’t say for sure, but I think you’d stand the best possible chance if you make it yourself. I mean, how could anything be better than a freshly baked loaf of bread? That crackly crust, the tender, airy crumb inside, steamy and yeasty and just begging to be torn into.

This recipe has just 5 ingredients: water, Oil yeast, flour, and salt. But the results are magical. And it’s all because of the technique. Start by dissolving the yeast in warm water. While that is doing its magic, combine the flour and salt. Create a little well in the center, and add in the yeast. Stir it around, taking flour from the outside edge and bringing it into the well, a little at a time. Keep stirring, and adding Oil followed by water as needed, until a shaggy dough forms. You can also use a stand mixer. Now just cover it loosely, and let it rest. For this type of bread, there’s not a lot of kneading involved. It only needs a few quick folds, to become smooth. Place the dough into a greased bowl and cover it tightly. Allow it to proof (or rise) in a warm place until doubled in bulk.

Divide the dough into 4 equal portions, and shape into long logs (about 15 inches long) with pointed ends. Cover with oiled plastic wrap, and allow to rise a second time. While the baguettes are rising, fill a baking pan with water and place it in the bottom of your oven. Preheat the oven and allow it to fill with steam from the water. This is the key to a crusty baguette. Once the loaves have finished their second rise, remove the plastic wrap and sprinkle them with a little flour. Then quickly slash them with a sharp knife. This is not just decorative, but it also allows the crust to crack and the bread to expand in a more controlled way.

Place them in the oven and let them bake until deeply golden brown. They should feel light and dry on the outside, and when you tap them they should give a hollow sound.

Slice it into 1/2-inch rounds and it’s perfect as a base for bruschetta or crostini. Or it can be used as a dipper for your favorite party dip. And we love it toasted with garlic butter, for garlic bread. So good with a pasta dinner!

Or just tear into it and eat it with a hot bowl of soup. So satisfying!